Cub Cadet LTX 1045 Operation Manual - Page 97
Changing - deck belt replacement
 |
View all Cub Cadet LTX 1045 manuals
Add to My Manuals
Save this manual to your list of manuals |
Page 97 highlights
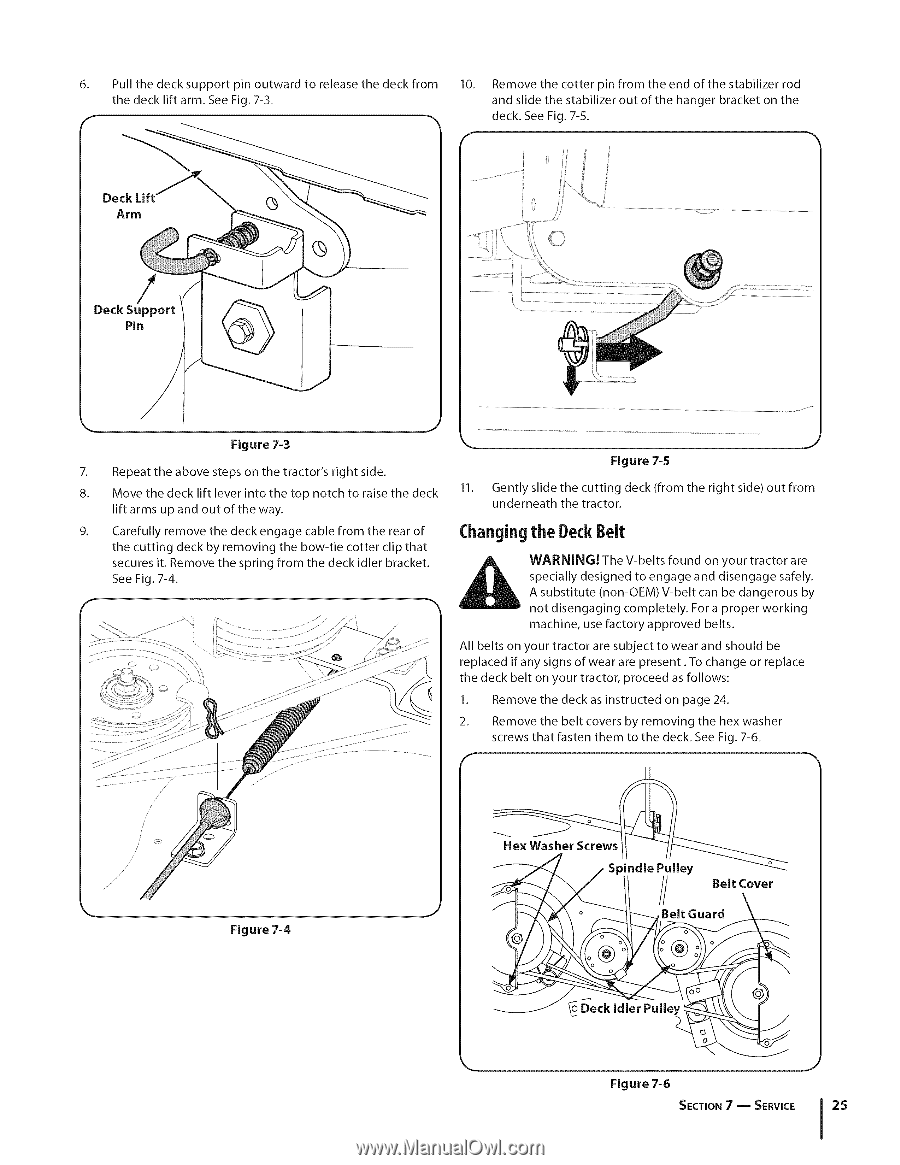
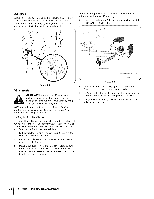
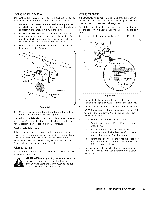
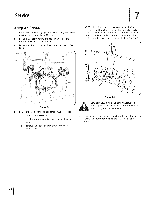
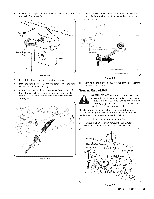
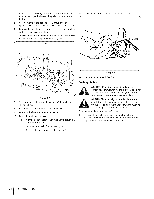
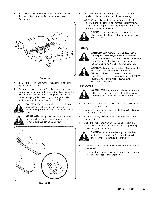
6. Pultlhedecksupporptinoutwartdo releastheedecfkrom 10. Remove the cotter pin from the end of the stabilizer rod thedeckliftarmS. eeFig7. -3. and slide the stabilizer out of the hanger bracket on the deck. See Fig. 7-5. Deck Support Pin J Figure 7-3 7. Repeat the above steps on the tractor's right side. Figure 7-5 8. Move the deck lift lever into the top notch to raise the deck 11. Gently slide the cutting deck (from the right side) out from underneath the tractor. lift arms upand out of the way. 9. Carefully remove the deck engage cable from the rear of the cutting deck by removing the bow-tie cotter clip that secures it. Remove the spring from the deck idler bracket. See Fig. 7-4. Changingthe DeckBelt specially designed to engage and disengage safely. _ WA AsuRbNsItNituGte! (Tnohne-OVE-bMe)lts V-fobuenltd caonn yboeurdatnragcetroorus areby not disengaging completely. For a proper working machine, use factory approved belts. All belts on your tractor are subject to wear and should be replaced if any signs of wear are present. To change or replace the deck belt on your tractor, proceed as follows: 1. Remove the deck as instructed on page 24. 2_ Remove the belt covers by removing the hex washer screws that fasten them to the deck. See Fig. 7-6. Figure 7-4 Figure 7-6 SECTIO7N-- SERVICE 25
-
 1
1 -
2
-
3
-
4
-
5
-
6
-
7
-
8
-
9
-
10
-
11
-
12
-
13
-
14
-
15
-
16
-
17
-
18
-
19
-
20
-
21
-
22
-
23
-
24
-
25
-
26
-
27
-
28
-
29
-
30
-
31
-
32
-
33
-
34
-
35
-
36
-
37
-
38
-
39
-
40
-
41
-
42
-
43
-
44
-
45
-
46
-
47
-
48
-
49
-
50
-
51
-
52
-
53
-
54
-
55
-
56
-
57
-
58
-
59
-
60
-
61
-
62
-
63
-
64
-
65
-
66
-
67
-
68
-
69
-
70
-
71
-
72
-
73
-
74
-
75
-
76
-
77
-
78
-
79
-
80
-
81
-
82
-
83
-
84
-
85
-
86
-
87
-
88
-
89
-
90
-
91
-
 92
92 -
 93
93 -
 94
94 -
 95
95 -
 96
96 -
 97
97 -
 98
98 -
 99
99 -
 100
100 -
 101
101 -
 102
102 -
103
-
104
-
105
-
106
-
107
-
108
-
109
-
110
-
111
-
112
-
113
-
114
-
115
-
116
-
117
-
118
-
119
-
120
-
121
-
122
-
123
-
124
-
125
-
126
-
127
-
128
-
129
-
130
-
131
-
132
-
133
-
134
-
135
-
136
-
137
-
138
-
139
-
140
-
141
-
142
-
143
-
144
 |
 |