Dell 1130 Laser Mono Printer User's Guide - Page 30
Add TCP/IP Port, Installer OS X
 |
View all Dell 1130 Laser Mono Printer manuals
Add to My Manuals
Save this manual to your list of manuals |
Page 30 highlights
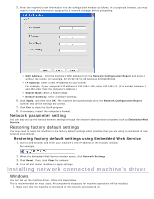
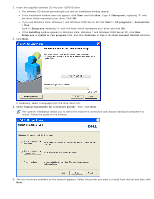
If you do not see your printer on the list, click Update to refresh the list, or select Add TCP/IP Port to add your printer to the network. To add the printer to the network, enter the port name and the IP address for the printer. To verify your printer's IP address, print a Network Configuration page. (By pressing the (cancel button) for about 5 seconds, then release. (Example IP Address is 13.121.52.104) To find a shared network printer (UNC Path), select Shared Printer [UNC] and enter the shared name manually or find a shared printer by clicking the Browse button. If you cannot find your machine in network, please turn off the firewall and click Update. For Windows operating system, Start > Control Panel and start windows firewall, and deactivate this option. For other operating system, refer to its on-line guide. 6. After the installation is finished, a window asking you to print a test page appears. If you choose to print a test page, select the checkbox and click Next. Otherwise, just click Next and skip to step 8. 7. If the test page prints out correctly, click Yes. If not, click No to reprint it. 8. Click Finish. After the driver setup, you may enable firewall. If the printer driver does not work properly, follow the steps below to repair or reinstall the driver. 1. Make sure that the machine is connected to your machine and powered on. 2. From the Start menu, select Programs or All Programs > Dell > Dell Printers > your printer driver name > Maintenance. 3. Select the option as you wish, follow the instruction on the window. Macintosh 1. Make sure that the machine is connected to your network and powered on. Also, your machine's IP address should have been set. 2. Insert the supplied software CD into your CD/DVD drive. 3. Double-click the CD-ROM icon that appears on your Macintosh desktop. 4. Double-click the MAC_Installer folder. 5. Double-click the Installer OS X icon. 6. Enter the password and click OK. 7. The Dell Installer window opens. Click Continue. 8. Select Easy Install and click Install. Easy Install is recommended for most users. All components necessary for machine operations will be installed. If you select Custom Install, you can choose individual components to install. 9. The message which warns that all applications will close on your computer appears. Click Continue.
-
 1
1 -
2
-
3
-
4
-
5
-
6
-
7
-
8
-
9
-
10
-
11
-
12
-
13
-
14
-
15
-
16
-
17
-
18
-
19
-
20
-
21
-
22
-
23
-
24
-
 25
25 -
 26
26 -
 27
27 -
 28
28 -
 29
29 -
 30
30 -
 31
31 -
 32
32 -
 33
33 -
 34
34 -
 35
35 -
36
-
37
-
38
-
39
-
40
-
41
-
42
-
43
-
44
-
45
-
46
-
47
-
48
-
49
-
50
-
51
-
52
-
53
-
54
-
55
-
56
-
57
-
58
-
59
-
60
-
61
-
62
-
63
-
64
-
65
-
66
-
67
-
68
-
69
-
70
-
71
-
72
-
73
-
74
-
75
-
76
-
77
-
78
-
79
-
80
-
81
-
82
-
83
-
84
-
85
-
86
-
87
-
88
-
89
-
90
-
91
-
92
-
93
-
94
-
95
-
96
-
97
-
98
-
99
-
100
-
101
-
102
-
103
 |
 |
