Dell 1130 Laser Mono Printer User's Guide - Page 31
Install Linux Driver, Add network Printer, Socket/HP Jet Direct - hp printer drivers
 |
View all Dell 1130 Laser Mono Printer manuals
Add to My Manuals
Save this manual to your list of manuals |
Page 31 highlights
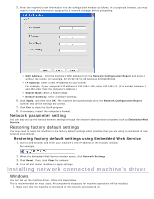
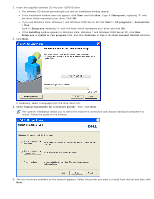
10. After the installation is finished, click Quit. 11. Open the Applications folder > Utilities > Print Setup Utility. For Mac OS X 10.5~10.6, open the Applications folder > System Preferences and click Print & Fax. 12. Click Add on the Printer List. For Mac OS X 10.5~10.6, click the "+" icon; a display window will pop up. 13. For Mac OS X 10.3, select the IP Printing tab. For Mac OS X10.4, click IP Printer. For Mac OS X 10.5~10.6, click IP. 14. Select Socket/HP Jet Direct in Printer Type. When printing a document containing many pages, printing performance may be enhanced by choosing Socket for Printer Type option. 15. Enter the machine's IP address in the Printer Address field. 16. Enter the queue name in the Queue Name field. If you cannot determine the queue name for your machine server, try using the default queue first. 17. For Mac OS X 10.3, if Auto Select does not work properly, select Dell in Printer Model and your machine name in Model Name. For Mac OS X 10.4, if Auto Select does not work properly, select Dell in Print Using and your machine name in Model . For Mac OS X 10.5~10.6, if Auto Select does not work properly, select Select a driver to use... and your machine name in Print Using. Your machine appears on the Printer List, and is set as the default machine. 18. Click Add. If the printer driver does not work properly, uninstall the driver and reinstall it. Follow steps below to uninstall the driver for Macintosh. 1. Make sure that the machine is connected to your computer and powered on. 2. Insert the supplied software CD into your CD/DVD drive. 3. Double-click CD-ROM icon that appears on your Macintosh desktop. 4. Double-click the MAC_Installer folder. 5. Double-click the Installer OS X icon. 6. Enter the password and click OK. 7. The Dell Installer window opens. Click Continue. 8. Select Uninstall and click Uninstall. 9. When the message which warns that all applications will close on your computer appears, Click Continue . 10. When the uninstall is done, click Quit. Linux Install Linux Driver 1. Make sure that the machine is connected to your network and powered on. Also, your machine's IP address should have been set. 2. Insert the supplied software CD into your CD/DVD drive. 3. Double-click CD-ROM icon that appears on your Linux desktop. 4. Double-click the Linux folder. 5. Double-click the install.sh icon. 6. The Dell Installer window opens. Click Continue. 7. The Add printer wizard window opens. Click Next. 8. Select Network printer and click Search button. 9. The Printer's IP address and model name appears on list field. 10. Select your machine and click Next. Add network Printer
-
 1
1 -
2
-
3
-
4
-
5
-
6
-
7
-
8
-
9
-
10
-
11
-
12
-
13
-
14
-
15
-
16
-
17
-
18
-
19
-
20
-
21
-
22
-
23
-
24
-
25
-
 26
26 -
 27
27 -
 28
28 -
 29
29 -
 30
30 -
 31
31 -
 32
32 -
 33
33 -
 34
34 -
 35
35 -
 36
36 -
37
-
38
-
39
-
40
-
41
-
42
-
43
-
44
-
45
-
46
-
47
-
48
-
49
-
50
-
51
-
52
-
53
-
54
-
55
-
56
-
57
-
58
-
59
-
60
-
61
-
62
-
63
-
64
-
65
-
66
-
67
-
68
-
69
-
70
-
71
-
72
-
73
-
74
-
75
-
76
-
77
-
78
-
79
-
80
-
81
-
82
-
83
-
84
-
85
-
86
-
87
-
88
-
89
-
90
-
91
-
92
-
93
-
94
-
95
-
96
-
97
-
98
-
99
-
100
-
101
-
102
-
103
 |
 |
