Dell 962 All In One Photo Printer Dell™ Photo Printer 540 User's Gui - Page 5
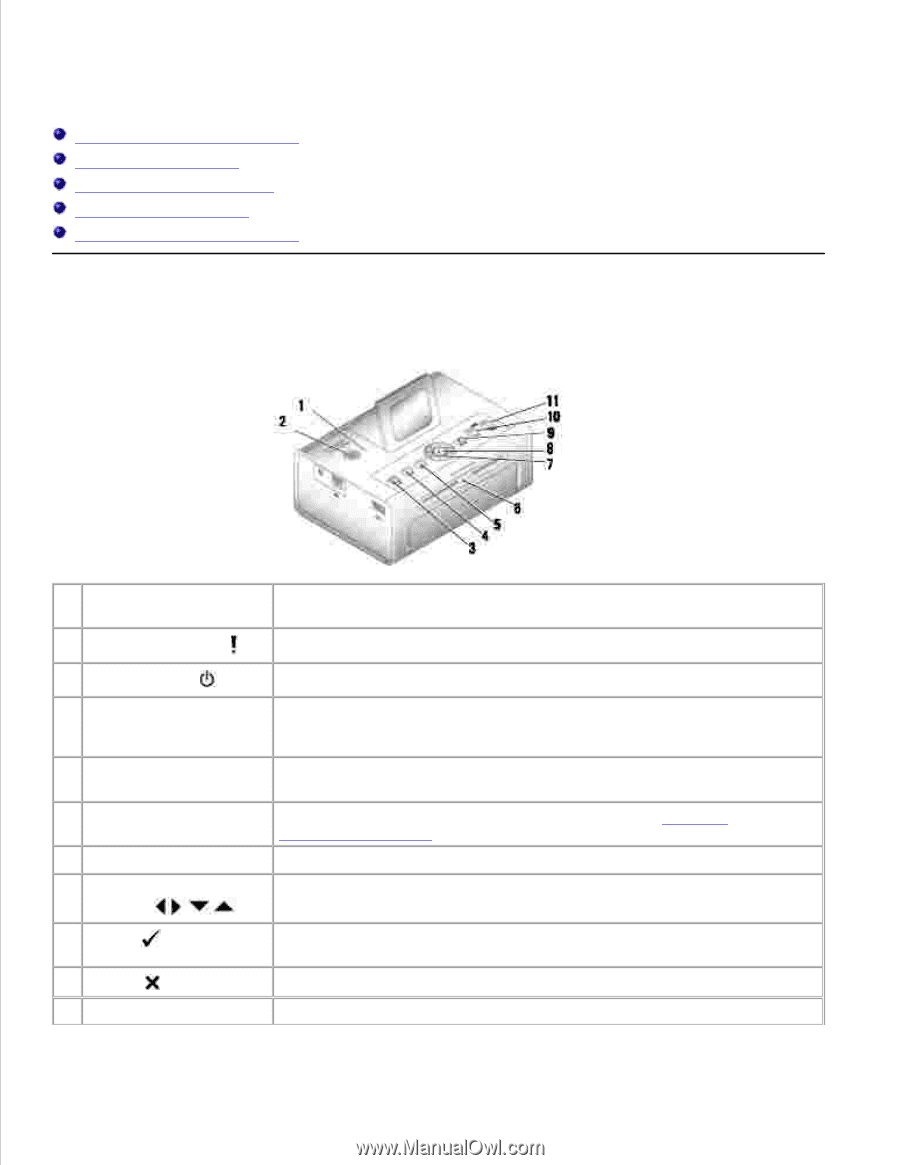
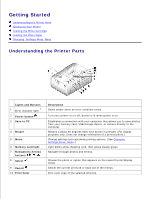
Getting Started, Understanding the Printer Parts
 |
View all Dell 962 All In One Photo Printer manuals
Add to My Manuals
Save this manual to your list of manuals |
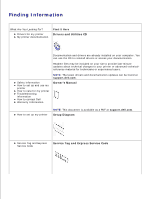
Page 5 highlights
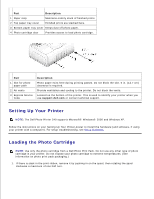
Getting Started Understanding the Printer Parts Setting Up Your Printer Loading the Photo Cartridge Loading the Photo Paper Changing Settings-Press Menu Understanding the Printer Parts Lights and Buttons 1 Error indicator light 2 Power button 3 Save to PC 4 Rotate 5 Menu 6 Memory card light 7 Navigation (Arrow) buttons 8 Select 9 Cancel 10 Print Color Description Glows amber when an error condition exists. Turn your printer on or off; button is lit when power is on. Establishes a connection with your computer that allows you to save photos from your memory card, USB storage device, or camera directly to the computer. Rotates a photo 90 degrees each time button is pressed. (For display purposes only. Does not change orientation of a printed photo.) Change settings and customize printing options. (See Changing Settings-Press Menu.) Light blinks while checking card, then glows steady green. Navigate through photos and menus. Choose the photo or option that appears on the Liquid Crystal Display (LCD). Cancel the current print job or back out of the menus. Print color copy of the selected photo(s).
-
 1
1 -
 2
2 -
 3
3 -
 4
4 -
 5
5 -
 6
6 -
 7
7 -
 8
8 -
 9
9 -
 10
10 -
 11
11 -
12
-
13
-
14
-
15
-
16
-
17
-
18
-
19
-
20
-
21
-
22
-
23
-
24
-
25
-
26
-
27
-
28
-
29
-
30
-
31
-
32
-
33
-
34
-
35
-
36
-
37
-
38
-
39
-
40
-
41
-
42
 |
 |