Dell B3465dnf Mono Embedded Web Server -- Security Administrators Guide - Page 22
Managing certificates and other settings, Installing a Certificate Authority certificate on the device
 |
View all Dell B3465dnf Mono manuals
Add to My Manuals
Save this manual to your list of manuals |
Page 22 highlights
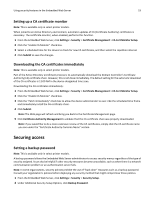
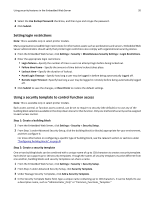
Using security features in the Embedded Web Server 22 • You can delete a security template only if it is not in use; however, security templates currently in use can be edited. Managing certificates and other settings Note: This is available only in select printer models. The Certificate Management menu allows users to configure printers to use certificates for establishing SSL, PSec, and 802.1X connections. Additionally, MFPs use certificates for LDA over SSL authentication and address book look‑ups. The process for configuring devices consists of the following activities: • Loading of the CA (Certificate Authority) certificate for a certificate authority into the device • Creating a device certificate or using of the device default certificate • Creating a CA‑signed certificate using the device certificate data • Loading of the CA‑signed certificate into the device Note: This process can be greatly simplified by using a new Automatic Certificate Enrollment Application, which is available when an Active Directory environment is being used. For details on the usage of this application, see "Appendix C: Automatic Certificate Enrollment Application" on page 41. Installing a Certificate Authority certificate on the device Note: This feature is available only in network printers or printers connected to print servers. The Certificate Authority (CA) is needed so that the printer can trust and validate the credentials of another system on the network. Without a CA certificate, the printer has no other means to determine whether to trust the certificate that has been presented by the system that would like to create the secure connection. Start with the certificate file (.pem format) for the CA that is to be utilized. An example of how to create this file is provided in "Appendix A: CA file creation" on page 41. 1 Open a Web browser, and then type the IP address or host name of the printer. 2 From the Embedded Web Server, click Settings > Security > Certificate Management > Certificate Authority Management. Notes: • This window allows the device administrator the ability to initiate a request for a new CA certificate, delete all CA certificates, and view previously installed CA certificates. To view more details of an installed CA certificate or delete a particular CA certificate, simply click on the certificate common name link listed under the Certificate Authority Common Name heading. • There is no installed CA certificates to view on this page if this a new, out‑of‑the‑box device. 3 Click New to display the Certificate Authority Installation screen. 4 Click Browse to select the .pem format certificate authority file, and then select Submit. This completed the process of installing a CA certificate.
-
 1
1 -
2
-
3
-
4
-
5
-
6
-
7
-
8
-
9
-
10
-
11
-
12
-
13
-
14
-
15
-
16
-
 17
17 -
 18
18 -
 19
19 -
 20
20 -
 21
21 -
 22
22 -
 23
23 -
 24
24 -
 25
25 -
 26
26 -
 27
27 -
28
-
29
-
30
-
31
-
32
-
33
-
34
-
35
-
36
-
37
-
38
-
39
-
40
-
41
-
42
-
43
-
44
-
45
-
46
-
47
-
48
-
49
-
50
-
51
-
52
 |
 |
