Dell Force10 C300 Quick Start Guide - Page 7
Installing the Hardware, Installing the Chassis, Installing the Chassis in a Two-Post Rack
 |
View all Dell Force10 C300 manuals
Add to My Manuals
Save this manual to your list of manuals |
Page 7 highlights
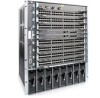
1 Installing the Hardware This guide assumes all site preparation has been performed before installing the chassis. Installing the Chassis To install the C150/300 chassis, Dell Force10 recommends that you complete the installation procedures in the order presented below. NOTE: Unless stated otherwise, the installation instructions below apply to both the C150 and C300 chassis. Always handle the system and its components with care. Avoid dropping the switch or its field replaceable units. CAUTION: Always wear an ESD-preventive wrist or heel ground strap when handling the chassis and its components. As with all electrical devices of this type, take all necessary safety precautions to prevent injury when installing this system. Electrostatic discharge (ESD) damage can occur if components are mishandled. Installing the Chassis in a Two-Post Rack WARNING: Use an equipment lift or pallet jack when lifting or moving the chassis. Install the chassis into the rack before inserting chassis components. Lift the C150/300 chassis only from the bottom. Lifting by the chassis shelves or power supply openings might damage the chassis. WARNING: To prevent bodily injury when mounting or servicing this unit in a rack, you must take special precautions to ensure that the system remains stable. The following guidelines are provided to ensure your safety: • This unit should be mounted at the bottom of the rack if it is the only unit in the rack. • When mounting this unit in a partially filled rack, load the rack from the bottom to the top with the heaviest component at the bottom of the rack. • If the rack is provided with stabilizing devices, install the stabilizers before mounting or servicing the unit in the rack. Follow these steps to install the chassis into a 19-inch equipment rack: Installing the Hardware 5
-
 1
1 -
 2
2 -
 3
3 -
 4
4 -
 5
5 -
 6
6 -
 7
7 -
 8
8 -
 9
9 -
 10
10 -
 11
11 -
 12
12 -
13
-
14
-
15
-
16
-
17
-
18
-
19
-
20
-
21
-
22
-
23
-
24
-
25
-
26
-
27
-
28
-
29
-
30
-
31
-
32
 |
 |
