Dell Force10 MXL Blade Getting Started Guide - Page 27
stack-unit priority, reload, show system, MXL 10/40GbE Switch
 |
View all Dell Force10 MXL Blade manuals
Add to My Manuals
Save this manual to your list of manuals |
Page 27 highlights
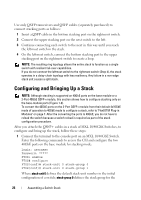
lower 40GbE base-module port and stack-group 1 defines the stack group for the upper 40GbE base-module port. To display the ports in each stack group, enter the show system stack-unit unit-number stack-group command. 2 Save the stacking configuration on the 40GbE ports: FTOS# write memory 3 Repeat Steps 1 and 2 on each MXL 10/40GbE Switch in the stack by entering the stack-unit 0 stack-group 0 and stack-unit 0 stack-group 1 commands and saving the configuration. 4 Reboot each switch by entering the reload command in EXEC Privilege mode: FTOS# reload If the stacked switches all reboot at approximately the same time, the switch with the highest MAC address is automatically elected as the Master Switch. The switch with the next highest MAC address is elected as Standby Master. To configure the stack so that the roles are assigned according to pre-determined priorities, enter the stack-unit priority command as described in the Note below. To reload the stack, connect the terminal to the Master Switch and enter the reload command in EXEC Privilege mode. If you connect the terminal to a member (non-Master) switch, you will not be able to access the CLI. To determine which switch is the Stack Master, enter the show system command at the terminal. To remove a port from stacking mode, use the no form of the stack-unit stackgroup command; for example, no stack-unit 0 stack-group 0. After entering the command, save the configuration and reload the switch for the change to take effect. When the reload completes, the port comes up in 40GbE mode if it is on the base module and in 4x10GbE (quad) mode if the port is on a plug-in module. NOTE: You can also manually configure the switch that will be master by entering the stack-unit unit-number priority number command in CONFIGURATION mode on each stacked switch, where: stack-unit unit-number identifies the switch in the stack. priority number specifies the management priority. Range: 1-14. Default: 0. The switch with the highest priority number is elected Master. The switch with the next highest priority number is elected Standby Master and takes over stack Assembling a Switch Stack 27
-
 1
1 -
2
-
3
-
4
-
5
-
6
-
7
-
8
-
9
-
10
-
11
-
12
-
13
-
14
-
15
-
16
-
17
-
18
-
19
-
20
-
21
-
 22
22 -
 23
23 -
 24
24 -
 25
25 -
 26
26 -
 27
27 -
 28
28 -
 29
29 -
 30
30 -
 31
31 -
 32
32 -
33
-
34
-
35
-
36
-
37
-
38
 |
 |