Dell Latitude 7370 Owners Manual
Dell Latitude 7370 Manual
 |
View all Dell Latitude 7370 manuals
Add to My Manuals
Save this manual to your list of manuals |
Dell Latitude 7370 manual content summary:
- Dell Latitude 7370 | Owners Manual - Page 1
Dell Latitude 7370 Owner's Manual Regulatory Model: P67G Regulatory Type: P67G001 - Dell Latitude 7370 | Owners Manual - Page 2
potential damage to hardware or loss of data and tells you how to avoid the problem. WARNING: A WARNING indicates a potential for property damage, personal injury, or death. Copyright © 2016 Dell Inc. All rights reserved. This product is protected by U.S. and international copyright and intellectual - Dell Latitude 7370 | Owners Manual - Page 3
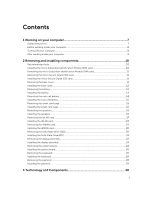
Contents 1 Working on your computer 7 Safety instructions...7 Before working inside your computer 8 Turning off your the base cover...12 Removing the battery...12 Installing the battery...13 Removing the coin cell battery...14 Installing the coin cell battery...15 Removing the smart card cage... - Dell Latitude 7370 | Owners Manual - Page 4
Power adapter...30 Processors...30 Identifying processors in Windows 10 30 Identifying processors in Windows 8 30 Verifying the processor usage in Task Manager 31 Verifying the processor usage in Resource Monitor 31 Chipsets...32 Downloading the chipset driver Secure Boot Entering BIOS setup - Dell Latitude 7370 | Owners Manual - Page 5
drivers...42 Intel HD Graphics drivers...43 Realtek HD audio drivers...43 4 System Setup...44 Boot Boot screen options...50 Intel Software Guard Extensions screen options 51 Performance screen options...51 Power Management screen options 52 POST Behavior screen options...53 Virtualization support - Dell Latitude 7370 | Owners Manual - Page 6
Touchpad specifications...64 Battery specifications...64 AC Adapter specifications...65 Physical specifications...66 Environmental specifications...66 7 Contacting Dell 67 6 - Dell Latitude 7370 | Owners Manual - Page 7
can be replaced or--if purchased separately--installed by performing the removal procedure in reverse order. WARNING: Disconnect all power sources service and support team. Damage due to servicing that is not authorized by Dell is not covered by your warranty. Read and follow the safety instructions - Dell Latitude 7370 | Owners Manual - Page 8
you begin working inside the computer. 1. Ensure that you follow the Safety instructions. 2. Ensure that your work surface is flat and clean to prevent all attached devices from the electrical outlets. 6. Press and hold the power button while the computer is unplugged to ground the system board. 7. - Dell Latitude 7370 | Owners Manual - Page 9
To avoid damage to the computer, use only the battery designed for this particular Dell computer. Do not use batteries designed for other Dell computers. 1. Connect any external devices, such as a port replicator or media base, and replace any cards, such as an ExpressCard. 2. Connect any telephone - Dell Latitude 7370 | Owners Manual - Page 10
2 Removing and installing components This section provides detailed information on how to remove or install the components from your computer. Recommended tools The procedures in this document require the following tools: • Small flat blade screwdriver • Phillips screwdriver • Small plastic scribe - Dell Latitude 7370 | Owners Manual - Page 11
into place. Removing the micro Secure Digital (SD) card 1. Follow the procedure in Before working inside your computer. 2. Press in the micro SD card to release it from the computer. Slide the micro SD card out of the computer. Installing the micro Secure Digital (SD) card 1. Push in the micro SD - Dell Latitude 7370 | Owners Manual - Page 12
to the computer. 3. Press the edges of the cover until it clicks into place. 4. Follow the procedure in After working inside your computer. Removing the battery 1. Follow the procedure in Before working inside your computer. 2. Remove the base cover. 3. Disconnect the - Dell Latitude 7370 | Owners Manual - Page 13
: a. Remove the screws that secure the battery to the computer [1]. b. Lift the battery away from the computer [2]. Installing the battery 1. Align the tabs on the battery with the slots on the palmrest. 2. Tighten the screws to secure the battery to the computer. NOTE: The number of screws vary - Dell Latitude 7370 | Owners Manual - Page 14
Remove the: a. base cover 3. Disconnect the battery cable from the connector on the system board [1]. 4. To remove the coin cell battery: a. Disconnect the coin cell battery cable from the connector on the system board [1]. b. Lift the coin cell battery to release it from the adhesive and remove it - Dell Latitude 7370 | Owners Manual - Page 15
working inside your computer. Removing the smart card cage 1. Follow the procedure in Before working inside your computer. 2. Remove the: a. base cover b. battery 3. To remove the smart card cage: a. Disconnect the smart card FFC cable [1,2]. b. Remove the screws that secure the smart card cage to - Dell Latitude 7370 | Owners Manual - Page 16
inside your computer. Removing the speakers 1. Follow the procedure in Before working inside your computer. 2. Remove the: a. base cover b. battery 3. To remove the speakers: a. Disconnect the speaker cable [1]. b. Unroute the speaker cable [2]. c. Remove the speakers from the computer [3]. NOTE - Dell Latitude 7370 | Owners Manual - Page 17
2. Route the speaker cable through the retention clips on the dock frame. 3. Connect the speaker cable to its connector on the system board. 4. Install the: a. battery b. base cover 5. Follow the procedure in After working inside your computer. Removing the WLAN card 1. Follow the procedure in - Dell Latitude 7370 | Owners Manual - Page 18
4. To remove the WLAN card: a. Remove the screw that secures the metal bracket to the WLAN card [1]. b. Remove the metal bracket [2]. c. Disconnect the WLAN cables from the connectors on the WLAN card [3]. d. Remove the WLAN card from the computer [4]. Installing the WLAN card 1. Insert the WLAN - Dell Latitude 7370 | Owners Manual - Page 19
inside your system. Removing the WWAN card 1. Follow the procedure in Before working inside your computer. 2. Remove the: a. base cover 3. Disconnect the battery cable from the connector on the system board [1]. 4. To remove the WWAN card: a. Peel the aluminum foil until the folding line. b. Remove - Dell Latitude 7370 | Owners Manual - Page 20
metal bracket and tighten the screw to secure it to the computer. 6. Stick the aluminum foil on the bracket and WWAN card. 7. Connect the battery cable to the connector on the system board. 8. Install the: a. base cover 9. Follow the procedure in After working inside your system. Removing the Solid - Dell Latitude 7370 | Owners Manual - Page 21
4. To remove the SSD: a. Peel the aluminum foil until the folding line. b. Remove the screw that secures the SSD to the computer [1]. c. Remove the SSD bracket [2]. d. Remove the copper thermal plate. e. Remove the SSD from the computer [3]. Installing the Solid State Drive(SSD) 1. Insert the SSD - Dell Latitude 7370 | Owners Manual - Page 22
your computer. Removing the display assembly 1. Follow the procedure in Before working inside your computer. 2. Remove the base cover 3. Disconnect the battery cable from the connector on the system board [1]. 4. Remove the: a. WLAN card b. WWAN card 5. To remove the cables: a. Disconnect the camera - Dell Latitude 7370 | Owners Manual - Page 23
6. Lift to separate the palmrest assembly from the display assembly. 7. To remove the display assembly: a. Remove the screws that secure the display assembly to the computer [1]. b. Slide the display assembly to release it from the computer [2]. 23 - Dell Latitude 7370 | Owners Manual - Page 24
the screw holders on the computer. 5. Tighten the screws to secure the display assembly. 6. Install the: a. WWAN card b. WLAN card 7. Connect the battery cable to the connector on the system board. 8. Install the base cover. 9. Follow the procedure in After working inside your system. Removing the - Dell Latitude 7370 | Owners Manual - Page 25
e. WWAN card f. coin cell g. display 3. Disconnect the following cables from the system board: a. speaker cable b. touch pad cable c. smart card cable d. LED cable e. array mic cable f. finger print cable g. WWAN AUX antenna cable h. NFC cable 4. To remove the system board: a. Remove the screws that - Dell Latitude 7370 | Owners Manual - Page 26
. 3. Tighten the screws to secure the metal tab over the USB type C port. 4. Connect the following cables to the connectors on the system board: a. speaker a. display b. coin cell c. WWAN card d. WLAN card e. SSD f. battery g. base cover 6. Follow the procedure in After working inside your computer. - Dell Latitude 7370 | Owners Manual - Page 27
a. base cover b. battery c. SSD d. WLAN card e. WWAN card f. coin-cell g. display h. system board 3. To remove the keyboard: a. Disconnect the keyboard cables from the connectors on the system board [1, 2]. b. - Dell Latitude 7370 | Owners Manual - Page 28
the keyboard cables to the connectors on the system board. 5. Install the: a. system board b. display c. SSD d. WWAN e. WLAN f. coin cell g. battery h. base cover 6. Follow the procedure in After working inside your system. Removing the palmrest 1. Follow the procedure in Before working inside your - Dell Latitude 7370 | Owners Manual - Page 29
palmrest 1. Place the palmrest on the computer. 2. Install the: a. keyboard b. system board c. display assembly d. speakers e. smart-card cage f. coin cell g. WLAN card h. WWAN card i. SSD j. battery k. base cover 3. Follow the procedure in After working inside your system. 29 - Dell Latitude 7370 | Owners Manual - Page 30
The power adapter works with electrical outlets worldwide. However, power connectors and power strips power strip or electrical outlet may cause fire or equipment damage. Processors This laptop is shipped with the following processors: • Intel Core M3-6Y30 • Intel Core M5-6Y57 • Intel Core M7-6Y75 - Dell Latitude 7370 | Owners Manual - Page 31
The basic information of the processor is displayed. Verifying the processor usage in Task Manager 1. Press and hold the taskbar. 2. Select Start Task Manager. The Windows Task Manager window is displayed. 3. Click the Performance tab in the Windows Task Manager window. The processor performance - Dell Latitude 7370 | Owners Manual - Page 32
on the laptop. 2. Go to www.dell.com/support. 3. Click Product Support, enter the Service Tag of your laptop, and then click Submit. NOTE: If you do not have the Service Tag, use the autodetect feature or manually browse for your laptop model. 4. Click Drivers and Downloads. 5. Select the operating - Dell Latitude 7370 | Owners Manual - Page 33
Identifying chipset in Device Manager on Windows 8 1. Click Settings on the Windows 8.1 Charms Bar. 2. From the Control Panel, select Device Manager. 3. Expand System Devices and search for the chipset. Graphic options This laptop is shipped with the Intel HD Graphics 515 graphics chipset. 33 - Dell Latitude 7370 | Owners Manual - Page 34
on the laptop. 2. Go to www.dell.com/support. 3. Click Product Support, enter the Service Tag of your laptop, and then clickSubmit. NOTE: If you do not have the Service Tag, use the auto detect feature or manually browse for your laptop model. 4. Click Drivers and Downloads. 5. Select the operating - Dell Latitude 7370 | Owners Manual - Page 35
degrees) Display options This laptop has 11.57- inch FHD with 1920 x 1080 resolution (maximum) and QHD with level slider to adjust the brightness manually. Adjusting brightness in Windows 8 To Settings → Change PC Settings → PC and devices→ Power and sleep. 3. Use the Adjust my screen brightness - Dell Latitude 7370 | Owners Manual - Page 36
steps to connect your laptop to an external display device: 1. Ensure that the projector is turned on and plug the projector cable into a video port on your laptop. 2. Press the Windows logo+P key. 3. Select one of the following modes: • PC screen only • Duplicate • Extend • Second Screen only NOTE - Dell Latitude 7370 | Owners Manual - Page 37
on the laptop. 2. Go to www.dell.com/support. 3. Click Product Support, enter the Service Tag of your laptop and click Submit. NOTE: If you do not have the Service Tag, use the autodetect feature or manually browse for your laptop model. 4. Click Drivers and Downloads. 5. Select the operating system - Dell Latitude 7370 | Owners Manual - Page 38
Dell Audio in the search box. 2. Start the Dell Audio utility from the left pane. WLAN cards This laptop supports the Intel Dual Band Wireless AC 8260 WLAN card. Secure Boot screen options Option Secure Boot key to a user-selected file • Replace from File-Replaces the current key with a key from - Dell Latitude 7370 | Owners Manual - Page 39
Hard drive options This laptop supports M.2 SATA drive and M.2 BIOS setup 1. Turn on or restart your laptop. 2. When the Dell logo appears, perform one of the following actions to enter the BIOS setup program: • With keyboard - Tap F2 until the Entering BIOS setup message appears. To enter the Boot - Dell Latitude 7370 | Owners Manual - Page 40
Manager and expand Imaging devices. Starting the camera To start the camera, open an application that uses the camera. For instance, if you tap the Dell webcam central software or the Skype software that is shipped with the laptop, the camera turns on. Similarly, if you are chatting on the internet - Dell Latitude 7370 | Owners Manual - Page 41
not available in the apps list, search for it. Memory features In this laptop, the memory (RAM) is a part of the system board. This laptop supports 4-16 GB LPDDR3 memory, up to 1600 MHz. NOTE: Since memory is part of the system board, it cannot be upgraded as a separate module. If - Dell Latitude 7370 | Owners Manual - Page 42
laptop. 2. Perform one of the following actions after the Dell logo is displayed: • With keyboard - Tap F2 until the Entering BIOS setup message appears. To enter the Boot selection menu, tap F12. • Without keyboard - When the F12 boot selection menu is displayed, press the Volume Down button to - Dell Latitude 7370 | Owners Manual - Page 43
After installation Intel HD Graphics drivers Verify if the Intel HD Graphics drivers are already installed in the laptop. Table 4. Intel HD Graphics drivers Before installation After installation Realtek HD audio drivers Verify if the Realtek audio drivers are already installed in the - Dell Latitude 7370 | Owners Manual - Page 44
drive or hard drive). During the Power-on Self Test (POST), when the Dell logo appears, you can: • Access System Setup by pressing F2 key • Bring up the one-time boot menu by pressing F12 key The one-time boot menu displays the devices that you can boot from including the diagnostic option. The - Dell Latitude 7370 | Owners Manual - Page 45
PCIe SSD-0, Video Controller, Video BIOS Version, Video Memory, Panel Type, Native Resolution, Audio Controller, WiFi Device, WiGig Device, Cellular Device, Bluetooth Device. Battery Information Boot Sequence Displays the battery status and the type of AC adapter connected to the computer. Allows - Dell Latitude 7370 | Owners Manual - Page 46
Port (by default enable) • Enable Thunderbolt Port (by default enable). • Enable Thunderbolt Boot Support. This is an optional feature. • Always Allows Dell Docks. This is an optional feature. • Enables Thunderbolt (and PCIe behind TBT) Pre-boot NOTE: USB keyboard and mouse always work in the BIOS - Dell Latitude 7370 | Owners Manual - Page 47
the time-out value for the keyboard backlight when an AC Backlight Timeout adapter is plugged into the system. The main keyboard illumination feature is not on AC affected. Keyboard Illumination will continue to support the various illumination levels. This field has an effect when the backlight - Dell Latitude 7370 | Owners Manual - Page 48
(SD) Card read only mode Video screen options Option LCD Brightness Description Allows you to set the display brightness depending up on the power source (On Battery and On AC). NOTE: The video setting will be visible only when a video card is installed into the system. Security screen options - Dell Latitude 7370 | Owners Manual - Page 49
the admin password. UEFI Capsule Allows to control whether this system allows BIOS updates via UEFI capsule update Firmware Updates packages. Default setting: Enable UEFI Default setting: Deactivate CPU XD Support Allows you to enable the Execute Disable mode of the processor. Enable CPU XD - Dell Latitude 7370 | Owners Manual - Page 50
option to enter the Option ROM Configuration screens using hotkeys during boot. The options are: • Enabled • One Time Enable • options are: • Save to File-Saves the key to a user-selected file • Replace from File-Replaces the current key with a key from a user-selected file • Append from File-Adds - Dell Latitude 7370 | Owners Manual - Page 51
option sets SGX Enclave Reserve Memory Size. The options are: • 32 MB • 64 MB • 128 MB Performance screen options Option Multi Core Support Description This field specifies whether the process has one or all cores enabled. The performance of some applications improves with the additional cores - Dell Latitude 7370 | Owners Manual - Page 52
This feature is only functional when the AC power adapter is connected. If the AC power adapter is removed during Standby, the system setup removes power from all the USB ports to conserve battery power. • Enable USB Wake Support • Wake on Trinity Dock - The option is selected by default. Allows you - Dell Latitude 7370 | Owners Manual - Page 53
, disable the Advanced Battery Charge Configuration option. POST Behavior screen options Option Description Adapter Warnings Allows you to enable or disable the system setup (BIOS) warning messages when you use certain power adapters. Default setting: Enable Adapter Warnings Keypad (Embedded - Dell Latitude 7370 | Owners Manual - Page 54
Allows you to specify whether the MEBx Hotkey function should enable, during the system boot. Default Setting: Enable MEBx Hotkey Fastboot Extended BIOS POST Time Allows you to speed up the boot process by bypassing some of the compatibility steps. The options are: • Minimal • Thorough (default - Dell Latitude 7370 | Owners Manual - Page 55
Tag Asset Tag Description Displays the Service Tag of your computer. Allows you to create a system asset tag if an asset tag is not already set. This option is not set by default. BIOS Downgrade This controls flashing of the system firmware to previous revisions. Data Wipe This field allows - Dell Latitude 7370 | Owners Manual - Page 56
to update your BIOS (System Setup), on replacing the system board or if an update is available. For laptops, ensure that your computer battery is fully charged and connected to a power outlet 1. Restart the computer. 2. Go to Dell.com/support. 3. Enter the Service Tag or Express Service Code and - Dell Latitude 7370 | Owners Manual - Page 57
you need not provide the system password to log on to the computer. To enter the system setup, press F2 immediately after a power-on or re-boot. 1. In the System BIOS or System Setup screen, select System Security and press Enter. The System Security screen appears. 2. In the System Security screen - Dell Latitude 7370 | Owners Manual - Page 58
an existing System or Setup password, if the Password Status is Locked. To enter the System Setup, press F2 immediately after a power-on or reboot. 1. In the System BIOS or System Setup screen, select System Security and press Enter. The System Security screen is displayed. 2. In the System Security - Dell Latitude 7370 | Owners Manual - Page 59
yourself, service and support personnel can use the diagnostics results to help you solve the problem. Enhanced Pre-Boot System Assessment (ePSA) diagnostics The ePSA diagnostics (also known as system diagnostics) performs a complete check of your hardware. The ePSA is embedded with the BIOS and is - Dell Latitude 7370 | Owners Manual - Page 60
Device status lights Table 7. Device status lights Icon Name Description Power status light Turns on when you turn on the computer and blinks when the computer is in a power management mode. This can be useful as a diagnostic tool when there's a possible failure to the system. NOTE: The - Dell Latitude 7370 | Owners Manual - Page 61
Specification Skylake 64-bit SPI 128 Mbits 100 MHz DMI 3.0 (8GT/s) Processor specifications Feature Types Intel Smart Cache Specification Intel Core m3 / m5 / m7 3 MB and 4 MB Memory specifications Feature Specification Memory type LPDDR3 Minimum memory 4 GB Maximum memory 16 GB 61 - Dell Latitude 7370 | Owners Manual - Page 62
Two Internal speaker amplifier 2 W (RMS) per channel Volume controls Hot keys Video specifications Feature Type UMA controller External display support Specification Integrated on system board Intel HD Graphics 515 One micro-HDMI Camera specifications Feature HD Panel Resolution Video - Dell Latitude 7370 | Owners Manual - Page 63
PowerShare • two type C ports with thunderbolt 3 support Memory card One reader ( Micro SD) Micro Subscriber Identity Module (uSIM) card One Smart Card Optional RFID Optional Finger print reader Optional Display specifications Feature Specification FHD - Dell Latitude 7370 | Owners Manual - Page 64
• Brazil: 84 keys • Japan: 86 keys Touchpad specifications Feature Active Area: X-axis Y-axis Specification 99.50 mm 51.00 mm53.00 mm Battery specifications Feature Type Specification • 34 WHr (4 cell) Entry • 43 WHr (4 cell) Upsell 34 WHr (4 cell) Entry: Length Height 267 mm (10.5 inches - Dell Latitude 7370 | Owners Manual - Page 65
3 V CR2032 lithium coin cell AC Adapter specifications Feature Specification Type 45 W (Type C) Input voltage 100 VAC to 240 VAC Input current 1.3A (maximum) Input frequency 50 Hz to 60 Hz Output power 45 W Output current 2.25 A Rated output voltage 20 VDC Weight 0.17 kg (.37 lb - Dell Latitude 7370 | Owners Manual - Page 66
Temperature range -40°C to 70°C (-40°F to 158°F) (Non-Operating) Physical specifications Feature Front height Back height Width Depth Minimum Weight (Non-touch with 34Whr battery) Specification 9.86 mm (0.39 inches) 14.32 mm (0.56 inches) 304.8 mm (12 inches) 210.5 mm (8.29 inches) 1.12 kg - Dell Latitude 7370 | Owners Manual - Page 67
options. Availability varies by country and product, and some services may not be available in your area. To contact Dell for sales, technical support, or customer service issues: 1. Go to Dell.com/support. 2. Select your support category. 3. Verify your country or region in the Choose a Country
-
 1
1 -
 2
2 -
 3
3 -
 4
4 -
 5
5 -
 6
6 -
 7
7 -
8
-
9
-
10
-
11
-
12
-
13
-
14
-
15
-
16
-
17
-
18
-
19
-
20
-
21
-
22
-
23
-
24
-
25
-
26
-
27
-
28
-
29
-
30
-
31
-
32
-
33
-
34
-
35
-
36
-
37
-
38
-
39
-
40
-
41
-
42
-
43
-
44
-
45
-
46
-
47
-
48
-
49
-
50
-
51
-
52
-
53
-
54
-
55
-
56
-
57
-
58
-
59
-
60
-
61
-
62
-
63
-
64
-
65
-
66
-
67
 |
 |

Dell Latitude 7370
Owner's Manual
Regulatory Model: P67G
Regulatory Type: P67G001