Dell Latitude CPi A User Manual - Page 22
Keyboard Assembly, key; see away from the center of the keyboard, until the tab
 |
View all Dell Latitude CPi A manuals
Add to My Manuals
Save this manual to your list of manuals |
Page 22 highlights
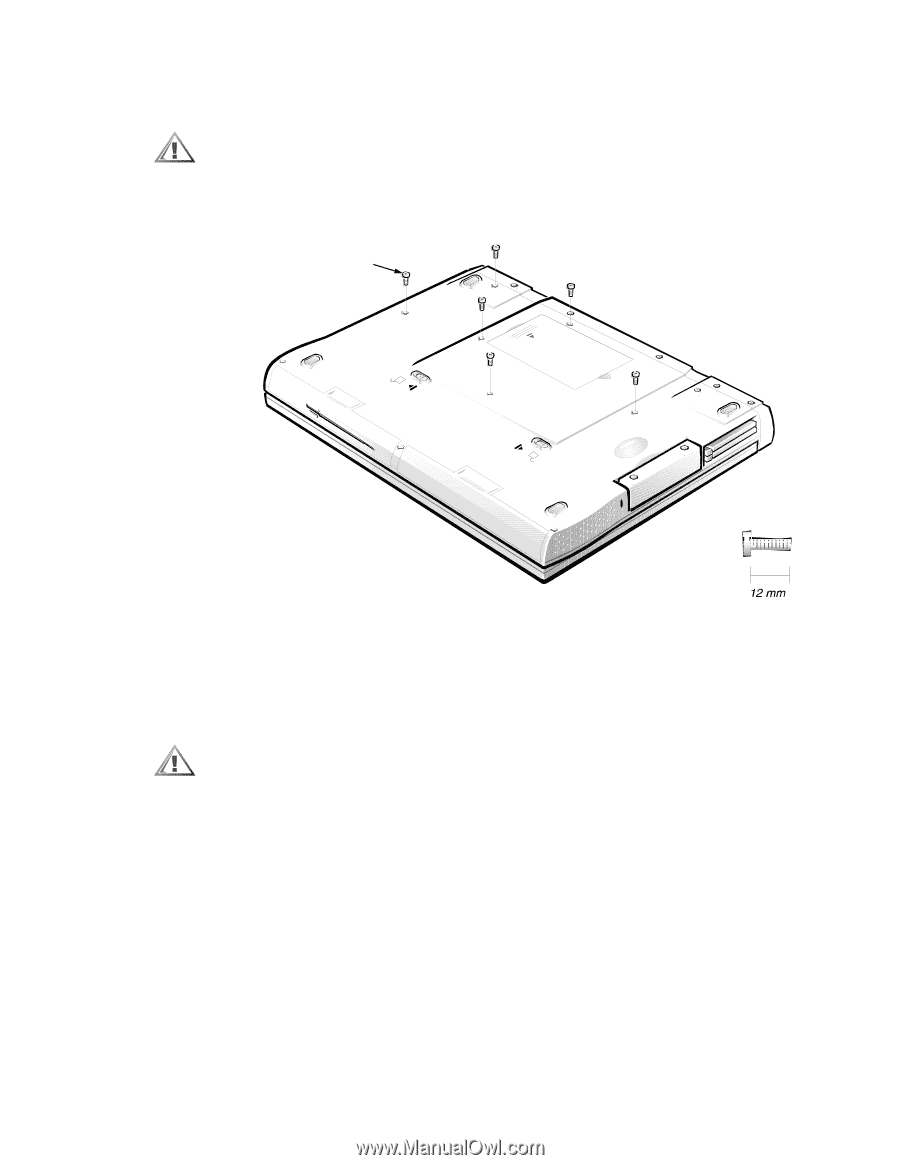
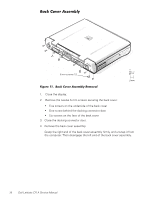
To remove the keyboard assembly, perform the following steps. 1. Close the display assembly, and turn the computer upside down on a flat work surface (see Figure 9). 12-mm screws (6) 2. Remove the six 12-mm screws securing the keyboard to the computer. 3. Turn the computer right-side up and open the display. 4. Release the keyboard from the palmrest assembly: a. Carefully deflect the palmrest (next to the blank key below the key; see Figure 10) away from the center of the keyboard, until the tab on the palmrest's inner edge disengages from the keyboard. The keyboard should raise up slightly. b. Insert a fingernail or a small flat-bladed screwdriver under the scalloped edge of the blank key (see Figure 10), and lift the right edge of the keyboard. 16 Dell Latitude CPi A Service Manual
-
 1
1 -
2
-
3
-
4
-
5
-
6
-
7
-
8
-
9
-
10
-
11
-
12
-
13
-
14
-
15
-
16
-
 17
17 -
 18
18 -
 19
19 -
 20
20 -
 21
21 -
 22
22 -
 23
23 -
 24
24 -
 25
25 -
 26
26 -
 27
27 -
28
-
29
-
30
-
31
-
32
-
33
-
34
-
35
-
36
-
37
-
38
-
39
-
40
-
41
-
42
-
43
-
44
-
45
-
46
-
47
-
48
-
49
-
50
 |
 |