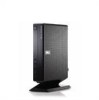
Dell OptiPlex FX160 Dell™ OptiPlex™ FX160 Re-Imaging Guide - Page 7
the Boot Menu. - manual
 |
View all Dell OptiPlex FX160 manuals
Add to My Manuals
Save this manual to your list of manuals |
Page 7 highlights
10 On the workstation computer, copy the entire \winpe_x86\ISO directory to the UFD device. You can create the directory structure manually, or use xcopy to replicate the entire structure and contents of \ISO. If using xcopy, enter: xcopy c:\winpe_x86\iso\*.* /s /e /f f:\ where c is the letter of your technician computer hard disk and f is the letter of the UFD device. 11 Remove the UFD device from the technician computer. Re-Imaging Windows on the FX160 Computer With a UFD Device CAUTION: Re-imaging your FX160 computer will erase all data from the hard drive or flash card. Back up your system to an external device before re-imaging your computer. 1 Power off the FX160 computer. 2 Plug the UFD device with the bootable Windows XP Embedded image update into a USB port. 3 Power on the FX160 computer. When the BIOS window options list appears (in the upper right-corner of the screen) press to access the Boot Menu. 4 In the Boot Device selection window, use the arrow keys to highlight the UFD device with the Windows XP Embedded image update, then press . When the Windows PE system is initialized, the Windows XP Embedded imaging tool is launched. 5 To save the current FX160 system image, click the Capture System Image button and follow the prompts to save the system image to an external device. When the capture operation completes, the imaging tool window reappears. CAUTION: By default, all existing files are erased and system images are installed on the first available boot drive as configured in the BIOS System Boot Device Priority. Back up your system to an external device before re-imaging your computer. 6 To install a new system image, click the Install System Image button. In the browse window, select the system image to install, then click Install. 7 When the installation completes, restart the system, booting from the drive that was imaged. Dell OptiPlex FX160 Re-Imaging Guide 7
-
 1
1 -
 2
2 -
 3
3 -
 4
4 -
 5
5 -
 6
6 -
 7
7 -
 8
8 -
 9
9 -
 10
10 -
 11
11 -
 12
12 -
13
-
14
-
15
-
16
-
17
-
18
-
19
-
20
-
21
-
22
-
23
-
24
-
25
-
26
-
27
-
28
-
29
-
30
-
31
-
32
-
33
-
34
-
35
-
36
-
37
-
38
-
39
-
40
-
41
-
42
-
43
-
44
-
45
-
46
-
47
-
48
-
49
-
50
-
51
-
52
-
53
-
54
-
55
-
56
-
57
-
58
-
59
-
60
-
61
-
62
-
63
-
64
-
65
-
66
-
67
-
68
-
69
-
70
-
71
-
72
-
73
-
74
-
75
-
76
-
77
-
78
-
79
-
80
-
81
-
82
-
83
-
84
-
85
-
86
-
87
-
88
-
89
-
90
-
91
-
92
-
93
-
94
-
95
-
96
-
97
-
98
-
99
-
100
-
101
-
102
-
103
-
104
-
105
-
106
-
107
-
108
-
109
-
110
-
111
-
112
-
113
-
114
-
115
-
116
-
117
-
118
-
119
-
120
-
121
-
122
-
123
-
124
-
125
-
126
-
127
-
128
-
129
-
130
-
131
-
132
 |
 |