Dell PowerConnect J-EX4500 Hardware Guide - Page 134
Connecting and Configuring a J-EX Series Switch (J-Web Procedure), Specify the SNMP Read Community
 |
View all Dell PowerConnect J-EX4500 manuals
Add to My Manuals
Save this manual to your list of manuals |
Page 134 highlights
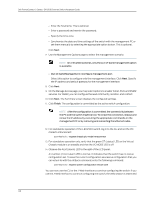
Dell PowerConnect J-Series J-EX4500 Ethernet Switch Hardware Guide 6. Use the Management Options page to select the management scenario: NOTE: On J-EX4500 switches, only the out-of-band management option is available. • Configure out-of-band management. Specify the IP address and gateway of the management interface. Use this IP address to connect to the switch. 7. Specify the SNMP Read Community, Location, and Contact to configure SNMP parameters. These parameters are optional. 8. Specify the system date and time. Select the time zone from the list. These options are optional. 9. When the configured parameters are displayed, enter yes to commit the configuration. The configuration is committed as the active configuration for the switch. 10. For standalone operation of the J-EX4500 switch, set the PIC mode to intraconnect: user@switch> request chassis pic-mode intraconnect 11. For standalone operation only, verify that the green ST (status) LED on the Virtual Chassis module is on steadily and that the VC MODE LED is off. 12. Observe the ALM (alarm) LED to the right of the LCD panel. A lit amber (minor) alarm LED is normal. It indicates that the switch has no rescue configuration set. To save the current configuration as a rescue configuration that you can return to with the rollback command, enter the following command: user@switch> request system configuration rescue save You can now use the CLI or log in to the J-Web interface to continue configuring the switch. If you use the J-Web interface to continue configuring the switch, the Web session is redirected to the new management IP address. If the connection cannot be made, the J-Web interface displays instructions for starting a J-Web session. To configure the switch in a J-EX4500 Virtual Chassis or mixed Virtual Chassis, see the Dell PowerConnect J-Series Ethernet Switch Complete Software Guide for Junos OS at http://www.support.dell.com/manuals. Related • Connecting and Configuring a J-EX Series Switch (J-Web Procedure) on page 118 Documentation • Installing and Connecting a J-EX4500 Switch on page 75 Connecting and Configuring a J-EX Series Switch (J-Web Procedure) There are two ways to connect and configure a J-EX Series switch: one method is through the console using the CLI and the other is using the J-Web interface. This topic describes the J-Web procedure. 118
-
 1
1 -
2
-
3
-
4
-
5
-
6
-
7
-
8
-
9
-
10
-
11
-
12
-
13
-
14
-
15
-
16
-
17
-
18
-
19
-
20
-
21
-
22
-
23
-
24
-
25
-
26
-
27
-
28
-
29
-
30
-
31
-
32
-
33
-
34
-
35
-
36
-
37
-
38
-
39
-
40
-
41
-
42
-
43
-
44
-
45
-
46
-
47
-
48
-
49
-
50
-
51
-
52
-
53
-
54
-
55
-
56
-
57
-
58
-
59
-
60
-
61
-
62
-
63
-
64
-
65
-
66
-
67
-
68
-
69
-
70
-
71
-
72
-
73
-
74
-
75
-
76
-
77
-
78
-
79
-
80
-
81
-
82
-
83
-
84
-
85
-
86
-
87
-
88
-
89
-
90
-
91
-
92
-
93
-
94
-
95
-
96
-
97
-
98
-
99
-
100
-
101
-
102
-
103
-
104
-
105
-
106
-
107
-
108
-
109
-
110
-
111
-
112
-
113
-
114
-
115
-
116
-
117
-
118
-
119
-
120
-
121
-
122
-
123
-
124
-
125
-
126
-
127
-
128
-
 129
129 -
 130
130 -
 131
131 -
 132
132 -
 133
133 -
 134
134 -
 135
135 -
 136
136 -
 137
137 -
 138
138 -
 139
139 -
140
-
141
-
142
-
143
-
144
-
145
-
146
-
147
-
148
-
149
-
150
-
151
-
152
-
153
-
154
-
155
-
156
-
157
-
158
-
159
-
160
-
161
-
162
-
163
-
164
-
165
-
166
-
167
-
168
-
169
-
170
-
171
-
172
-
173
-
174
-
175
-
176
-
177
-
178
-
179
-
180
-
181
-
182
-
183
-
184
-
185
-
186
-
187
-
188
-
189
-
190
-
191
-
192
-
193
-
194
-
195
-
196
-
197
-
198
-
199
-
200
-
201
-
202
-
203
-
204
-
205
-
206
-
207
-
208
-
209
-
210
-
211
-
212
-
213
-
214
-
215
-
216
-
217
-
218
-
219
-
220
-
221
-
222
-
223
-
224
-
225
-
226
 |
 |
