Dell PowerConnect J-EX4500 Hardware Guide - Page 85
Planning the Virtual Chassis, Understanding J-EX4500 Virtual Chassis Hardware
 |
View all Dell PowerConnect J-EX4500 manuals
Add to My Manuals
Save this manual to your list of manuals |
Page 85 highlights
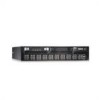
CHAPTER 8 Planning the Virtual Chassis • Understanding J-EX4500 Virtual Chassis Hardware Configurations on page 69 • Planning J-EX4200 and J-EX4500 Virtual Chassis on page 70 Understanding J-EX4500 Virtual Chassis Hardware Configurations Up to two J-EX4500 switches can be interconnected into a Virtual Chassis composed exclusively of J-EX4500 switches. J-EX4200 and J-EX4500 switches can be connected together into the same Virtual Chassis to form a mixed J-EX4200 and J-EX4500 Virtual Chassis. A mixed Virtual Chassis supports up to two J-EX4500 switches and up to eight J-EX4200 switches. The Virtual Chassis configuration requires designating one of the members as the master switch, and another as the backup switch. All other switches in the configuration are designated as being in the line card role. You manage Virtual Chassis operation through the master switch. Each switch in the Virtual Chassis is assigned a unique identifier that is displayed on the switch LCD panel. In a mixed Virtual Chassis, a J-EX4500 switch must be configured in the master and backup roles. For configuration details, see the Dell PowerConnect J-Series Ethernet Switch Complete Software Guide for Junos OS at http://www.support.dell.com/manuals. NOTE: You can configure and manage a standalone J-EX4500 switch with the J-Web interface, but the J-Web interface does not support configuration and management of a J-EX4500 Virtual Chassis. Related Documentation • For more information about the J-EX4200 and J-EX4500 Virtual Chassis and components, see the Dell PowerConnect J-Series Ethernet Switch Complete Software Guide for Junos OS at http://www.support.dell.com/manuals. • Planning J-EX4200 and J-EX4500 Virtual Chassis on page 70 • Virtual Chassis Ports Connector Pinout Information for J-EX4500 Switches on page 36 69
-
 1
1 -
2
-
3
-
4
-
5
-
6
-
7
-
8
-
9
-
10
-
11
-
12
-
13
-
14
-
15
-
16
-
17
-
18
-
19
-
20
-
21
-
22
-
23
-
24
-
25
-
26
-
27
-
28
-
29
-
30
-
31
-
32
-
33
-
34
-
35
-
36
-
37
-
38
-
39
-
40
-
41
-
42
-
43
-
44
-
45
-
46
-
47
-
48
-
49
-
50
-
51
-
52
-
53
-
54
-
55
-
56
-
57
-
58
-
59
-
60
-
61
-
62
-
63
-
64
-
65
-
66
-
67
-
68
-
69
-
70
-
71
-
72
-
73
-
74
-
75
-
76
-
77
-
78
-
79
-
 80
80 -
 81
81 -
 82
82 -
 83
83 -
 84
84 -
 85
85 -
 86
86 -
 87
87 -
 88
88 -
 89
89 -
 90
90 -
91
-
92
-
93
-
94
-
95
-
96
-
97
-
98
-
99
-
100
-
101
-
102
-
103
-
104
-
105
-
106
-
107
-
108
-
109
-
110
-
111
-
112
-
113
-
114
-
115
-
116
-
117
-
118
-
119
-
120
-
121
-
122
-
123
-
124
-
125
-
126
-
127
-
128
-
129
-
130
-
131
-
132
-
133
-
134
-
135
-
136
-
137
-
138
-
139
-
140
-
141
-
142
-
143
-
144
-
145
-
146
-
147
-
148
-
149
-
150
-
151
-
152
-
153
-
154
-
155
-
156
-
157
-
158
-
159
-
160
-
161
-
162
-
163
-
164
-
165
-
166
-
167
-
168
-
169
-
170
-
171
-
172
-
173
-
174
-
175
-
176
-
177
-
178
-
179
-
180
-
181
-
182
-
183
-
184
-
185
-
186
-
187
-
188
-
189
-
190
-
191
-
192
-
193
-
194
-
195
-
196
-
197
-
198
-
199
-
200
-
201
-
202
-
203
-
204
-
205
-
206
-
207
-
208
-
209
-
210
-
211
-
212
-
213
-
214
-
215
-
216
-
217
-
218
-
219
-
220
-
221
-
222
-
223
-
224
-
225
-
226
 |
 |