Dell PowerEdge R640 Deploying the 55TB Data Warehouse Fast Track Reference Arc - Page 12
Reset the HBAs to default settings, 5.4 Con the HBAs, Port Down Retry Count
 |
View all Dell PowerEdge R640 manuals
Add to My Manuals
Save this manual to your list of manuals |
Page 12 highlights
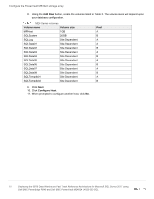
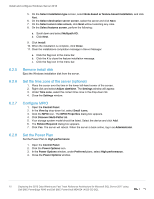
Configure the PowerEdge R640 server 5.3 Reset the HBAs to default settings To reset the HBAs using QLogic Fast!UTIL, which is accessible during the server boot cycle, perform the following steps: 1. Reboot the server and press [Ctrl]+[Q] when prompted to enter QLogic Fast!UTIL. 2. In Select Host Adapter, select the first port in the list and press [Enter]. 3. Reset the HBA port to factory defaults: a. In Fast!UTIL Options, select Configuration Settings and press [Enter]. b. In Configuration Settings, select Restore Default Settings and press [Enter]. c. After Adapter Defaults Restored is displayed, press any key to return to the Configuration Settings screen. d. Press [Esc] to exit Configuration Settings. When prompted, select Save Changes and press [Enter]. 4. In Fast!UTIL Options, select Select Host Adapter and press [Enter]. 5. In Select Host Adapter, select the next port in the list and press [Enter]. 6. Using the instructions in step 3, reset the port to factory defaults. Repeat these steps until all four ports have been configured. 5.4 Configure the HBAs The HBAs can be configured using QLogic Fast!UTIL, which is accessible during the server boot cycle. This section assumes that QLogic Fast!UTIL is still open on the server after completing the previous procedure. To configure the HBAs using QLogic Fast!UTIL, perform the following steps: 1. In Fast!UTIL Options, select Select Host Adapter and press [Enter]. 2. In Select Host Adapter, select the first port in the list and press [Enter]. 3. Set the parameters on the HBA port according to best practices: a. In Configuration Settings, select Adapter Settings and press [Enter]. b. In Adapter Settings, complete the following: i. Set Connection Options to 1 (Point to point only). ii. Press [Esc] to exit Adapter Settings. c. In Configuration Settings, select Advanced Adapter Settings and press [Enter]. d. In Advanced Adapter Settings, complete the following: i. Set Login Retry Count to 60. ii. Set Port Down Retry Count to 60. iii. Set Link Down Timeout to 30. iv. Press [Esc] to exit Advanced Adapter Settings. e. Press [Esc] to exit Configuration Settings. When prompted, select Save Changes and press [Enter]. 4. In Fast!UTIL Options, select Select Host Adapter and press [Enter]. 5. In Select Host Adapter, select the next port in the list and press [Enter]. 6. Using the instructions in step 3, set the parameters according to best practices. Repeat these steps until all four ports have been configured. 12 Deploying the 55TB Data Warehouse Fast Track Reference Architecture for Microsoft SQL Server 2017 using Dell EMC PowerEdge R640 and Dell EMC PowerVault ME4024 | 4023-CD-SQL
-
 1
1 -
2
-
3
-
4
-
5
-
6
-
 7
7 -
 8
8 -
 9
9 -
 10
10 -
 11
11 -
 12
12 -
 13
13 -
 14
14 -
 15
15 -
 16
16 -
 17
17 -
18
-
19
-
20
-
21
-
22
-
23
-
24
 |
 |
