Dell PowerEdge R640 Deploying the 55TB Data Warehouse Fast Track Reference Arc - Page 16
Remove SMBv1 (optional), 6.2.10 Con Windows Updates (optional)
 |
View all Dell PowerEdge R640 manuals
Add to My Manuals
Save this manual to your list of manuals |
Page 16 highlights
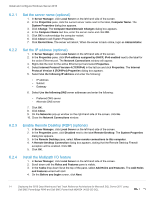
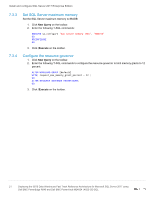
Install and configure Windows Server 2016 6.2.9 Remove SMBv1 (optional) 1. Run the following PowerShell command: Remove-WindowsFeature -Name "FS-SMB1" 2. Reboot the server. When the server is back online, log in as Administrator. 6.2.10 Configure Windows Updates (optional) 1. Click the start icon. 2. Click the settings icon. 3. Click Update & security. 4. Under Update Status, click Check for updates. 5. Apply all important updates. 6. Repeat until there are no results after clicking Check for updates and Update Status shows Your device is up to date. 6.2.11 Create a local SQL Server service account Create a local SQL Server service account called SQLService: 1. Open Computer Management. 2. Expand Local Users and Groups. 3. Right-click Users and select New User. The New User dialog box appears. 4. In the User name text box, enter SQLService. 5. In the Description text box, enter SQL Server service account. 6. In the Password and Confirm password text boxes, enter the password. 7. Deselect User must change password at next logon. 8. Select Password never expires. 9. Click Create. 10. Click Close. 11. Close the Computer Management window. 6.2.12 Lock pages in memory Grant the Lock pages in memory right to the SQL Server service account: 1. Right-click the start icon and select Run. 2. In the Open text box, enter secpol.msc. The Local Security Policy window appears. 3. Expand Local Policies. 4. Select User Rights Assignment. 5. In the Policy list, double-click Lock pages in memory. The Lock Pages in Memory Properties dialog box appears. 6. Click Add User or Group. The Select Users or Groups dialog box appears. 7. Enter SQLService in the text box. 8. Click Check Names and click OK. 9. Click OK. 10. Close the Local Security Policy window. 16 Deploying the 55TB Data Warehouse Fast Track Reference Architecture for Microsoft SQL Server 2017 using Dell EMC PowerEdge R640 and Dell EMC PowerVault ME4024 | 4023-CD-SQL
-
 1
1 -
2
-
3
-
4
-
5
-
6
-
7
-
8
-
9
-
10
-
 11
11 -
 12
12 -
 13
13 -
 14
14 -
 15
15 -
 16
16 -
 17
17 -
 18
18 -
 19
19 -
 20
20 -
 21
21 -
22
-
23
-
24
 |
 |