Dell PowerEdge R640 Deploying the 55TB Data Warehouse Fast Track Reference Arc - Page 20
Install SQL Server Management Studio (optional), 7.3 Con SQL Server 2017 Enterprise Edition
 |
View all Dell PowerEdge R640 manuals
Add to My Manuals
Save this manual to your list of manuals |
Page 20 highlights
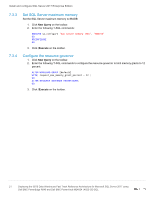
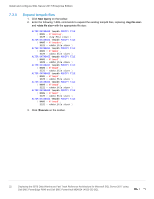
Install and configure SQL Server 2017 Enterprise Edition a. In the Number of files list box, enter 8. b. Remove existing directories in the Data directories list box. Select the directory and click Remove. c. Add the directory M:\ft\SQLTempdb01\Data. Click Add. The Browse for Folder dialog box appears. Select the folder and click OK. d. Add the directory M:\ft\SQLTempdb02\Data. Click Add. The Browse for Folder dialog box appears. Select the folder and click OK. e. In the Log directory list box, enter M:\ft\SQLLog\Data. f. On the FILESTREAM tab (optional), select Enable FILESTREAM for Transaction-SQL access and click Next. 12. On the Ready to Install screen, click Install. 13. On the Complete screen, click Close. 14. Close the SQL Server Installation Center window. 15. Remove the SQL Server install media. 7.2 Install SQL Server Management Studio (optional) Starting with SQL Server 2016, SQL Server Management Studio (SSMS) is no longer installed as part of the SQL Server installation and is installed separately. 1. Download the latest SSMS installation package from Microsoft. 2. Double-click the SSMS setup executable file (for example, SSMS-Setup-ENU.exe). 3. On the Welcome screen, click Install. 4. On the Setup Completed screen, click Close. 7.3 7.3.1 7.3.2 Configure SQL Server 2017 Enterprise Edition After SQL Server is installed, a few configuration changes need to be made to optimize SQL Server for the Data Warehouse Fast Track workload. To configure SQL Server, perform the steps in the following subsections. Open SQL Server Management Studio 1. The Connect to Server dialog box appears. 2. In the Server name text box, enter the server name. 3. In the Authentication drop-down list, select Windows Authentication. 4. Click Connect. Turn on advanced configuration options 1. Click New Query on the toolbar. 2. Enter the following T-SQL commands: EXECUTE sp_configure 'show advanced options', 1 GO RECONFIGURE GO 3. Click !Execute on the toolbar. 20 Deploying the 55TB Data Warehouse Fast Track Reference Architecture for Microsoft SQL Server 2017 using Dell EMC PowerEdge R640 and Dell EMC PowerVault ME4024 | 4023-CD-SQL
-
 1
1 -
2
-
3
-
4
-
5
-
6
-
7
-
8
-
9
-
10
-
11
-
12
-
13
-
14
-
 15
15 -
 16
16 -
 17
17 -
 18
18 -
 19
19 -
 20
20 -
 21
21 -
 22
22 -
 23
23 -
 24
24
 |
 |
