Dell PowerEdge R640 Deploying the 55TB Data Warehouse Fast Track Reference Arc - Page 15
Remove install disk, 6.2.6 Set the time zone of the server (optional), 6.2.7 Con MPIO
 |
View all Dell PowerEdge R640 manuals
Add to My Manuals
Save this manual to your list of manuals |
Page 15 highlights
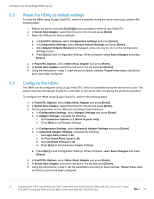
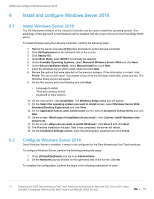
Install and configure Windows Server 2016 5. On the Select installation type screen, select Role-based or feature-based installation, and click Next. 6. On the Select destination server screen, select the server and click Next. 7. On the Select server roles screen, click Next without selecting any roles. 8. On the Select features screen, perform the following: a. Scroll down and select Multipath I/O. b. Click Next. 9. Click Install. 10. When the installation is complete, click Close. 11. Clear the installations completion message in Server Manager: a. Click the flag icon in the menu bar. b. Click the X to close the feature installation message. c. Click the flag icon in the menu bar. 6.2.5 Remove install disk Eject the Windows installation disk from the server. 6.2.6 Set the time zone of the server (optional) 1. Place the cursor over the time in the lower left-hand corner of the screen. 2. Right-click and select Adjust date/time. The Settings window will appear. 3. Under Time zone, select the correct time zone in the drop-down list. 4. Close the Settings window. 6.2.7 Configure MPIO 1. Open the Control Panel. 2. In the View by drop-down list, select Small icons. 3. Click the MPIO icon. The MPIO Properties dialog box appears. 4. Click Discover Multi-Paths tab. 5. Your storage system model should be listed. Select the device and click Add. 6. The Reboot Required dialog box appears. 7. Click Yes. The server will reboot. When the server is back online, log in as Administrator. 6.2.8 Set the Power Plan Set the Power Plan to High performance: 1. Open the Control Panel. 2. Click the Power Options icon. 3. In the Power Options window, under Preferred plans, select High performance. 4. Close the Power Options window. 15 Deploying the 55TB Data Warehouse Fast Track Reference Architecture for Microsoft SQL Server 2017 using Dell EMC PowerEdge R640 and Dell EMC PowerVault ME4024 | 4023-CD-SQL
-
 1
1 -
2
-
3
-
4
-
5
-
6
-
7
-
8
-
9
-
 10
10 -
 11
11 -
 12
12 -
 13
13 -
 14
14 -
 15
15 -
 16
16 -
 17
17 -
 18
18 -
 19
19 -
 20
20 -
21
-
22
-
23
-
24
 |
 |
