Dell PowerEdge R740 EMC PowerEdge Servers Troubleshooting Guide - Page 58
Drive timeout error, Drives not accessible, Troubleshooting an optical drive
 |
View all Dell PowerEdge R740 manuals
Add to My Manuals
Save this manual to your list of manuals |
Page 58 highlights
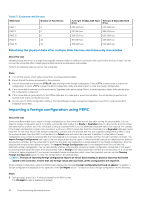
Drive timeout error Issue-Drive times out and the RAID controller displays the drive as failed. Corrective action-Update the hard drive firmware/PERC controller. For information about driver installation, see the driver installation section. For information about firmware installation, see the Firmware section. Drives not accessible Multiple physical disk errors in a single array typically indicate a failure in cabling or connection and could involve the loss of data. You can recover the virtual disk after multiple physical disks become simultaneously inaccessible. Perform the following steps to recover the virtual disk. Prerequisites Follow the safety precautions to prevent electrostatic discharge. Steps 1. Turn Off the System. 2. Reseat the cable at both the ends. 3. Reseat the controller card. 4. Reseat the Drives and ensure that all the drives are present in the system. 5. Turn on the system and enter the CTRL+R utility. or and either import or clear the foreign configuration. 6. Press at the prompt to import the foreign configuration. 7. press to enter the BIOS configuration utility. If the virtual disk is redundant and transitioned to degraded state before going Offline, a rebuild operation starts automatically after the configuration is imported. If the virtual disk has gone directly to the Offline state due to a cable pull or power loss situation, the virtual disk is imported in its Optimal state without a rebuild occurring. You can also use the BIOS Configuration Utility or Dell OpenManage storage management application to perform a manual rebuild of multiple physical disks. Troubleshooting an optical drive Prerequisites CAUTION: Many repairs may only be done by a certified service technician. You should only perform troubleshooting and simple repairs as authorized in your product documentation, or as directed by the online or telephone service and support team. Damage due to servicing that is not authorized by Dell is not covered by your warranty. Read and follow the safety instructions that are shipped with your product. Steps 1. Try using a different CD or DVD. 2. If the problem is not resolved, enter System Setup and ensure that the integrated SATA controller and the drive's SATA port are enabled. 3. Run the appropriate diagnostic test. 4. Turn off the system and attached peripherals, and disconnect the system from the electrical outlet. 5. If installed, remove the bezel. 6. Remove the system cover. 7. Ensure that the interface cable is securely connected to the optical drive and to the controller. 8. Ensure that a power cable is properly connected to the drive. 9. Install the system cover. Next steps If the problem persists, see the Getting help section. 58 Troubleshooting hardware issues
-
 1
1 -
2
-
3
-
4
-
5
-
6
-
7
-
8
-
9
-
10
-
11
-
12
-
13
-
14
-
15
-
16
-
17
-
18
-
19
-
20
-
21
-
22
-
23
-
24
-
25
-
26
-
27
-
28
-
29
-
30
-
31
-
32
-
33
-
34
-
35
-
36
-
37
-
38
-
39
-
40
-
41
-
42
-
43
-
44
-
45
-
46
-
47
-
48
-
49
-
50
-
51
-
52
-
 53
53 -
 54
54 -
 55
55 -
 56
56 -
 57
57 -
 58
58 -
 59
59 -
 60
60 -
 61
61 -
 62
62 -
 63
63 -
64
-
65
-
66
-
67
-
68
-
69
-
70
-
71
-
72
-
73
-
74
-
75
-
76
-
77
-
78
-
79
-
80
-
81
-
82
-
83
-
84
-
85
-
86
-
87
-
88
-
89
-
90
-
91
-
92
-
93
-
94
-
95
-
96
-
97
-
98
-
99
-
100
-
101
-
102
-
103
-
104
-
105
-
106
-
107
-
108
-
109
-
110
-
111
-
112
-
113
-
114
-
115
-
116
 |
 |