Dell PowerVault 120T DDS4 User Guide - Page 31
Dell PowerVault 120T DDS4 Autoloader User's Guide
 |
View all Dell PowerVault 120T DDS4 manuals
Add to My Manuals
Save this manual to your list of manuals |
Page 31 highlights
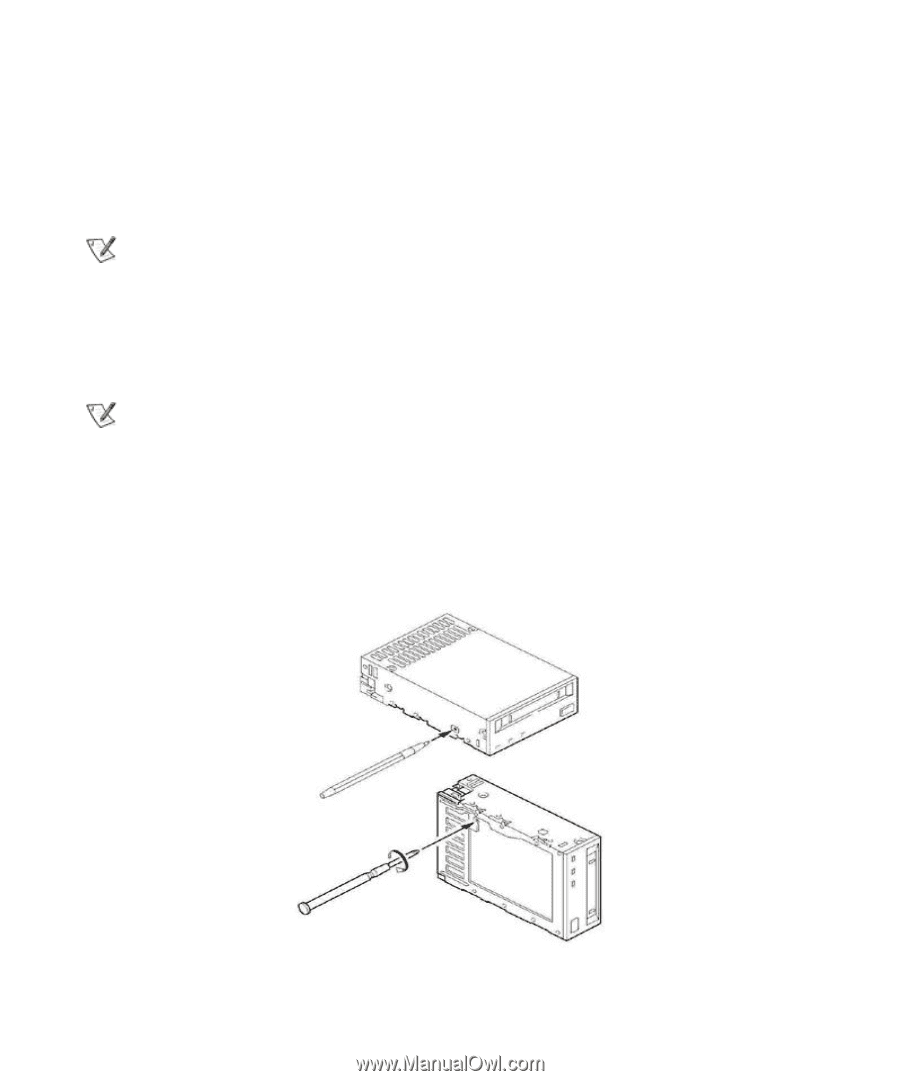
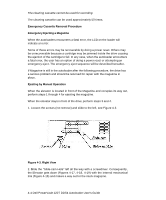
In case the tape is stuck inside the drive, you could remove the tape cartridge manually by performing the following steps. 1. Remove the drive from the chassis or enclosure to allow access to the bottom and left side of the drive. 2. Remove the drive's top cover to monitor the degree of tape slack throughout the process. NOTE: Never touch the inside of the drive when the top cover is opened. Otherwise it may cause a trouble. 3. Rotate the Loading/Threading motor clockwise with a small screwdriver (ex. Phillips "+" No. 1) put into the plastic screw head on the back of the drive (see the location in a drawing below). This will enable you to move back the threading mechanism to the initial position. NOTES: Do not rotate the screw further when you reach to the mechanical limit to avoid damage on the mechanism. To prevent damage on the tape, take up the slack of tape from time to time by clicking the ratchet mechanism located on the left side of the drive. 4. Continue the procedure until the tape is lifted out of the drive mechanism and ejected. 5. Return the drive to a service station for repair. 4-6 Dell PowerVault 120T DDS4 Autoloader User's Guide
-
 1
1 -
2
-
3
-
4
-
5
-
6
-
7
-
8
-
9
-
10
-
11
-
12
-
13
-
14
-
15
-
16
-
17
-
18
-
19
-
20
-
21
-
22
-
23
-
24
-
25
-
 26
26 -
 27
27 -
 28
28 -
 29
29 -
 30
30 -
 31
31 -
 32
32 -
 33
33 -
 34
34 -
 35
35 -
 36
36 -
37
-
38
-
39
-
40
-
41
-
42
-
43
-
44
-
45
-
46
-
47
-
48
-
49
-
50
-
51
-
52
-
53
 |
 |