Dell PowerVault MD3000i Hardware Owner's Manual - Page 60
Removing and Installing a RAID Controller Module, Removing a RAID Controller Module - troubleshooting
 |
View all Dell PowerVault MD3000i manuals
Add to My Manuals
Save this manual to your list of manuals |
Page 60 highlights
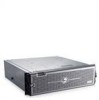
4 Rotate the carrier handle to the closed position while continuing to push the carrier into the slot. The status LED indicator (see Table 1-3 for description) will display a steady green if the physical disk is inserted properly. If the indicator is not illuminated, see "Troubleshooting SAS Physical Disks" on page 76. NOTE: At least two physical disks must be installed in the enclosure. Removing and Installing a RAID Controller Module The enclosure contains two RAID controller modules. Both are hot-pluggable and can be removed and installed independently without shutting down the enclosure. NOTICE: Removing a module is not recommended while data traffic involving that module is occurring. Although RAID controller modules are hot-pluggable, data loss could result from removing a module involved in data traffic. CAUTION: Always wear a wrist grounding strap when handling equipment with static-sensitive components. See your Product Information Guide for safety information. Removing a RAID Controller Module 1 Push up on the release tab on the left side of the module (see Figure 3-4). 2 At the same time, pull out on the release lever. When the lever is pulled out, the controller module partially ejects from the enclosure. 3 Remove the module from the enclosure and place it on a flat, secure surface. NOTICE: To avoid damage to the sensitive EMI contacts on the bottom of the controller module, do not stack or place it on a hard surface. 60 Installing Enclosure Components
-
 1
1 -
2
-
3
-
4
-
5
-
6
-
7
-
8
-
9
-
10
-
11
-
12
-
13
-
14
-
15
-
16
-
17
-
18
-
19
-
20
-
21
-
22
-
23
-
24
-
25
-
26
-
27
-
28
-
29
-
30
-
31
-
32
-
33
-
34
-
35
-
36
-
37
-
38
-
39
-
40
-
41
-
42
-
43
-
44
-
45
-
46
-
47
-
48
-
49
-
50
-
51
-
52
-
53
-
54
-
 55
55 -
 56
56 -
 57
57 -
 58
58 -
 59
59 -
 60
60 -
 61
61 -
 62
62 -
 63
63 -
 64
64 -
 65
65 -
66
-
67
-
68
-
69
-
70
-
71
-
72
-
73
-
74
-
75
-
76
-
77
-
78
-
79
-
80
-
81
-
82
-
83
-
84
-
85
-
86
-
87
-
88
-
89
-
90
-
91
-
92
-
93
-
94
-
95
-
96
-
97
-
98
-
99
-
100
-
101
-
102
-
103
-
104
-
105
-
106
 |
 |
