Dell Precision 7920 Tower Owners Manual - Page 84
Installing the system board
 |
View all Dell Precision 7920 manuals
Add to My Manuals
Save this manual to your list of manuals |
Page 84 highlights
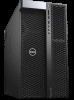
7. Lift the system board away from the chassis. Installing the system board 1. Align and place the system board onto the chassis and slide it back to its position. 2. Tighten the screws to secure the system board to the chassis. 3. Connect all the cables to the connectors on the system board. 4. Install the: a) rear system fan b) processor heat sink module c) GPU d) memory module e) front system fan f) PCIe card holder g) air shroud 84 Removing and installing components
-
 1
1 -
2
-
3
-
4
-
5
-
6
-
7
-
8
-
9
-
10
-
11
-
12
-
13
-
14
-
15
-
16
-
17
-
18
-
19
-
20
-
21
-
22
-
23
-
24
-
25
-
26
-
27
-
28
-
29
-
30
-
31
-
32
-
33
-
34
-
35
-
36
-
37
-
38
-
39
-
40
-
41
-
42
-
43
-
44
-
45
-
46
-
47
-
48
-
49
-
50
-
51
-
52
-
53
-
54
-
55
-
56
-
57
-
58
-
59
-
60
-
61
-
62
-
63
-
64
-
65
-
66
-
67
-
68
-
69
-
70
-
71
-
72
-
73
-
74
-
75
-
76
-
77
-
78
-
 79
79 -
 80
80 -
 81
81 -
 82
82 -
 83
83 -
 84
84 -
 85
85 -
 86
86 -
 87
87 -
 88
88 -
 89
89 -
90
-
91
-
92
-
93
-
94
-
95
-
96
-
97
-
98
-
99
-
100
-
101
-
102
-
103
-
104
-
105
-
106
-
107
-
108
-
109
-
110
-
111
-
112
-
113
-
114
-
115
-
116
-
117
-
118
-
119
-
120
-
121
-
122
-
123
-
124
-
125
-
126
-
127
 |
 |

7.
Lift the system board away from the chassis.
Installing the system board
1.
Align and place the system board onto the chassis and slide it back to its position.
2.
Tighten the screws to secure the system board to the chassis.
3.
Connect all the cables to the connectors on the system board.
4.
Install the:
a)
rear system fan
b)
processor heat sink module
c)
GPU
d)
memory module
e)
front system fan
f)
PCIe card holder
g)
air shroud
84
Removing and installing components