Dell S5296F-ON EMC PowerSwitch S5200F-ON Series Setup Guide - Page 17
Switch rail attachment, Front rack installation
 |
View all Dell S5296F-ON manuals
Add to My Manuals
Save this manual to your list of manuals |
Page 17 highlights
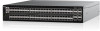
Figure 16. Switch rail attachment 2. After you install both rails, line them up on the ReadyRails. Slide the switch in until it is flush with the front of rack. About three inches before you fully insert your switch, the rail locking feature engages to keep the switch from inadvertently sliding out and falling. Figure 17. Front rack installation NOTE: Do not the use the mounted Ready-Rails as a shelf or a workplace. S5200F-ON Series switch Installation 17
-
 1
1 -
2
-
3
-
4
-
5
-
6
-
7
-
8
-
9
-
10
-
11
-
 12
12 -
 13
13 -
 14
14 -
 15
15 -
 16
16 -
 17
17 -
 18
18 -
 19
19 -
 20
20 -
 21
21 -
 22
22 -
23
-
24
-
25
-
26
 |
 |

Figure 16. Switch rail attachment
2.
After you install both rails, line them up on the ReadyRails. Slide the switch in until it is flush with the front of rack.
About three inches before you fully insert your switch, the rail locking feature engages to keep the switch from inadvertently sliding
out and falling.
Figure 17. Front rack installation
NOTE:
Do not the use the mounted Ready-Rails as a shelf or a workplace.
S5200F-ON Series switch Installation
17