Dell Studio XPS M1640 Service Manual - Page 21
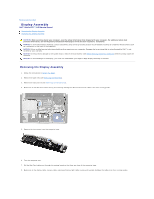
Replacing the Display Assembly
 |
View all Dell Studio XPS M1640 manuals
Add to My Manuals
Save this manual to your list of manuals |
Page 21 highlights
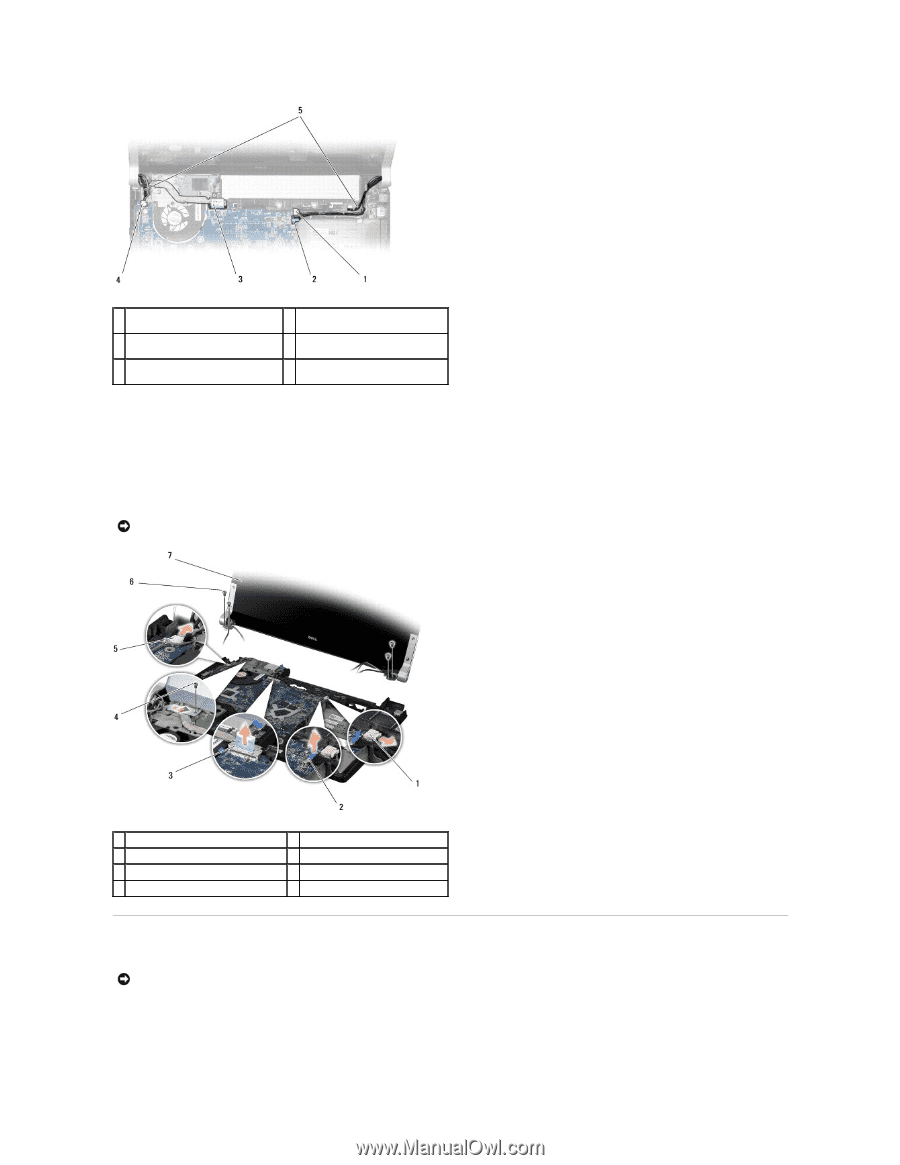
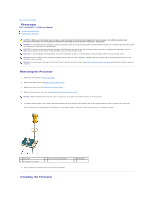
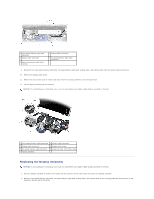
1 right power/battery light cable connector 3 display cable connector 5 Mini-Card antenna cable front routing 2 camera cable connector 4 left power/battery light cable connector 9. Disconnect the right power/battery light cable, left power/battery light cable, display cable, and camera cable from the system board connectors. 10. Remove the display cable screw. 11. Remove the four screws (two on either side) that secure the display assembly to the computer base. 12. Lift the display assembly off the computer. NOTICE: To avoid damage to the display, you must not disassemble your Edge-to-Edge display assembly in the field. 1 right power/battery cable connector 2 camera cable connector 3 display cable connector 4 display cable screw 5 left power/battery cable connector 6 screws (4 total; 2 on either side) 7 display assembly Replacing the Display Assembly NOTICE: To avoid damage to the display, you must not disassemble your Edge-to-Edge display assembly in the field. 1. Place the display assembly in position and replace the four screws (two on either side) that secure the display assembly. 2. Place the right power/battery light cable, left power/battery light cable, display cable, and camera cable in the routing guides and connect them to the respective system board connectors.
-
 1
1 -
2
-
3
-
4
-
5
-
6
-
7
-
8
-
9
-
10
-
11
-
12
-
13
-
14
-
15
-
 16
16 -
 17
17 -
 18
18 -
 19
19 -
 20
20 -
 21
21 -
 22
22 -
 23
23 -
 24
24 -
 25
25 -
 26
26 -
27
-
28
-
29
-
30
-
31
-
32
-
33
-
34
-
35
-
36
-
37
-
38
-
39
-
40
-
41
-
42
-
43
-
44
-
45
-
46
-
47
-
48
 |
 |