E-Z-GO RXV - Electric Owner Manual - Page 23
Notice
 |
View all E-Z-GO RXV - Electric manuals
Add to My Manuals
Save this manual to your list of manuals |
Page 23 highlights
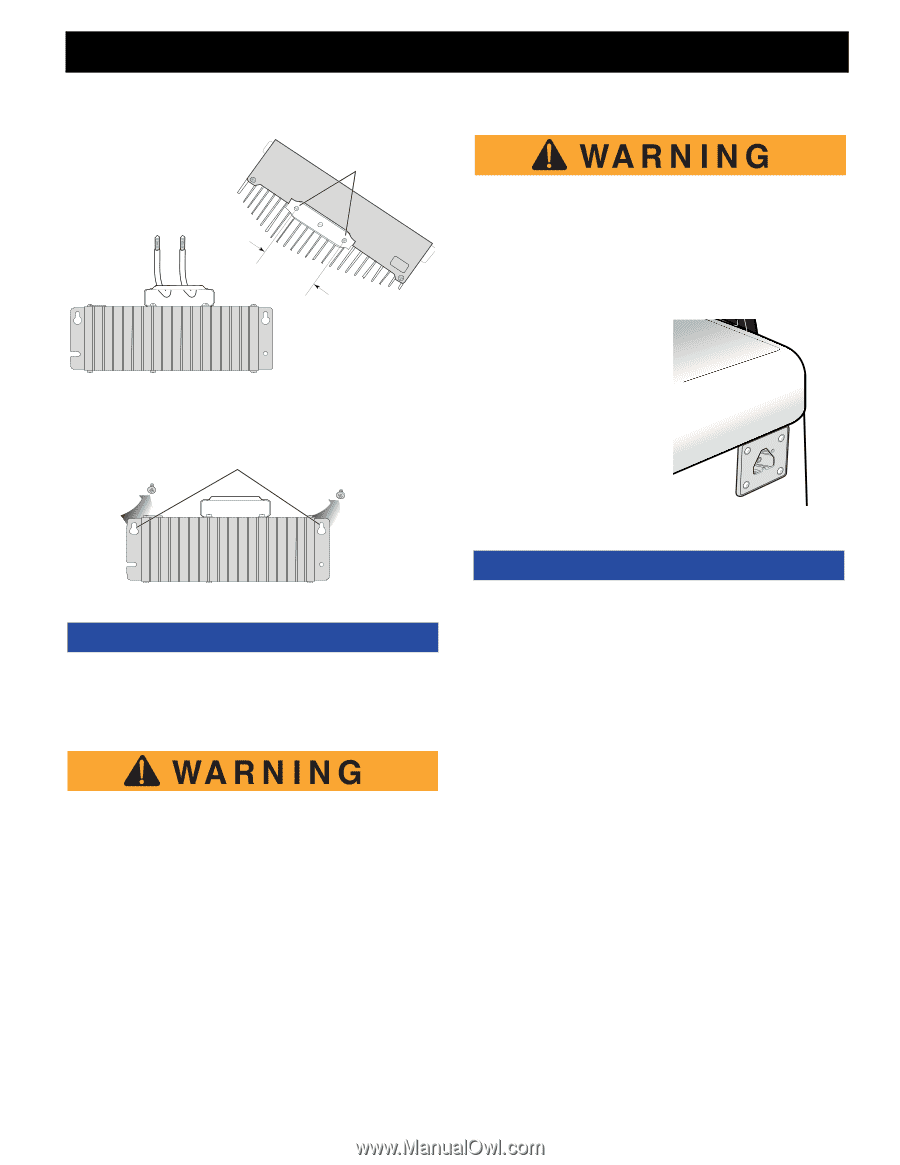
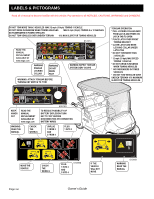
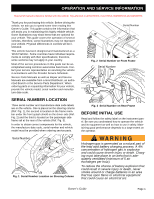
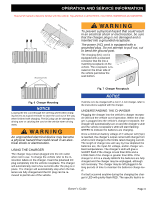
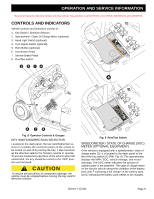
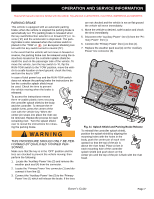
B OPERATION AND SERVICE INFORMATION Read all of manual to become familiar with this vehicle. Pay attention to all NOTICES, CAUTIONS, WARNINGS and DANGERS. Hanging Holes (7.893c.1m" ) Mounting Holes B To prevent a physical hazard that could result in an electrical shock or electrocution, be sure that the charger plug is not damaged and is inserted into a grounded receptacle. The power (AC) cord is equipped with a grounded plug. Do not attempt to pull out, cut or bend the ground post. The charging (DC) cord is equipped with a polarized connector that fits into a matching receptacle on the vehicle. The receptacle is located on the driver side of the vehicle just below the seat bottom. Fig. 6 Charger Mounting NOTICE Looping the DC cord through the steering wheel when charging serves as a good reminder to store the cord out of the way when finished with charging. The DC plug can be damaged by driving over or catching the cord on the vehicle when driving away. An ungrounded electrical device may become a physical hazard that could result in an electrical shock or electrocution. USING THE CHARGER The charger may remain plugged into the AC outlet when not in use. To charge the vehicle refer to the instruction labels on the charger. Insert the polarized DC plug completely into the vehicle receptacle. The charger will automatically start a few seconds after the plug is in place. The charger will automatically stop when the batteries are fully charged and the DC plug can be removed to permit use of the vehicle. Fig. 7 Charger Receptacle NOTICE If vehicle is to be charged with a non E-Z-GO charger, refer to the instructions supplied with the charger. UNDERSTANDING THE CHARGER Plugging the charger into the vehicle's charger receptacle will lock the vehicle out of operation. When the charger is plugged into the vehicle's charger receptacle, the charger will automatically turn on and the charger's LED and the vehicle receptacle's LED will start flashing GREEN to indicate the batteries are charging. Once a minimum battery voltage of 2 volts per cell (Vpc) is reached, the charger's output current will change from a full current charge to the trickle rated charging current. The length of charge time will vary by how depleted the batteries are, the input AC voltage, and/or charger ambient temperatures. The charger's LED will give a SHORT flash if the charge is less than 80% and a LONG flash if the charge is greater than 80%. If the charger's LED is a steady GREEN the batteries are fully charged and the charger may be unplugged, although not necessary. The charger may be left plugged in for long periods of time to maintain the batteries charge level. If a fault occurred anytime during the charging the charger's LED will quickly flash RED. The specific fault is in- Owner's Guide Page 3
-
 1
1 -
2
-
3
-
4
-
5
-
6
-
7
-
8
-
9
-
10
-
11
-
12
-
13
-
14
-
15
-
16
-
17
-
 18
18 -
 19
19 -
 20
20 -
 21
21 -
 22
22 -
 23
23 -
 24
24 -
 25
25 -
 26
26 -
 27
27 -
 28
28 -
29
-
30
-
31
-
32
-
33
-
34
-
35
-
36
-
37
-
38
-
39
-
40
-
41
-
42
-
43
-
44
-
45
-
46
-
47
-
48
-
49
-
50
-
51
-
52
-
53
-
54
-
55
-
56
-
57
-
58
-
59
-
60
 |
 |