E-Z-GO RXV - Electric Owner Manual - Page 44
Battery Charging, Troubleshooting
 |
View all E-Z-GO RXV - Electric manuals
Add to My Manuals
Save this manual to your list of manuals |
Page 44 highlights
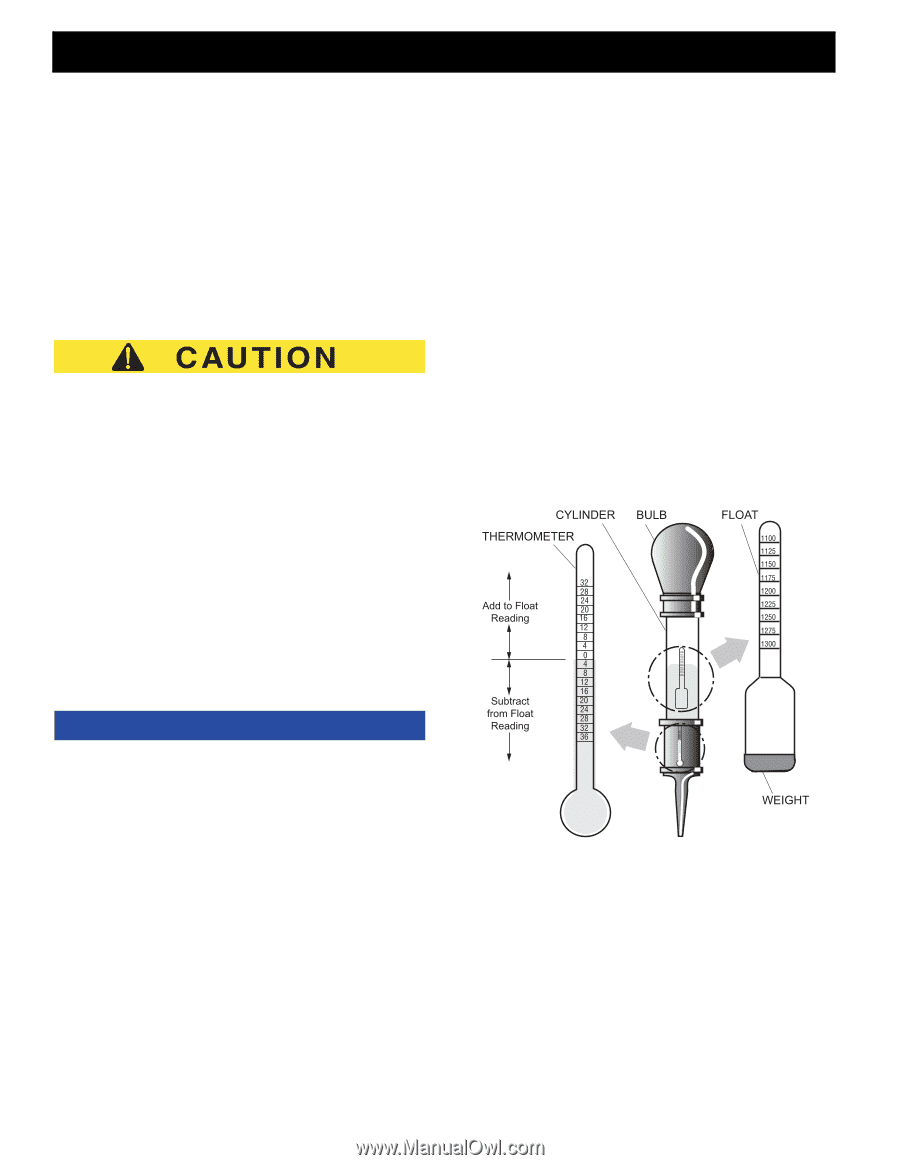
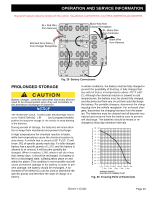
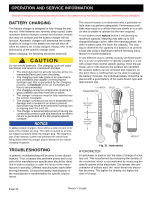
OPERATION AND SERVICE INFORMATION Read all of manual to become familiar with this vehicle. Pay attention to all NOTICES, CAUTIONS, WARNINGS and DANGERS. BBATTERY CHARGING The battery charger is designed to fully charge the battery set. If the batteries are severely deep cycled, some automatic battery chargers contain an electronic module that may not activate and the battery charger will not function. Automatic chargers will determine the correct duration of charge to the battery set and will shut off when the battery set is fully charged. Always refer to the instructions of the specific charger used. Before charging, the following should be observed: Do not overfill batteries. The charging cycle will expel electrolyte and result in component damage. • The electrolyte level in all cells must be at the recommended level and cover the plates. • The charging must take place in an area that is well ventilated and capable of removing the hydrogen gas that is generated by the charging process. A minimum of five air exchanges per hour is recommended. • The charging connector components must be in good condition and free from dirt or debris. • The charger connector must be fully inserted into the vehicle receptacle. • The charger connector/cord set is protected from damage and is located in an area to prevent injury that may result from personnel running over or tripping over the cord set. • The charger is automatically turned off during the connect/disconnect cycle and therefore no electrical arc is generated at the DC plug/receptacle contacts. NOTICE In some portable chargers, there will be a rattle present in the body of the charger DC plug. This rattle is caused by an internal magnet contained within the charger plug. The magnet is part of the interlock system that prevents the vehicle from being driven when the charger plug is inserted in the vehicle charging receptacle. TROUBLESHOOTING In general, troubleshooting will be done for two distinct reasons. First, a battery that performs poorly and is outside of the manufacturers specification should be identified in order to replace it under the terms of the manufacturer's warranty. Different manufacturers have different requirements. Consult the battery manufacturer or the manufacturer's representative for specific requirements. The second reason is to determine why a particular vehicle does not perform adequately. Performance problems may result in a vehicle that runs slowly or in a vehicle that is unable to operate for the time required. A new battery must mature before it will develop its maximum capacity. Maturing may take up to 100 charge/discharge cycles. After the maturing phase, the older a battery gets, the lower the capacity. The only way to determine the capacity of a battery is to perform a load test using a discharge machine following manufacturer's recommendations. A cost effective way to identify a poorly performing battery is to use a hydrometer to identify a battery in a set with a lower than normal specific gravity. Once the particular cell or cells that are the problem are identified, the suspect battery can be removed and replaced. At this point there is nothing that can be done to salvage the battery; however, the individual battery should be replaced with a good battery of the same brand, type and approximate age. Fig. 31 Hydrometer HYDROMETER A hydrometer is used to test the state of charge of a battery cell. This is performed by measuring the density of the electrolyte, which is accomplished by measuring the specific gravity of the electrolyte. The greater the concentration of sulfuric acid, the more dense the electrolyte becomes. The higher the density, the higher the state of charge. Page 24 Owner's Guide
-
 1
1 -
2
-
3
-
4
-
5
-
6
-
7
-
8
-
9
-
10
-
11
-
12
-
13
-
14
-
15
-
16
-
17
-
18
-
19
-
20
-
21
-
22
-
23
-
24
-
25
-
26
-
27
-
28
-
29
-
30
-
31
-
32
-
33
-
34
-
35
-
36
-
37
-
38
-
 39
39 -
 40
40 -
 41
41 -
 42
42 -
 43
43 -
 44
44 -
 45
45 -
 46
46 -
 47
47 -
 48
48 -
 49
49 -
50
-
51
-
52
-
53
-
54
-
55
-
56
-
57
-
58
-
59
-
60
 |
 |