Epson 4880 Printer Guide - Page 49
Printing Trim Lines, Adjusting the Platen Gap for Thick or Thin Paper, setting allows the printer
 |
UPC - 010343866898
View all Epson 4880 manuals
Add to My Manuals
Save this manual to your list of manuals |
Page 49 highlights
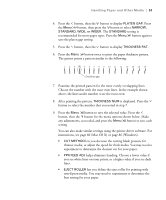
Handling Paper and Other Media | 49 Printing Trim Lines You can print trim lines on the right edge of your pages (if you're using auto cut) or on the right and bottom edge (if you're not using auto cut). Follow these steps: 1. Press the Menu button. PRINTER SETUP appears on the display. 2. Press the Menu button again to display PLATEN GAP. 3. Press the button to display PAGE LINE. 4. Press the Menu button. 5. Press the button to highlight ON. 6. Press the Menu button to save the setting. An asterisk appears next to ON. 7. Press the pause button to exit the menu. You can also specify trim lines from your printer driver software. For instructions, see page 64 (Mac OS X) or page 82 (Windows). Adjusting the Platen Gap for Thick or Thin Paper When you print on unusually thick or thin paper, you may need to adjust the platen gap setting. Normally, the STANDARD setting allows the printer to adjust automatically. However, if print quality is not satisfactory when using very thin or very thick stock, you may need to change this setting. Follow these steps: 1. Press the Menu button. PRINTER SETUP appears on the display. 2. Press the Menu button again to display PLATEN GAP. 3. Press the Menu button. STANDARD is displayed as the current setting. 4. Use the and buttons to change the setting. (STANDARD is the default setting; you can also choose NARROW, WIDE, WIDER, or WIDEST.) 49
-
 1
1 -
2
-
3
-
4
-
5
-
6
-
7
-
8
-
9
-
10
-
11
-
12
-
13
-
14
-
15
-
16
-
17
-
18
-
19
-
20
-
21
-
22
-
23
-
24
-
25
-
26
-
27
-
28
-
29
-
30
-
31
-
32
-
33
-
34
-
35
-
36
-
37
-
38
-
39
-
40
-
41
-
42
-
43
-
 44
44 -
 45
45 -
 46
46 -
 47
47 -
 48
48 -
 49
49 -
 50
50 -
 51
51 -
 52
52 -
 53
53 -
 54
54 -
55
-
56
-
57
-
58
-
59
-
60
-
61
-
62
-
63
-
64
-
65
-
66
-
67
-
68
-
69
-
70
-
71
-
72
-
73
-
74
-
75
-
76
-
77
-
78
-
79
-
80
-
81
-
82
-
83
-
84
-
85
-
86
-
87
-
88
-
89
-
90
-
91
-
92
-
93
-
94
-
95
-
96
-
97
-
98
-
99
-
100
-
101
-
102
-
103
-
104
-
105
-
106
-
107
-
108
-
109
-
110
-
111
-
112
-
113
-
114
-
115
-
116
-
117
-
118
-
119
-
120
-
121
-
122
-
123
-
124
-
125
-
126
-
127
-
128
-
129
-
130
-
131
-
132
-
133
-
134
-
135
-
136
-
137
-
138
-
139
-
140
-
141
-
142
-
143
-
144
-
145
-
146
-
147
-
148
-
149
-
150
-
151
-
152
-
153
-
154
-
155
-
156
 |
 |
