Epson 7900p Product Information Guide - Page 18
Using EMP NetworkManager, Selecting the Projectors to Monitor, Setting a Password - projector manual
 |
UPC - 010343852464
View all Epson 7900p manuals
Add to My Manuals
Save this manual to your list of manuals |
Page 18 highlights
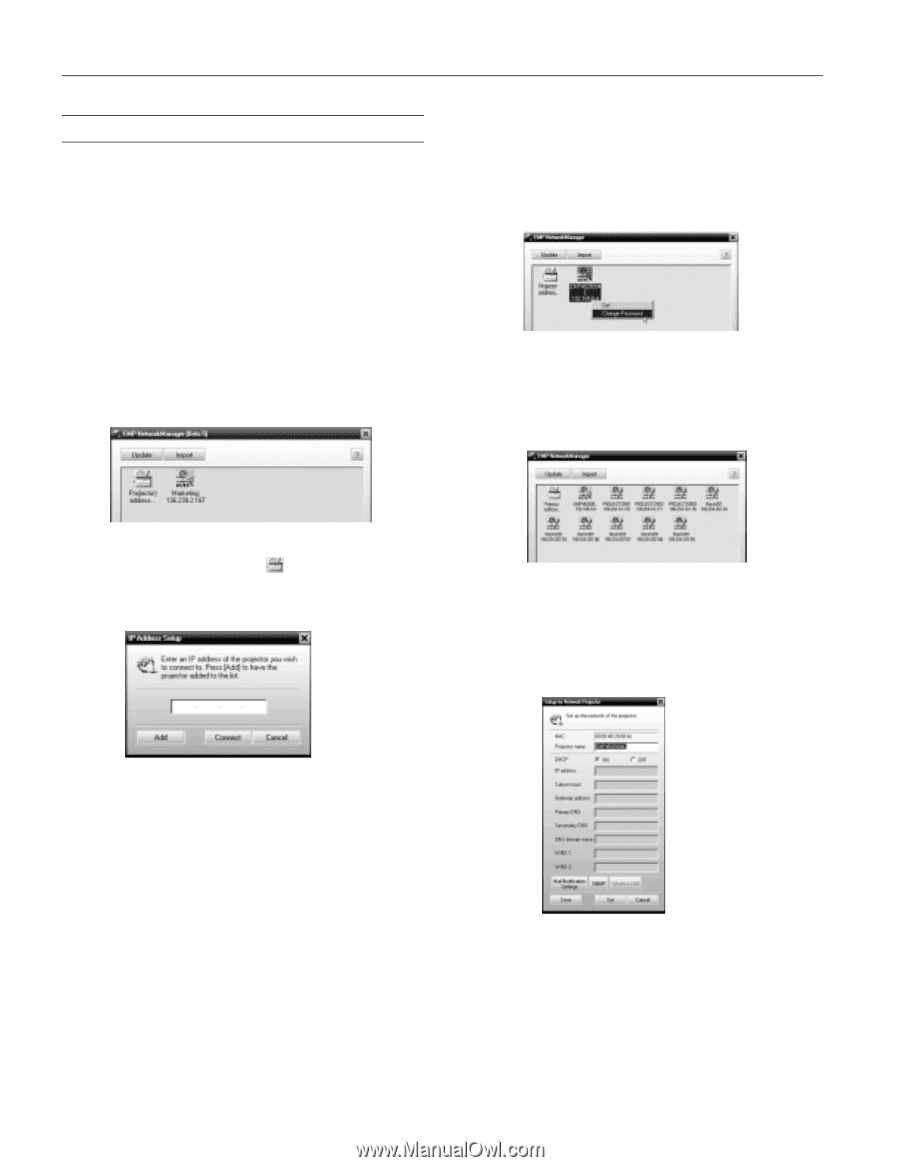
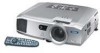
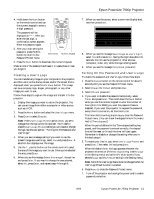
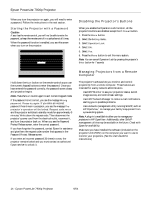
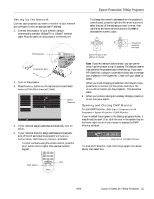
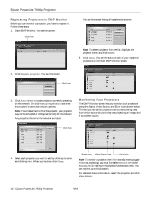
Epson PowerLite 7900p Projector Using EMP NetworkManager You can use EMP NetworkManager to configure the projector to send out messages by e-mail, notifying you when a problem occurs with the projector. Before running EMP NetworkManager, make sure you've installed the software as described in the User's Guide. Then follow the steps below to create e-mail settings for each projector you want to monitor. Selecting the Projectors to Monitor 1. To start EMP NetworkManager, click Start > Programs or All Programs > EPSON Projector > EMP NetworkManager. You see the EMP NetworkManager screen. The projectors you've registered through EMP Monitor appear as icons. Setting a Password You can set a password to restrict access to each projector from EMP NetworkManager: 1. Right-click the icon of the projector whose password you want to set, then select Change Password. 2. Enter a password up to 14 characters in length. Creating the E-Mail Settings 1. If EMP NetworkManager is not already running, open it from the Start menu. You see your registered projectors: 2. If you'd like to register a projector manually and you know its IP address, double-click the Proj(ector) address selection icon. You see this screen: 2. Double-click the icon for the projector whose e-mail settings you want to create. Enter your password, if you created one. 3. EMP NetworkManager connects to the projector, and you see this screen: 3. Enter the projector's IP address and click Add. The projector's icon is added to the EMP NetworkManager screen. 18 - Epson PowerLite 7900p Projector Note: The projector must be plugged in (projecting or in standby mode) for you to be able to connect to it. To access a projector in standby mode, you must first select Network ON as the Standby Mode setting in the projector's Advanced1 menu. (See the User's Guide for instructions.) 9/04
-
 1
1 -
2
-
3
-
4
-
5
-
6
-
7
-
8
-
9
-
10
-
11
-
12
-
 13
13 -
 14
14 -
 15
15 -
 16
16 -
 17
17 -
 18
18 -
 19
19 -
 20
20 -
 21
21 -
 22
22 -
 23
23
 |
 |