Epson 7900p Product Information Guide - Page 9
Adjusting the Color Mode, Projecting Images Without a Screen, Making Initial Color Corrections - powerlite projector lamp
 |
UPC - 010343852464
View all Epson 7900p manuals
Add to My Manuals
Save this manual to your list of manuals |
Page 9 highlights
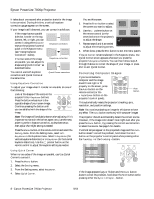
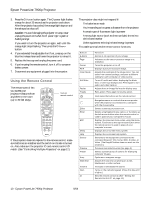
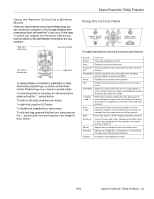
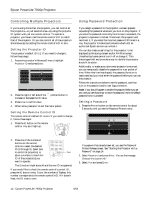
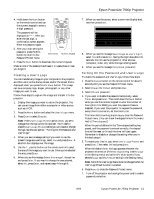
Epson PowerLite 7900p Projector Adjusting the Color Mode You may want to adjust the color mode to select a setting that is appropriate for the image you're projecting and the environment in which you're projecting it. The following table lists the available color modes. Color mode Description sRGB For matching the color palette of standard sRGB computer displays. Dynamic For increased brightness in bright rooms (the default for non-computer display). Presentation For computer presentations (the default when projecting from a computer with analog video). Theater For optimizing movie images with increased contrast. Living Room For increased brightness when playing video games or watching TV in a bright room. To change the color mode, press the Color Mode button on the remote control until you see the mode you want. The currently selected setting appears in the upper right corner of the screen. You can also use the projector menu system to select the Color Mode in the Video menu. Projecting Images Without a Screen Even if you don't have a screen, you can project images onto surfaces like blackboards and colored walls without loss of image color. Your projector has a sensor that measures the conditions of the projection surface and automatically adjusts the colors and shading of your image. Making Initial Color Corrections Press the Wall Shot button on either the remote control or the projector's control panel while projecting an image. Wall Shot's status appears in the upper right corner of your screen. Then you see a sequence of colors flash for approximately five seconds while the sensor measures the conditions of the projection surface and adjusts the image. Wall Shot ON Note: If the status message indicates that Wall Shot is off, press the Wall Shot button again to turn it on. When you turn off the projector, it stores the correction values obtained by the last Wall Shot measurements. This is useful if you're projecting against the same surface and under the same conditions. To retrieve these corrections, just press the Wall Shot button again while projecting an image. Adjusting Color Corrections for a New Surface Follow these steps to adjust the correction values if you're projecting on a new surface or in a new location: 1. Press the Wall Shot button on the remote control or projector while you're projecting an image. Wait for the Wall Shot status screen. 2. Press the Wall Shot button until you see Wall Shot Readjustment on the status screen. You see a sequence of colors flash for about five seconds as the projector adjusts the color correction values for the new projection surface. Shutting Down the Projector When you've finished using the projector, follow the recommended procedure below to shut it down. This extends the life of the lamp and protects the projector from possible overheating. Note: When the projector has not received any input signals for 30 minutes, it automatically turns off the projector lamp and enters sleep mode. This conserves electricity, cools the projector, and extends the life of the lamp. If you are done using the projector, unplug the power cord. If you want to start projecting again, press the PPower button. You can turn off sleep mode using the Sleep Mode option in the Setting menu. If Standby Mode has been set to Network ON (in the Advanced1 menu), the lamp turns off but the projector does not go into full sleep mode. (It provides enough operation to allow network access.) Follow these steps to turn off the projector: 1. Turn off any equipment plugged into the projector. 2. To turn off the projector, press the red PPower button on the projector or remote control. You see a confirmation message. (If you don't want to turn it off, press any other button.) 9/04 Epson PowerLite 7900p Projector - 9
-
 1
1 -
2
-
3
-
 4
4 -
 5
5 -
 6
6 -
 7
7 -
 8
8 -
 9
9 -
 10
10 -
 11
11 -
 12
12 -
 13
13 -
 14
14 -
15
-
16
-
17
-
18
-
19
-
20
-
21
-
22
-
23
 |
 |
