Epson ActionNote 660C User Manual - Page 76
Installing a Memory Module, Your computer comes with at least 4MB of memory soldered
 |
View all Epson ActionNote 660C manuals
Add to My Manuals
Save this manual to your list of manuals |
Page 76 highlights
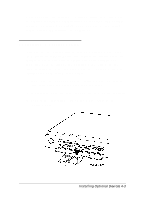
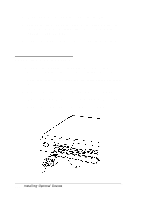
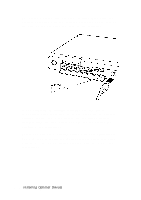
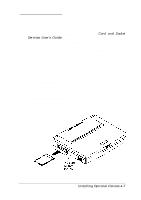
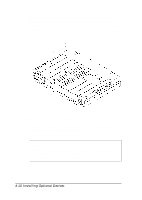
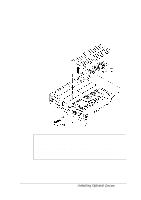
3. Align the card in the card guides of the appropriate slot. Then push the card gently but firmly into the slot as far as it will go. When you feel resistance, stop pushing; do not force it into the slot. When you have fully inserted the card, the release button on the side of the slot pops out. When you want to remove the PC card, check the PC Card Activity icon in the System Window to verify that the computer is not accessing the card; then press the release button to eject it. Store the card properly in the case that came with it. Caution Do not change the setting of a memory PC card's write-protect switch while the card is installed in the computer or you may damage the card. First eject the card, then change the switch setting and reinsert it. See Chapter 2 for instructions on configuring your PC card(s). Installing a Memory Module Your computer comes with at least 4MB of memory soldered on the system board. If your computer's startup screen shows more than 4MB of memory installed, your computer already has a memory module installed. You can increase the memory by installing a 4MB, 8MB, or 16MB memory module, as described in the table below. Install this size memory module 4MB 8MB 16MB For this amount of total memory 8MB 12MB 20MB 4-8 Installing Optional Devices
-
 1
1 -
2
-
3
-
4
-
5
-
6
-
7
-
8
-
9
-
10
-
11
-
12
-
13
-
14
-
15
-
16
-
17
-
18
-
19
-
20
-
21
-
22
-
23
-
24
-
25
-
26
-
27
-
28
-
29
-
30
-
31
-
32
-
33
-
34
-
35
-
36
-
37
-
38
-
39
-
40
-
41
-
42
-
43
-
44
-
45
-
46
-
47
-
48
-
49
-
50
-
51
-
52
-
53
-
54
-
55
-
56
-
57
-
58
-
59
-
60
-
61
-
62
-
63
-
64
-
65
-
66
-
67
-
68
-
69
-
70
-
 71
71 -
 72
72 -
 73
73 -
 74
74 -
 75
75 -
 76
76 -
 77
77 -
 78
78 -
 79
79 -
 80
80 -
 81
81 -
82
-
83
-
84
-
85
-
86
-
87
-
88
-
89
-
90
-
91
-
92
-
93
-
94
-
95
-
96
-
97
-
98
-
99
-
100
-
101
-
102
-
103
-
104
-
105
-
106
-
107
-
108
-
109
-
110
-
111
-
112
-
113
-
114
 |
 |
