Epson B107011F User Manual - Page 19
Connecting the Scanner to Your Computer - scsi cable
 |
UPC - 010343830202
View all Epson B107011F manuals
Add to My Manuals
Save this manual to your list of manuals |
Page 19 highlights
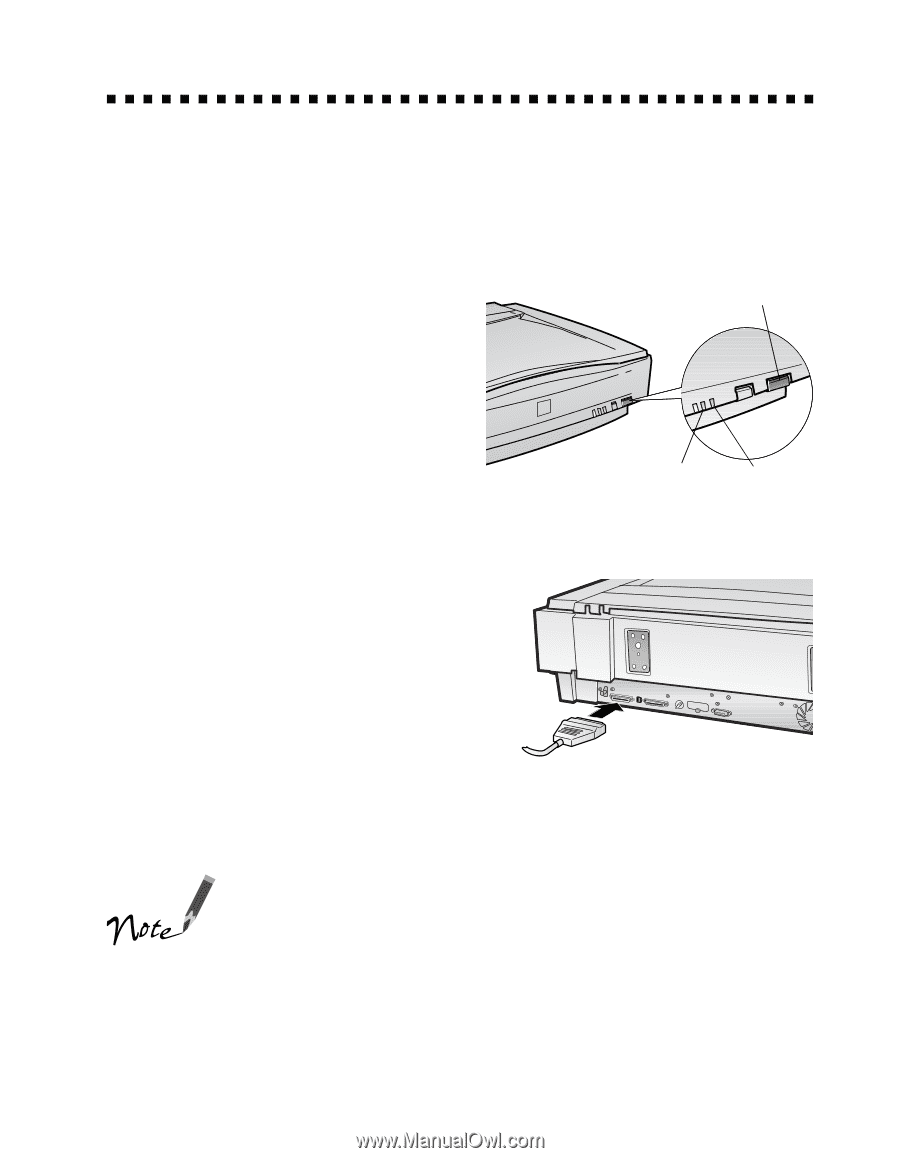
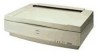
Connecting the Scanner to Your Computer To make sure your scanner is working properly, it's a good idea to turn it on before you connect it to your computer. Open the scanner's document cover so you can see the operation of the lamp carriage, and press the OPERATE button. As the scanner initializes, the OPERATE light on the scanner's front panel comes on. After a few seconds, the READY light comes on. OPERATE button Once you know the scanner is working properly, you can connect it to your computer. Follow these steps: 1. Turn off your scanner. Make sure the computer and any SCSI devices connected to your computer are turned off. READY OPERATE light light 2. Connect the scanner to your computer using the SCSI cable that came with your scanner. Squeeze the lock releases on the lock connector end of the SCSI cable and plug the cable into either SCSI connector on the back of the scanner. The cable is secure when both connector locks snap in. 3. Connect the pin end of the SCSI cable to the SCSI port on your computer or another SCSI device in the chain and tighten the screws to secure the cable. If you're connecting multiple SCSI devices, the total length of the SCSI bus (cables) must not exceed 9.8 feet (3 meters); otherwise the system may not work properly. If you're connecting the scanner directly to your computer, don't use a cable longer than 19.7 feet (6 meters). Don't use an external terminator. Setting Up Your Scanner 13
-
 1
1 -
2
-
3
-
4
-
5
-
6
-
7
-
8
-
9
-
10
-
11
-
12
-
13
-
 14
14 -
 15
15 -
 16
16 -
 17
17 -
 18
18 -
 19
19 -
 20
20 -
 21
21 -
 22
22 -
 23
23 -
 24
24 -
25
-
26
-
27
-
28
-
29
-
30
-
31
-
32
-
33
-
34
-
35
-
36
-
37
-
38
-
39
-
40
-
41
-
42
-
43
-
44
-
45
-
46
-
47
-
48
-
49
-
50
-
51
-
52
-
53
-
54
-
55
-
56
-
57
-
58
-
59
-
60
-
61
-
62
-
63
-
64
-
65
-
66
-
67
-
68
-
69
-
70
-
71
-
72
-
73
-
74
-
75
-
76
-
77
-
78
-
79
-
80
-
81
-
82
-
83
-
84
-
85
-
86
-
87
-
88
-
89
-
90
-
91
-
92
-
93
-
94
-
95
-
96
-
97
-
98
-
99
-
100
-
101
-
102
-
103
-
104
-
105
-
106
-
107
-
108
-
109
-
110
-
111
-
112
-
113
-
114
-
115
-
116
-
117
-
118
-
119
-
120
-
121
-
122
-
123
-
124
-
125
-
126
-
127
-
128
-
129
-
130
-
131
-
132
-
133
 |
 |