Epson DS-560 WorkForce DS-560 User Manual - Page 48
Available Image Adjustments, Parent topic, Related topics, Image Option, Unsharp Mask, Descreening
 |
View all Epson DS-560 WorkForce DS-560 manuals
Add to My Manuals
Save this manual to your list of manuals |
Page 48 highlights
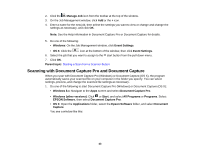
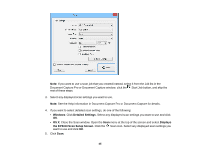
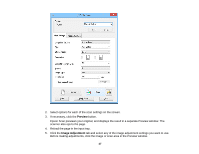
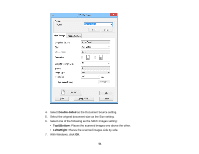
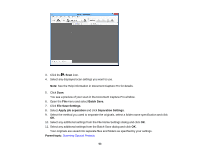
6. Click Scan. You see the File Save Settings window. 7. Change any of the necessary file save settings and click OK. Epson Scan scans your original, and saves the file in the selected folder or opens it in your scanning program. If the file was saved directly to your computer, you see the file in the Windows Explorer or OS X Finder, where you can view and print the image, if desired. Available Image Adjustments Parent topic: Scanning Related topics Loading Originals Available Image Adjustments You can select these options from the Image Adjustments tab in Epson Scan. Note: Not all adjustment settings may be available, depending on the Image Type setting. Select the Image Option checkbox to access additional settings. Unsharp Mask Makes the edges of certain image areas clearer. Turn off this option to leave softer edges. Descreening Removes the ripple pattern that might appear in subtly shaded image areas, such as skin tones. This option improves results when scanning magazines or newspapers. (The results of descreening do not appear in the preview image, only in your scanned image.) Text Enhancement Sharpens the appearance of letters in text documents. Auto Area Segmentation Makes grayscale images clearer and text recognition more accurate by separating the text from the graphics. Dropout The scan will not pick up the color you select. This setting is only available if you select an Image Type of Grayscale or Black & White. Color Enhance Enhances the red, green, or blue shades in the scanned image. 48
-
 1
1 -
2
-
3
-
4
-
5
-
6
-
7
-
8
-
9
-
10
-
11
-
12
-
13
-
14
-
15
-
16
-
17
-
18
-
19
-
20
-
21
-
22
-
23
-
24
-
25
-
26
-
27
-
28
-
29
-
30
-
31
-
32
-
33
-
34
-
35
-
36
-
37
-
38
-
39
-
40
-
41
-
42
-
 43
43 -
 44
44 -
 45
45 -
 46
46 -
 47
47 -
 48
48 -
 49
49 -
 50
50 -
 51
51 -
 52
52 -
 53
53 -
54
-
55
-
56
-
57
-
58
-
59
-
60
-
61
-
62
-
63
-
64
-
65
-
66
-
67
-
68
-
69
-
70
-
71
-
72
-
73
-
74
-
75
-
76
-
77
-
78
-
79
-
80
-
81
-
82
-
83
-
84
-
85
-
86
-
87
-
88
-
89
-
90
-
91
-
92
-
93
-
94
-
95
-
96
-
97
-
98
-
99
-
100
-
101
-
102
-
103
-
104
 |
 |
