Epson EMP-7600 User Manual - Page 94
Connecting to a DVI Video Source
 |
View all Epson EMP-7600 manuals
Add to My Manuals
Save this manual to your list of manuals |
Page 94 highlights
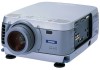
Connecting to a DVI Video Source The projector's Digital Visual Interface (DVI) receives pictures directly from your computer in digital format. This lets the projector display images of greater clarity than can be achieved using a standard analog VGA connection. To project images in digital video format, follow these steps: 1. Connect the computer's DVI cable to the projector's DVI port. slide switch to right Computer 2 / Component Video S-Video Video L-Audio2-R Computer 1 Analog Digital DVI port Audio 1 Audio Out Remote Control (RS-232C) Mouse 2. Using the tip of a pen or a small screwdriver, slide the Computer 1 interface switch to the right to select Digital. (If you need to use the projector's VGA port again, be sure to slide the switch back to the left.) If you want to connect audio for this computer, use the projector's Audio 1 port; if you want to connect a mouse cable (to use the remote control as a wireless mouse), use the Mouse port. 88 Connecting to Additional Equipment
-
 1
1 -
2
-
3
-
4
-
5
-
6
-
7
-
8
-
9
-
10
-
11
-
12
-
13
-
14
-
15
-
16
-
17
-
18
-
19
-
20
-
21
-
22
-
23
-
24
-
25
-
26
-
27
-
28
-
29
-
30
-
31
-
32
-
33
-
34
-
35
-
36
-
37
-
38
-
39
-
40
-
41
-
42
-
43
-
44
-
45
-
46
-
47
-
48
-
49
-
50
-
51
-
52
-
53
-
54
-
55
-
56
-
57
-
58
-
59
-
60
-
61
-
62
-
63
-
64
-
65
-
66
-
67
-
68
-
69
-
70
-
71
-
72
-
73
-
74
-
75
-
76
-
77
-
78
-
79
-
80
-
81
-
82
-
83
-
84
-
85
-
86
-
87
-
88
-
 89
89 -
 90
90 -
 91
91 -
 92
92 -
 93
93 -
 94
94 -
 95
95 -
 96
96 -
 97
97 -
 98
98 -
 99
99 -
100
-
101
-
102
-
103
-
104
-
105
-
106
-
107
-
108
-
109
-
110
-
111
-
112
-
113
-
114
 |
 |
