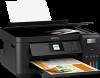
Epson ET-2850U for ReadyPrint Users Guide - Page 225
White or Dark Lines in Printout, Faint Printout or Printout Has Gaps
 |
View all Epson ET-2850U for ReadyPrint manuals
Add to My Manuals
Save this manual to your list of manuals |
Page 225 highlights
White or Dark Lines in Printout Blurry or Smeared Printout Faint Printout or Printout Has Gaps Grainy Printout Incorrect Colors Parent topic: Solving Problems White or Dark Lines in Printout If you notice white or dark lines in your prints (also called banding), try these solutions before you reprint: • Run a nozzle check to see if any of the print head nozzles are clogged. Then clean the print head, if necessary. • Make sure the paper type setting matches the type of paper you loaded. • Make sure you loaded the printable side of the paper correctly for your product. • Turn off any high speed settings in your product software. • Align the print head. • Adjust the print quality in the product software. • When horizontal banding appears or the top or bottom of the paper is smeared, load paper in the correct direction and slide the edge guides to the edges of the paper. • When vertical banding appears or the paper is smeared, clean the paper path. • You may need to refill the ink. Visually check the ink levels. • If you have not used the product for a long time, run the Power Cleaning utility. Note: Power Cleaning consumes a lot of ink, so run this utility only if you cannot improve print quality by cleaning the print head. Parent topic: Solving Print Quality Problems Related concepts Print Head Cleaning Print Head Nozzle Check Print Head Alignment Power Cleaning Check Ink Levels 225
-
 1
1 -
2
-
3
-
4
-
5
-
6
-
7
-
8
-
9
-
10
-
11
-
12
-
13
-
14
-
15
-
16
-
17
-
18
-
19
-
20
-
21
-
22
-
23
-
24
-
25
-
26
-
27
-
28
-
29
-
30
-
31
-
32
-
33
-
34
-
35
-
36
-
37
-
38
-
39
-
40
-
41
-
42
-
43
-
44
-
45
-
46
-
47
-
48
-
49
-
50
-
51
-
52
-
53
-
54
-
55
-
56
-
57
-
58
-
59
-
60
-
61
-
62
-
63
-
64
-
65
-
66
-
67
-
68
-
69
-
70
-
71
-
72
-
73
-
74
-
75
-
76
-
77
-
78
-
79
-
80
-
81
-
82
-
83
-
84
-
85
-
86
-
87
-
88
-
89
-
90
-
91
-
92
-
93
-
94
-
95
-
96
-
97
-
98
-
99
-
100
-
101
-
102
-
103
-
104
-
105
-
106
-
107
-
108
-
109
-
110
-
111
-
112
-
113
-
114
-
115
-
116
-
117
-
118
-
119
-
120
-
121
-
122
-
123
-
124
-
125
-
126
-
127
-
128
-
129
-
130
-
131
-
132
-
133
-
134
-
135
-
136
-
137
-
138
-
139
-
140
-
141
-
142
-
143
-
144
-
145
-
146
-
147
-
148
-
149
-
150
-
151
-
152
-
153
-
154
-
155
-
156
-
157
-
158
-
159
-
160
-
161
-
162
-
163
-
164
-
165
-
166
-
167
-
168
-
169
-
170
-
171
-
172
-
173
-
174
-
175
-
176
-
177
-
178
-
179
-
180
-
181
-
182
-
183
-
184
-
185
-
186
-
187
-
188
-
189
-
190
-
191
-
192
-
193
-
194
-
195
-
196
-
197
-
198
-
199
-
200
-
201
-
202
-
203
-
204
-
205
-
206
-
207
-
208
-
209
-
210
-
211
-
212
-
213
-
214
-
215
-
216
-
217
-
218
-
219
-
 220
220 -
 221
221 -
 222
222 -
 223
223 -
 224
224 -
 225
225 -
 226
226 -
 227
227 -
 228
228 -
 229
229 -
 230
230 -
231
-
232
-
233
-
234
-
235
-
236
-
237
-
238
-
239
-
240
-
241
-
242
-
243
-
244
-
245
-
246
-
247
-
248
-
249
-
250
-
251
-
252
-
253
-
254
-
255
-
256
-
257
-
258
-
259
-
260
-
261
-
262
 |
 |
