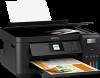
Epson ET-2850U for ReadyPrint Users Guide - Page 229
Grainy Printout, Aligning the Print Head Using the Product Control Panel
 |
View all Epson ET-2850U for ReadyPrint manuals
Add to My Manuals
Save this manual to your list of manuals |
Page 229 highlights
Parent topic: Solving Print Quality Problems Related concepts Print Head Cleaning Print Head Alignment Print Head Nozzle Check Power Cleaning Check Ink Levels Related tasks Refilling the Ink Tanks Loading Paper in the Rear Paper Feeder Aligning the Print Head Using the Product Control Panel Cleaning the Print Head Path Cleaning the Paper Guide Grainy Printout If your printouts are grainy, try these solutions: • Make sure you loaded the printable side of the paper correctly for your product. • Select a higher print quality setting and turn off any high speed settings in your product software. • Run a nozzle check to see if any of the print head nozzles are clogged. Then clean the print head, if necessary. • Align the print head. • Adjust the print quality in the product software. • You may need to increase the image resolution or print a smaller size; see your software documentation. Note: Images from the Internet may be low resolution and not result in a high quality printout. • If you enlarged the image size in an image-editing program, you need to increase the image resolution setting to retain a high image quality. Increase the image resolution by the same amount you increase the image size. For example, if the image resolution is 300 dpi (dots per inch) and you will double the image size for printing, change the resolution setting to 600 dpi. 229
-
 1
1 -
2
-
3
-
4
-
5
-
6
-
7
-
8
-
9
-
10
-
11
-
12
-
13
-
14
-
15
-
16
-
17
-
18
-
19
-
20
-
21
-
22
-
23
-
24
-
25
-
26
-
27
-
28
-
29
-
30
-
31
-
32
-
33
-
34
-
35
-
36
-
37
-
38
-
39
-
40
-
41
-
42
-
43
-
44
-
45
-
46
-
47
-
48
-
49
-
50
-
51
-
52
-
53
-
54
-
55
-
56
-
57
-
58
-
59
-
60
-
61
-
62
-
63
-
64
-
65
-
66
-
67
-
68
-
69
-
70
-
71
-
72
-
73
-
74
-
75
-
76
-
77
-
78
-
79
-
80
-
81
-
82
-
83
-
84
-
85
-
86
-
87
-
88
-
89
-
90
-
91
-
92
-
93
-
94
-
95
-
96
-
97
-
98
-
99
-
100
-
101
-
102
-
103
-
104
-
105
-
106
-
107
-
108
-
109
-
110
-
111
-
112
-
113
-
114
-
115
-
116
-
117
-
118
-
119
-
120
-
121
-
122
-
123
-
124
-
125
-
126
-
127
-
128
-
129
-
130
-
131
-
132
-
133
-
134
-
135
-
136
-
137
-
138
-
139
-
140
-
141
-
142
-
143
-
144
-
145
-
146
-
147
-
148
-
149
-
150
-
151
-
152
-
153
-
154
-
155
-
156
-
157
-
158
-
159
-
160
-
161
-
162
-
163
-
164
-
165
-
166
-
167
-
168
-
169
-
170
-
171
-
172
-
173
-
174
-
175
-
176
-
177
-
178
-
179
-
180
-
181
-
182
-
183
-
184
-
185
-
186
-
187
-
188
-
189
-
190
-
191
-
192
-
193
-
194
-
195
-
196
-
197
-
198
-
199
-
200
-
201
-
202
-
203
-
204
-
205
-
206
-
207
-
208
-
209
-
210
-
211
-
212
-
213
-
214
-
215
-
216
-
217
-
218
-
219
-
220
-
221
-
222
-
223
-
 224
224 -
 225
225 -
 226
226 -
 227
227 -
 228
228 -
 229
229 -
 230
230 -
 231
231 -
 232
232 -
 233
233 -
 234
234 -
235
-
236
-
237
-
238
-
239
-
240
-
241
-
242
-
243
-
244
-
245
-
246
-
247
-
248
-
249
-
250
-
251
-
252
-
253
-
254
-
255
-
256
-
257
-
258
-
259
-
260
-
261
-
262
 |
 |
