Epson ET-2850U for ReadyPrint Users Guide - Page 231
Solving Scanning Problems, Custom, Color Correction, Advanced, Scene Correction, Automatic
 |
View all Epson ET-2850U for ReadyPrint manuals
Add to My Manuals
Save this manual to your list of manuals |
Page 231 highlights
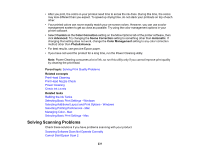
• After you print, the colors in your printout need time to set as the ink dries. During this time, the colors may look different than you expect. To speed up drying time, do not stack your printouts on top of each other. • Your printed colors can never exactly match your on-screen colors. However, you can use a color management system to get as close as possible. Try using the color management options in your printer software. • Select Custom as the Color Correction setting on the More Options tab of the printer software, then click Advanced. Try changing the Scene Correction setting to something other than Automatic. If changing that setting does not work, change the Color Management setting to any color correction method other than PhotoEnhance. • For best results, use genuine Epson paper. • If you have not used the product for a long time, run the Power Cleaning utility. Note: Power Cleaning consumes a lot of ink, so run this utility only if you cannot improve print quality by cleaning the print head. Parent topic: Solving Print Quality Problems Related concepts Print Head Cleaning Print Head Nozzle Check Power Cleaning Check Ink Levels Related tasks Refilling the Ink Tanks Selecting Basic Print Settings - Windows Selecting Additional Layout and Print Options - Windows Selecting Printing Preferences - Mac Managing Color - Mac Selecting Basic Print Settings - Mac Solving Scanning Problems Check these solutions if you have problems scanning with your product. Scanning Software Does Not Operate Correctly Cannot Start Epson Scan 2 231
-
 1
1 -
2
-
3
-
4
-
5
-
6
-
7
-
8
-
9
-
10
-
11
-
12
-
13
-
14
-
15
-
16
-
17
-
18
-
19
-
20
-
21
-
22
-
23
-
24
-
25
-
26
-
27
-
28
-
29
-
30
-
31
-
32
-
33
-
34
-
35
-
36
-
37
-
38
-
39
-
40
-
41
-
42
-
43
-
44
-
45
-
46
-
47
-
48
-
49
-
50
-
51
-
52
-
53
-
54
-
55
-
56
-
57
-
58
-
59
-
60
-
61
-
62
-
63
-
64
-
65
-
66
-
67
-
68
-
69
-
70
-
71
-
72
-
73
-
74
-
75
-
76
-
77
-
78
-
79
-
80
-
81
-
82
-
83
-
84
-
85
-
86
-
87
-
88
-
89
-
90
-
91
-
92
-
93
-
94
-
95
-
96
-
97
-
98
-
99
-
100
-
101
-
102
-
103
-
104
-
105
-
106
-
107
-
108
-
109
-
110
-
111
-
112
-
113
-
114
-
115
-
116
-
117
-
118
-
119
-
120
-
121
-
122
-
123
-
124
-
125
-
126
-
127
-
128
-
129
-
130
-
131
-
132
-
133
-
134
-
135
-
136
-
137
-
138
-
139
-
140
-
141
-
142
-
143
-
144
-
145
-
146
-
147
-
148
-
149
-
150
-
151
-
152
-
153
-
154
-
155
-
156
-
157
-
158
-
159
-
160
-
161
-
162
-
163
-
164
-
165
-
166
-
167
-
168
-
169
-
170
-
171
-
172
-
173
-
174
-
175
-
176
-
177
-
178
-
179
-
180
-
181
-
182
-
183
-
184
-
185
-
186
-
187
-
188
-
189
-
190
-
191
-
192
-
193
-
194
-
195
-
196
-
197
-
198
-
199
-
200
-
201
-
202
-
203
-
204
-
205
-
206
-
207
-
208
-
209
-
210
-
211
-
212
-
213
-
214
-
215
-
216
-
217
-
218
-
219
-
220
-
221
-
222
-
223
-
224
-
225
-
 226
226 -
 227
227 -
 228
228 -
 229
229 -
 230
230 -
 231
231 -
 232
232 -
 233
233 -
 234
234 -
 235
235 -
 236
236 -
237
-
238
-
239
-
240
-
241
-
242
-
243
-
244
-
245
-
246
-
247
-
248
-
249
-
250
-
251
-
252
-
253
-
254
-
255
-
256
-
257
-
258
-
259
-
260
-
261
-
262
 |
 |
