Epson Ensemble HD 8100 Installation Guide - Page 26
Connect the Cables to the Screen, packed in the AC power cable box inside box #5 with the subwoofer.
 |
View all Epson Ensemble HD 8100 manuals
Add to My Manuals
Save this manual to your list of manuals |
Page 26 highlights
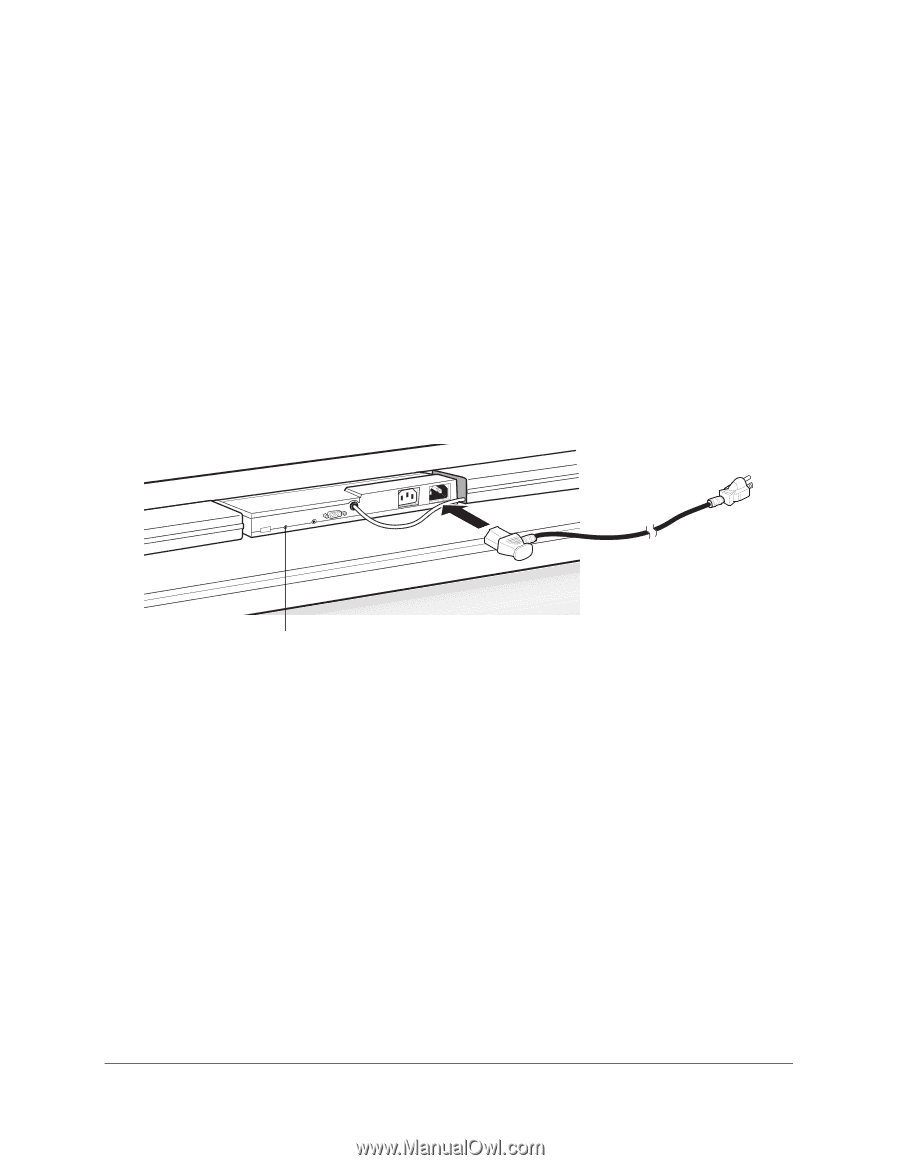
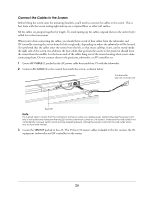
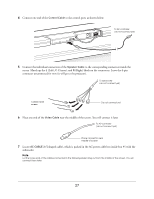
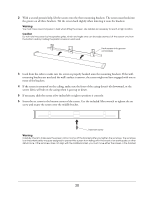
Connect the Cables to the Screen Before lifting the screen onto the mounting brackets, you'll need to connect the cables to the screen. This is best done with the screen resting right-side-up on a carpeted floor or other soft surface. All the cables are grouped together by length. To avoid mixing up the cables, unpack them in the order they're called for in the instructions. When you're done connecting the cables, you should have a total of four cables from the subwoofer and AV controller entering the screen from the left or right side, depending on where the subwoofer will be located. (It is preferred that the cables enter the screen from the left, so that excess cabling, if any, can be stored inside the right side of the screen.) In addition, the four cables that go from the screen to the projector should leave the screen from the middle. Let the loose ends of the cables hang out of the screen housing when you're done connecting them. Do not connect them to the projector, subwoofer, or AV controller yet. 1 Locate AC CABLE 2, packed in the AC power cable box inside box #5 with the subwoofer. 2 Connect AC CABLE 2 to the control box inside the screen, as shown below. To subwoofer (do not connect yet) Red LED Note It's a good idea to check that the control box comes on when you apply power. Temporarily plug the power cord into a wall outlet and make sure the red LED on the control box comes on. If it doesn't, make sure the wall outlet is not controlled by a power switch and is actively supplying power. Unplug the power cord from the wall outlet when you're done with this test. 3 Locate the 10M KIT packed in box #3. The 33-foot (10-meter) cables included in this kit connect the AV equipment (subwoofer and AV controller) to the screen. 26
-
 1
1 -
2
-
3
-
4
-
5
-
6
-
7
-
8
-
9
-
10
-
11
-
12
-
13
-
14
-
15
-
16
-
17
-
18
-
19
-
20
-
 21
21 -
 22
22 -
 23
23 -
 24
24 -
 25
25 -
 26
26 -
 27
27 -
 28
28 -
 29
29 -
 30
30 -
 31
31 -
32
-
33
-
34
-
35
-
36
-
37
-
38
-
39
-
40
-
41
-
42
-
43
-
44
-
45
-
46
-
47
-
48
-
49
-
50
-
51
-
52
-
53
-
54
-
55
-
56
-
57
-
58
-
59
-
60
-
61
-
62
-
63
-
64
-
65
-
66
-
67
-
68
-
69
-
70
-
71
 |
 |