Epson Ensemble HD 8100 Installation Guide - Page 53
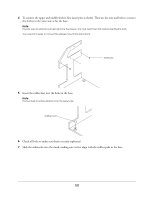
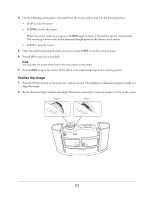
Position the Image, re-open the screen. Verify that it comes down and stops at the correct position.
 |
View all Epson Ensemble HD 8100 manuals
Add to My Manuals
Save this manual to your list of manuals |
Page 53 highlights
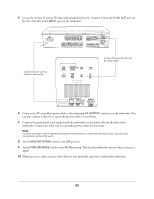
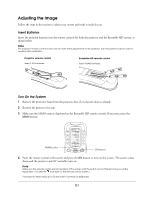
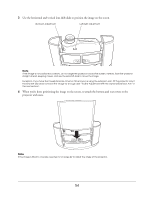
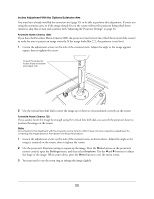
4 Use the following commands to raise and lower the screen, and to stop it at the desired position: • S-UP to raise the screen • S-DWN to lower the screen When the screen comes to a stop, press S-DWN again to lower it beyond the current stop-position. You can bring it down as far as the maximum length preset by the factory, or 64 inches. • S-STP to stop the screen 5 Once the screen is positioned where you want it, press S-SET to set the screen position. 6 Press S-UP to raise the screen fully. Note You must raise the screen all the way for the new position to take effect. 7 Press S-DWN re-open the screen. Verify that it comes down and stops at the correct position. Position the Image 1 Press the Pattern button on the projector's remote control. This displays an adjustment pattern to help you align the image. 2 Rotate the focus ring to sharpen the image. Rotate the zoom ring to resize the image so it fits on the screen. Focus Zoom 53
-
 1
1 -
2
-
3
-
4
-
5
-
6
-
7
-
8
-
9
-
10
-
11
-
12
-
13
-
14
-
15
-
16
-
17
-
18
-
19
-
20
-
21
-
22
-
23
-
24
-
25
-
26
-
27
-
28
-
29
-
30
-
31
-
32
-
33
-
34
-
35
-
36
-
37
-
38
-
39
-
40
-
41
-
42
-
43
-
44
-
45
-
46
-
47
-
 48
48 -
 49
49 -
 50
50 -
 51
51 -
 52
52 -
 53
53 -
 54
54 -
 55
55 -
 56
56 -
 57
57 -
 58
58 -
59
-
60
-
61
-
62
-
63
-
64
-
65
-
66
-
67
-
68
-
69
-
70
-
71
 |
 |
