Epson Ensemble HD 8100 Installation Guide - Page 41
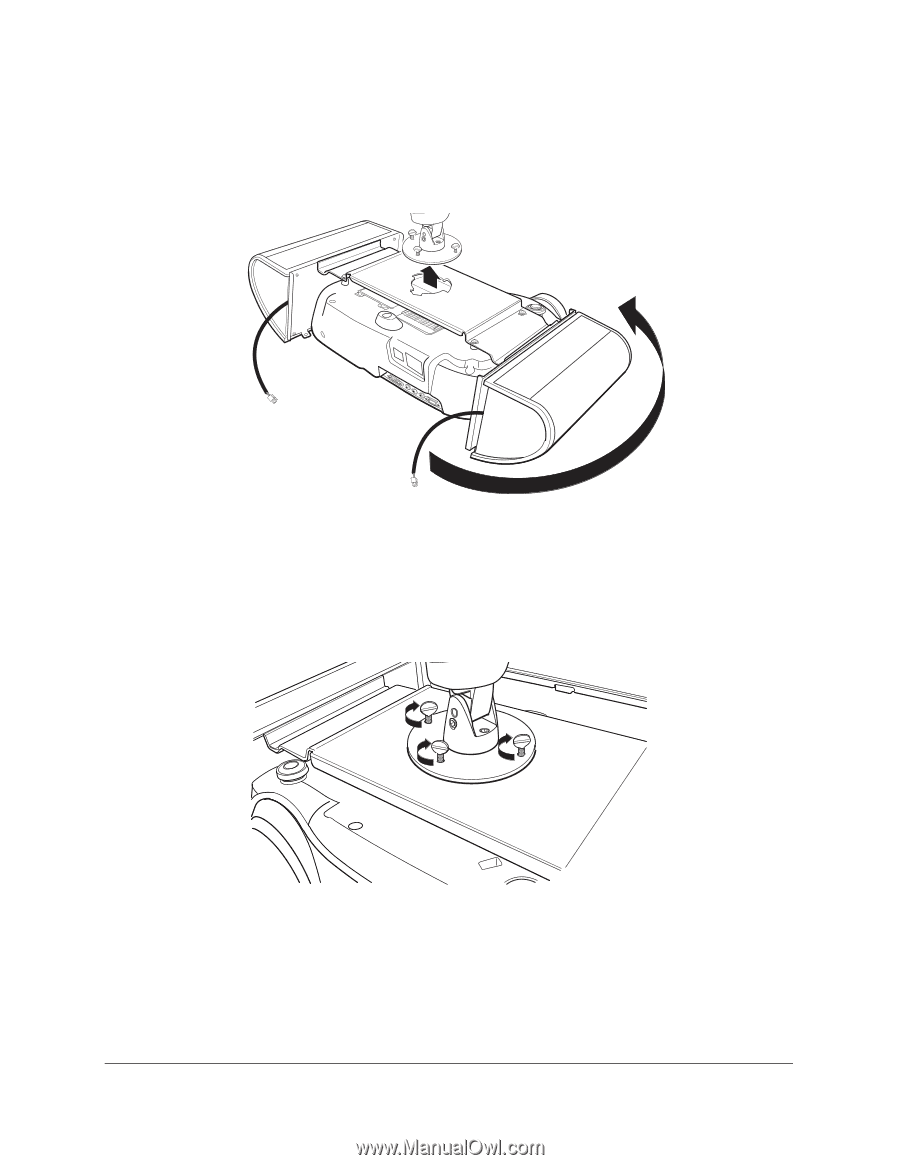
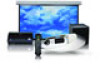
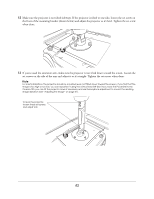
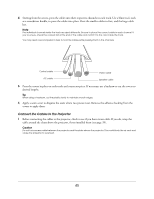
Tighten the three thumb screws. Make sure the projector is secure and does not rotate.
 |
View all Epson Ensemble HD 8100 manuals
Add to My Manuals
Save this manual to your list of manuals |
Page 41 highlights
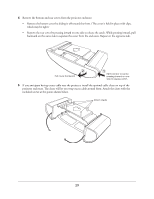
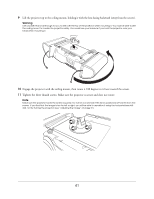
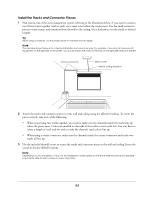
9 Lift the projector up to the ceiling mount, holding it with the lens facing backward (away from the screen). Warning Use a ladder that is tall enough for you to see over the top of the projector when mounting it. You must be able to see the ceiling mount to handle the projector safely. You could lose your balance if you hold the projector over your head when mounting it. 10 Engage the projector with the ceiling mount, then rotate it 180 degrees so it faces toward the screen. 11 Tighten the three thumb screws. Make sure the projector is secure and does not rotate. Note Make sure the projector faces the screen squarely. Do not be concerned if the lens is positioned off-center from the screen. If you find that the image is too far left or right, you will be able to reposition it using the horizontal lens shift dial, not by turning the projector (see "Adjusting the Image" on page 51). 41
-
 1
1 -
2
-
3
-
4
-
5
-
6
-
7
-
8
-
9
-
10
-
11
-
12
-
13
-
14
-
15
-
16
-
17
-
18
-
19
-
20
-
21
-
22
-
23
-
24
-
25
-
26
-
27
-
28
-
29
-
30
-
31
-
32
-
33
-
34
-
35
-
 36
36 -
 37
37 -
 38
38 -
 39
39 -
 40
40 -
 41
41 -
 42
42 -
 43
43 -
 44
44 -
 45
45 -
 46
46 -
47
-
48
-
49
-
50
-
51
-
52
-
53
-
54
-
55
-
56
-
57
-
58
-
59
-
60
-
61
-
62
-
63
-
64
-
65
-
66
-
67
-
68
-
69
-
70
-
71
 |
 |