Epson Ensemble HD 8100 Installation Guide - Page 52
Adjust the Screen Position
 |
View all Epson Ensemble HD 8100 manuals
Add to My Manuals
Save this manual to your list of manuals |
Page 52 highlights
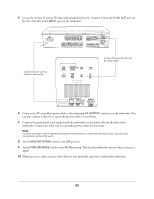
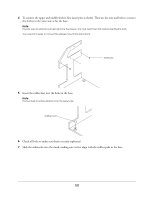
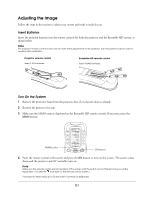
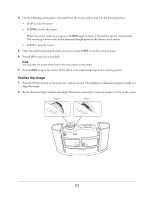
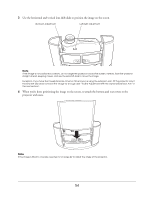
If you haven't already adjusted the projector settings, the image will be upside-down or you may see a No Signal message. This is normal. You will adjust these settings in "Adjusting the Projector Settings" on page 56. If the system doesn't turn on, check the following: • If the system is not receiving power, make sure your electrical outlet is working and isn't controlled by a wall switch or timer. • Check that the power cords on the back of the subwoofer are connected securely. • Check the POWER switches on the back of the subwoofer. Make sure the one near the bottom is in the ON position and the one near the top is set to AUTO. • If the projector doesn't come on, make sure the power switch on the back of the projector is in the on position. Make sure the lens cap is removed. 5 After the screen is lowered, remove and discard any protective packing material that was held in place with the screen rolled up. Adjust the Screen Position The screen is factory-set to come down 55 inches, but you can set it to come down as far as 64 inches. It is recommended that you set the screen to achieve a 7- to 10-degree viewing angle from your eyes, when you're seated, to the center of the screen. 55 inches 64 inches 1 Make sure the MAIN menu is displayed on the Ensemble HD remote control. If necessary, press the MAIN button. 2 Press the PAGE button to display the second page of components. 3 Press the button to the right of PROJ to select the projector menu. 52
-
 1
1 -
2
-
3
-
4
-
5
-
6
-
7
-
8
-
9
-
10
-
11
-
12
-
13
-
14
-
15
-
16
-
17
-
18
-
19
-
20
-
21
-
22
-
23
-
24
-
25
-
26
-
27
-
28
-
29
-
30
-
31
-
32
-
33
-
34
-
35
-
36
-
37
-
38
-
39
-
40
-
41
-
42
-
43
-
44
-
45
-
46
-
 47
47 -
 48
48 -
 49
49 -
 50
50 -
 51
51 -
 52
52 -
 53
53 -
 54
54 -
 55
55 -
 56
56 -
 57
57 -
58
-
59
-
60
-
61
-
62
-
63
-
64
-
65
-
66
-
67
-
68
-
69
-
70
-
71
 |
 |
