Epson G6870 User Manual - Page 113
Correcting Image Shape with Curved Surface
 |
View all Epson G6870 manuals
Add to My Manuals
Save this manual to your list of manuals |
Page 113 highlights
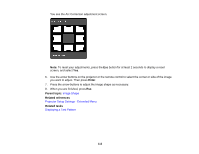
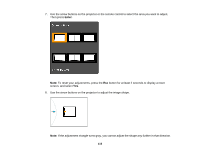
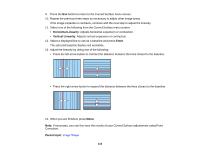
Correcting Image Shape with Curved Surface You can use the projector's Curved Surface setting to adjust the shape of an image projected on a curved surface (PowerLite Pro G6870/G6970WU). Note: For the best results, project from the front of the screen onto a surface with a uniform arc radius and with the lens centered horizontally using lens shift. The image may not be evenly focused throughout even after performing the steps here. 1. Turn on the projector and display an image. Note: You can display a pattern to aid in adjusting the projected image using the Settings menu. Note: You can also display a pattern to aid in adjusting the projected image using the Test Pattern button on the remote control. 2. Press the Menu button. 113
-
 1
1 -
2
-
3
-
4
-
5
-
6
-
7
-
8
-
9
-
10
-
11
-
12
-
13
-
14
-
15
-
16
-
17
-
18
-
19
-
20
-
21
-
22
-
23
-
24
-
25
-
26
-
27
-
28
-
29
-
30
-
31
-
32
-
33
-
34
-
35
-
36
-
37
-
38
-
39
-
40
-
41
-
42
-
43
-
44
-
45
-
46
-
47
-
48
-
49
-
50
-
51
-
52
-
53
-
54
-
55
-
56
-
57
-
58
-
59
-
60
-
61
-
62
-
63
-
64
-
65
-
66
-
67
-
68
-
69
-
70
-
71
-
72
-
73
-
74
-
75
-
76
-
77
-
78
-
79
-
80
-
81
-
82
-
83
-
84
-
85
-
86
-
87
-
88
-
89
-
90
-
91
-
92
-
93
-
94
-
95
-
96
-
97
-
98
-
99
-
100
-
101
-
102
-
103
-
104
-
105
-
106
-
107
-
 108
108 -
 109
109 -
 110
110 -
 111
111 -
 112
112 -
 113
113 -
 114
114 -
 115
115 -
 116
116 -
 117
117 -
 118
118 -
119
-
120
-
121
-
122
-
123
-
124
-
125
-
126
-
127
-
128
-
129
-
130
-
131
-
132
-
133
-
134
-
135
-
136
-
137
-
138
-
139
-
140
-
141
-
142
-
143
-
144
-
145
-
146
-
147
-
148
-
149
-
150
-
151
-
152
-
153
-
154
-
155
-
156
-
157
-
158
-
159
-
160
-
161
-
162
-
163
-
164
-
165
-
166
-
167
-
168
-
169
-
170
-
171
-
172
-
173
-
174
-
175
-
176
-
177
-
178
-
179
-
180
-
181
-
182
-
183
-
184
-
185
-
186
-
187
-
188
-
189
-
190
-
191
-
192
-
193
-
194
-
195
-
196
-
197
-
198
-
199
-
200
-
201
-
202
-
203
-
204
-
205
-
206
-
207
-
208
-
209
-
210
-
211
-
212
-
213
-
214
-
215
-
216
-
217
-
218
-
219
-
220
-
221
-
222
-
223
-
224
-
225
-
226
-
227
-
228
-
229
-
230
-
231
-
232
-
233
-
234
-
235
-
236
-
237
-
238
-
239
-
240
-
241
-
242
-
243
-
244
-
245
-
246
-
247
-
248
-
249
-
250
-
251
-
252
-
253
-
254
-
255
-
256
-
257
-
258
-
259
-
260
-
261
-
262
-
263
-
264
-
265
-
266
-
267
-
268
-
269
-
270
-
271
-
272
-
273
-
274
-
275
-
276
-
277
-
278
-
279
-
280
-
281
-
282
-
283
-
284
-
285
-
286
-
287
-
288
-
289
-
290
-
291
-
292
-
293
-
294
 |
 |
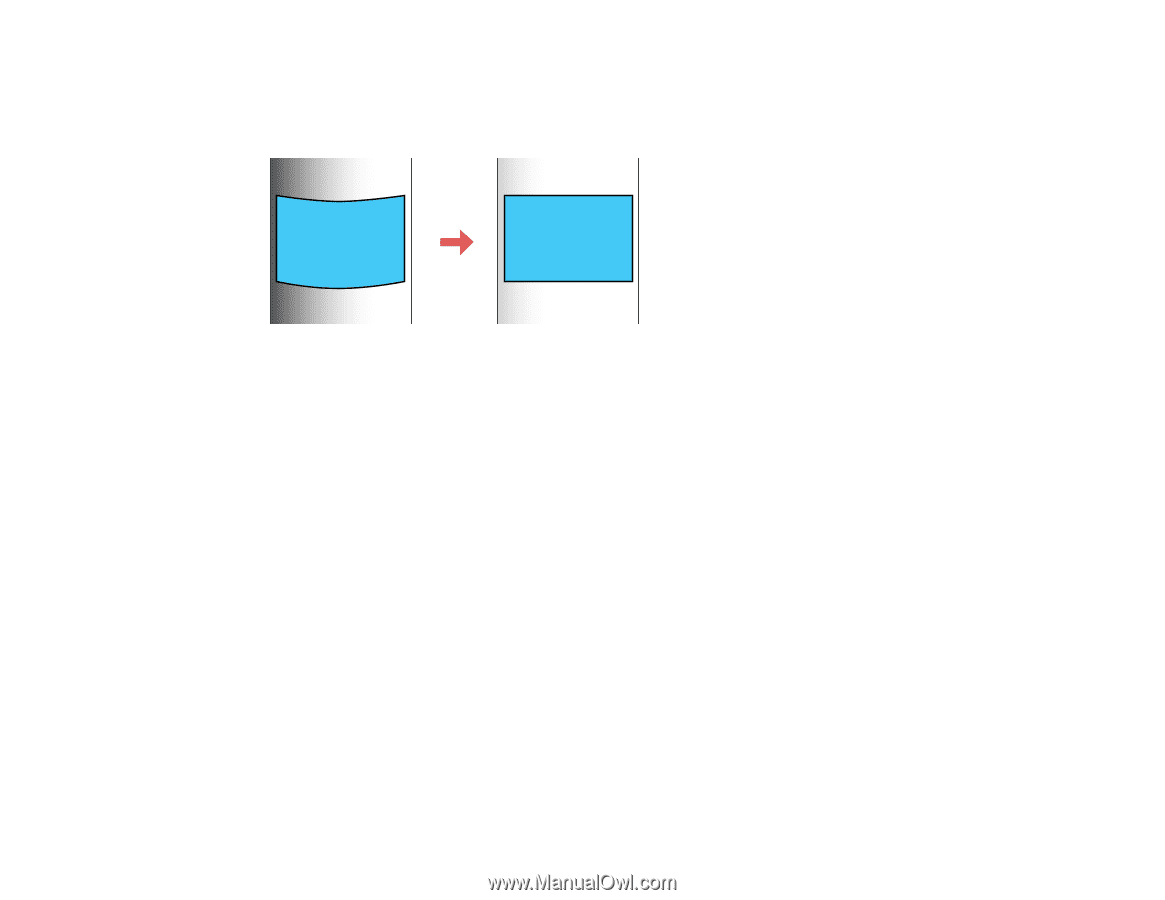
Correcting Image Shape with Curved Surface
You can use the projector's Curved Surface setting to adjust the shape of an image projected on a
curved surface (PowerLite Pro G6870/G6970WU).
Note:
For the best results, project from the front of the screen onto a surface with a uniform arc radius
and with the lens centered horizontally using lens shift. The image may not be evenly focused
throughout even after performing the steps here.
1.
Turn on the projector and display an image.
Note:
You can display a pattern to aid in adjusting the projected image using the Settings menu.
Note:
You can also display a pattern to aid in adjusting the projected image using the
Test Pattern
button on the remote control.
2.
Press the
Menu
button.
113