Epson LW-700 Quick Start and Warranty - Page 34
Applying Labels
 |
View all Epson LW-700 manuals
Add to My Manuals
Save this manual to your list of manuals |
Page 34 highlights
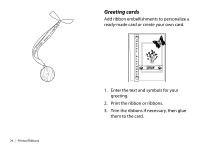
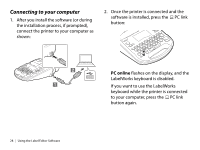
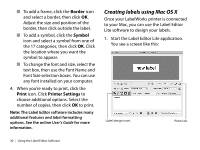
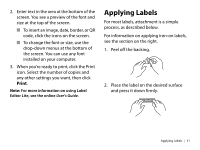
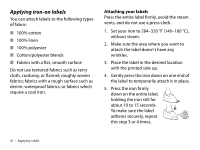
2. Enter text in the area at the bottom of the screen. You see a preview of the font and size at the top of the screen. ■ To insert an image, date, border, or QR code, click the icons on the screen. ■ To change the font or size, use the drop-down menus at the bottom of the screen. You can use any font installed on your computer. 3. When you're ready to print, click the Print icon. Select the number of copies and any other settings you want, then click Print. Note: For more information on using Label Editor Lite, see the online User's Guide. Applying Labels For most labels, attachment is a simple process, as described below. For information on applying iron-on labels, see the section on the right. 1. Peel off the backing. 2. Place the label on the desired surface and press it down firmly. Applying Labels | 31
-
 1
1 -
2
-
3
-
4
-
5
-
6
-
7
-
8
-
9
-
10
-
11
-
12
-
13
-
14
-
15
-
16
-
17
-
18
-
19
-
20
-
21
-
22
-
23
-
24
-
25
-
26
-
27
-
28
-
 29
29 -
 30
30 -
 31
31 -
 32
32 -
 33
33 -
 34
34 -
 35
35 -
 36
36 -
 37
37 -
 38
38 -
 39
39 -
40
-
41
-
42
-
43
-
44
-
45
-
46
-
47
-
48
-
49
-
50
-
51
-
52
-
53
-
54
-
55
-
56
-
57
-
58
-
59
-
60
-
61
-
62
-
63
-
64
-
65
-
66
-
67
-
68
-
69
-
70
-
71
-
72
-
73
-
74
-
75
-
76
-
77
-
78
-
79
-
80
-
81
-
82
-
83
-
84
-
85
-
86
-
87
-
88
 |
 |
