Epson PP-100II Users Guide - Page 117
Multiple Disc Feeds, Disc Jams, If you cannot remove the disc by restarting the product
 |
View all Epson PP-100II manuals
Add to My Manuals
Save this manual to your list of manuals |
Page 117 highlights
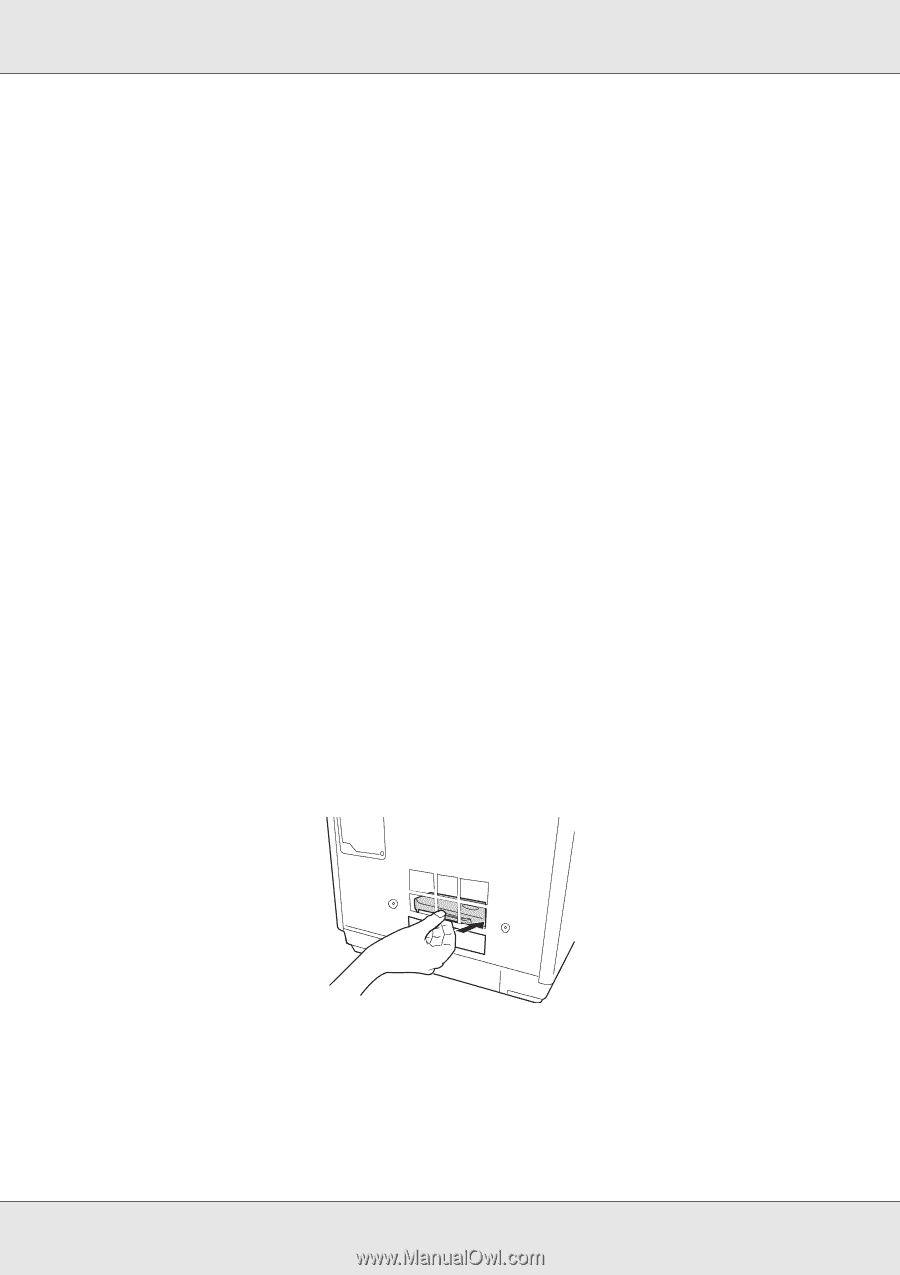
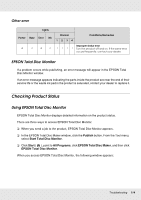
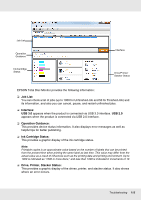
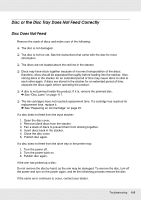
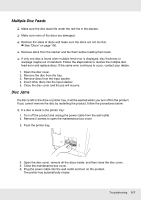
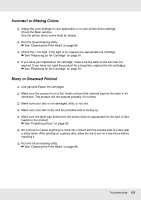
Multiple Disc Feeds ❏ Make sure the disc stack fits under the red line in the stacker. ❏ Make sure none of the discs are damaged. ❏ Remove the stack of discs and make sure the discs are not too thin. & See "Discs" on page 136. ❏ Remove discs from the stacker and fan them before loading them back. ❏ If only one disc is found when multiple feed error is displayed, disc thickness or warpage maybe out of standard. Follow the steps below to resolve the multiple disc feed error and replace discs. If the same error continues to occur, contact your dealer. 1. Open the disc cover. 2. Remove the disc from the tray. 3. Remove discs from the input stacker. 4. Insert other discs into the input stacker. 5. Close the disc cover and the job will resume. Disc Jams If a disc is left in the drive or printer tray, it will be ejected when you turn off/on the product. If you cannot remove the disc by restarting the product, follow the procedures below: ❏ If a disc is stuck in the printer tray: 1. Turn off the product and unplug the power cable from the wall outlet. 2. Remove 2 screws to open the maintenance box cover. 3. Push the printer tray. 4. Open the disc cover, remove all the discs inside, and then close the disc cover. 5. Close the maintenance box cover. 6. Plug the power cable into the wall outlet and turn on the product. The printer tray automatically closes. Troubleshooting 117
-
 1
1 -
2
-
3
-
4
-
5
-
6
-
7
-
8
-
9
-
10
-
11
-
12
-
13
-
14
-
15
-
16
-
17
-
18
-
19
-
20
-
21
-
22
-
23
-
24
-
25
-
26
-
27
-
28
-
29
-
30
-
31
-
32
-
33
-
34
-
35
-
36
-
37
-
38
-
39
-
40
-
41
-
42
-
43
-
44
-
45
-
46
-
47
-
48
-
49
-
50
-
51
-
52
-
53
-
54
-
55
-
56
-
57
-
58
-
59
-
60
-
61
-
62
-
63
-
64
-
65
-
66
-
67
-
68
-
69
-
70
-
71
-
72
-
73
-
74
-
75
-
76
-
77
-
78
-
79
-
80
-
81
-
82
-
83
-
84
-
85
-
86
-
87
-
88
-
89
-
90
-
91
-
92
-
93
-
94
-
95
-
96
-
97
-
98
-
99
-
100
-
101
-
102
-
103
-
104
-
105
-
106
-
107
-
108
-
109
-
110
-
111
-
 112
112 -
 113
113 -
 114
114 -
 115
115 -
 116
116 -
 117
117 -
 118
118 -
 119
119 -
 120
120 -
 121
121 -
 122
122 -
123
-
124
-
125
-
126
-
127
-
128
-
129
-
130
-
131
-
132
-
133
-
134
-
135
-
136
-
137
-
138
-
139
-
140
-
141
-
142
-
143
-
144
 |
 |