Epson PowerLite 77c User's Guide - Page 18
Connecting to a Computer - powerlite projector
 |
View all Epson PowerLite 77c manuals
Add to My Manuals
Save this manual to your list of manuals |
Page 18 highlights
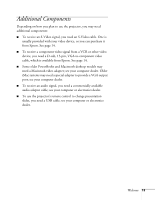
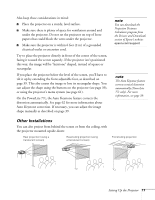
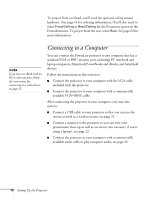
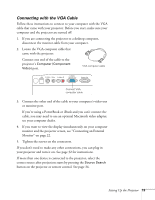
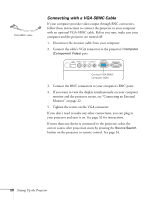
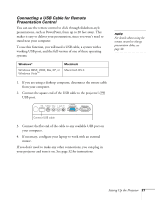
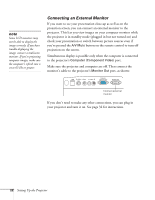
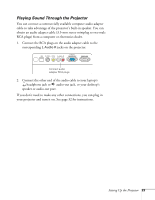
To project from overhead, you'll need the optional ceiling mount hardware. (See page 14 for ordering information.) You'll also need to select Front/Ceiling or Rear/Ceiling for the Projection option in the Extended menu. To project from the rear, select Rear. See page 63 for more information. note If you have an iBook with an RCA video-out port, follow the instructions for connecting to a video device on page 25. Connecting to a Computer You can connect the PowerLite projector to any computer that has a standard VGA or BNC monitor port, including PC notebook and laptop computers, Macintosh PowerBooks and iBooks, and hand-held devices. Follow the instructions in this section to: ■ Connect the projector to your computer with the VGA cable included with the projector. ■ Connect the projector to your computer with a commercially available VGA-5BNC cable. After connecting the projector to your computer, you may also want to: ■ Connect a USB cable to your projector so that you can use the remote control as a wireless mouse; see page 21 ■ Connect a monitor to the projector so you can view your presentation close-up as well as on-screen (not necessary if you're using a laptop); see page 22 ■ Connect the projector to your computer with a commercially available audio cable to play computer audio; see page 23. 18 Setting Up the Projector
-
 1
1 -
2
-
3
-
4
-
5
-
6
-
7
-
8
-
9
-
10
-
11
-
12
-
 13
13 -
 14
14 -
 15
15 -
 16
16 -
 17
17 -
 18
18 -
 19
19 -
 20
20 -
 21
21 -
 22
22 -
 23
23 -
24
-
25
-
26
-
27
-
28
-
29
-
30
-
31
-
32
-
33
-
34
-
35
-
36
-
37
-
38
-
39
-
40
-
41
-
42
-
43
-
44
-
45
-
46
-
47
-
48
-
49
-
50
-
51
-
52
-
53
-
54
-
55
-
56
-
57
-
58
-
59
-
60
-
61
-
62
-
63
-
64
-
65
-
66
-
67
-
68
-
69
-
70
-
71
-
72
-
73
-
74
-
75
-
76
-
77
-
78
-
79
-
80
-
81
-
82
-
83
-
84
-
85
-
86
-
87
-
88
-
89
-
90
-
91
-
92
-
93
-
94
-
95
-
96
-
97
-
98
-
99
-
100
-
101
-
102
-
103
-
104
-
105
-
106
-
107
-
108
-
109
-
110
 |
 |
