Epson PowerLite 77c User's Guide - Page 19
Connecting with the VGA Cable, monitor and the projector screen, see Connecting an External
 |
View all Epson PowerLite 77c manuals
Add to My Manuals
Save this manual to your list of manuals |
Page 19 highlights
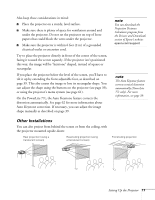
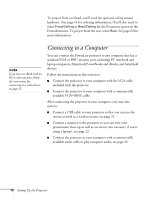
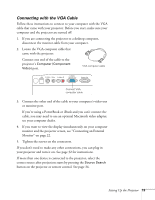
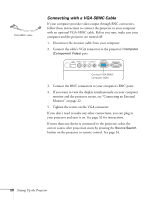
Connecting with the VGA Cable Follow these instructions to connect to your computer with the VGA cable that came with your projector. Before you start, make sure your computer and the projector are turned off. 1. If you are connecting the projector to a desktop computer, disconnect the monitor cable from your computer. 2. Locate the VGA computer cable that came with the projector. Connect one end of the cable to the projector's Computer (Component Video) port. VGA computer cable Connect VGA computer cable 3. Connect the other end of the cable to your computer's video-out or monitor port. If you're using a PowerBook or iBook and you can't connect the cable, you may need to use an optional Macintosh video adapter; see your computer dealer. 4. If you want to view the display simultaneously on your computer monitor and the projector screen, see "Connecting an External Monitor" on page 22. 5. Tighten the screws on the connectors. If you don't need to make any other connections, you can plug in your projector and turn it on. See page 32 for instructions. If more than one device is connected to the projector, select the correct source after projection starts by pressing the Source Search button on the projector or remote control. See page 34. Setting Up the Projector 19
-
 1
1 -
2
-
3
-
4
-
5
-
6
-
7
-
8
-
9
-
10
-
11
-
12
-
13
-
 14
14 -
 15
15 -
 16
16 -
 17
17 -
 18
18 -
 19
19 -
 20
20 -
 21
21 -
 22
22 -
 23
23 -
 24
24 -
25
-
26
-
27
-
28
-
29
-
30
-
31
-
32
-
33
-
34
-
35
-
36
-
37
-
38
-
39
-
40
-
41
-
42
-
43
-
44
-
45
-
46
-
47
-
48
-
49
-
50
-
51
-
52
-
53
-
54
-
55
-
56
-
57
-
58
-
59
-
60
-
61
-
62
-
63
-
64
-
65
-
66
-
67
-
68
-
69
-
70
-
71
-
72
-
73
-
74
-
75
-
76
-
77
-
78
-
79
-
80
-
81
-
82
-
83
-
84
-
85
-
86
-
87
-
88
-
89
-
90
-
91
-
92
-
93
-
94
-
95
-
96
-
97
-
98
-
99
-
100
-
101
-
102
-
103
-
104
-
105
-
106
-
107
-
108
-
109
-
110
 |
 |
