Epson PowerLite 77c User's Guide - Page 69
Turning On the Password and User’s Logo, Password, Enter, Change, the password?, Password accepted
 |
View all Epson PowerLite 77c manuals
Add to My Manuals
Save this manual to your list of manuals |
Page 69 highlights
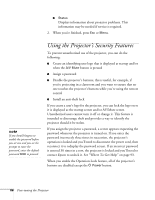
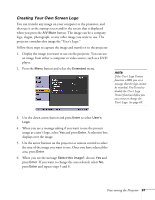
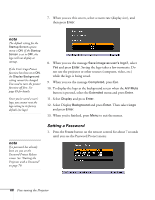
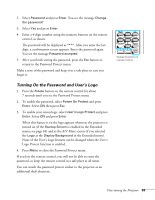
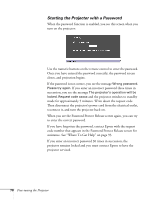
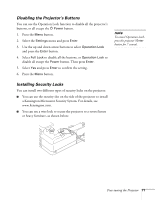
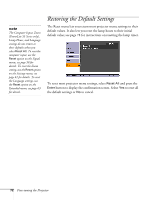
2. Select Password and press Enter. You see the message Change the password? 3. Select Yes and press Enter. 4. Enter a 4-digit number using the numeric buttons on the remote control, as shown. The password will be displayed as ****. After you enter the last digit, a confirmation screen appears. Enter the password again. You see the message Password accepted. 5. After you finish setting the password, press the Esc button to return to the Password Protect menu. Make a note of the password and keep it in a safe place in case you forget it. Turning On the Password and User's Logo 1. Press the Freeze button on the remote control for about 7 seconds until you see the Password Protect menu. 2. To enable the password, select Power On Protect and press Enter. Select ON then press Esc. 3. To enable your screen logo, select User's Logo Protect and press Enter. Select ON and press Enter. When this feature is on the logo appears whenever the projector is turned on (if the Startup Screen is enabled in the Extended menu; see page 63) and as the A/V Mute screen (if you selected the Logo as the Display Background in the Extended menu). None of the User's Logo features can be changed when the User's Logo Protect function is enabled. 4. Press Menu to close the Password Protect menu. If you lose the remote control, you will not be able to enter the password, so keep the remote control in a safe place at all times. You can attach the password protect sticker to the projector as an additional theft deterrent. Numeric buttons on remote control Fine-tuning the Projector 69
-
 1
1 -
2
-
3
-
4
-
5
-
6
-
7
-
8
-
9
-
10
-
11
-
12
-
13
-
14
-
15
-
16
-
17
-
18
-
19
-
20
-
21
-
22
-
23
-
24
-
25
-
26
-
27
-
28
-
29
-
30
-
31
-
32
-
33
-
34
-
35
-
36
-
37
-
38
-
39
-
40
-
41
-
42
-
43
-
44
-
45
-
46
-
47
-
48
-
49
-
50
-
51
-
52
-
53
-
54
-
55
-
56
-
57
-
58
-
59
-
60
-
61
-
62
-
63
-
 64
64 -
 65
65 -
 66
66 -
 67
67 -
 68
68 -
 69
69 -
 70
70 -
 71
71 -
 72
72 -
 73
73 -
 74
74 -
75
-
76
-
77
-
78
-
79
-
80
-
81
-
82
-
83
-
84
-
85
-
86
-
87
-
88
-
89
-
90
-
91
-
92
-
93
-
94
-
95
-
96
-
97
-
98
-
99
-
100
-
101
-
102
-
103
-
104
-
105
-
106
-
107
-
108
-
109
-
110
 |
 |
