Epson PowerLite 85 User's Guide - Page 41
Connecting to the USB Port, Connecting to Computers, USB Devices, and Other Equipment
 |
View all Epson PowerLite 85 manuals
Add to My Manuals
Save this manual to your list of manuals |
Page 41 highlights
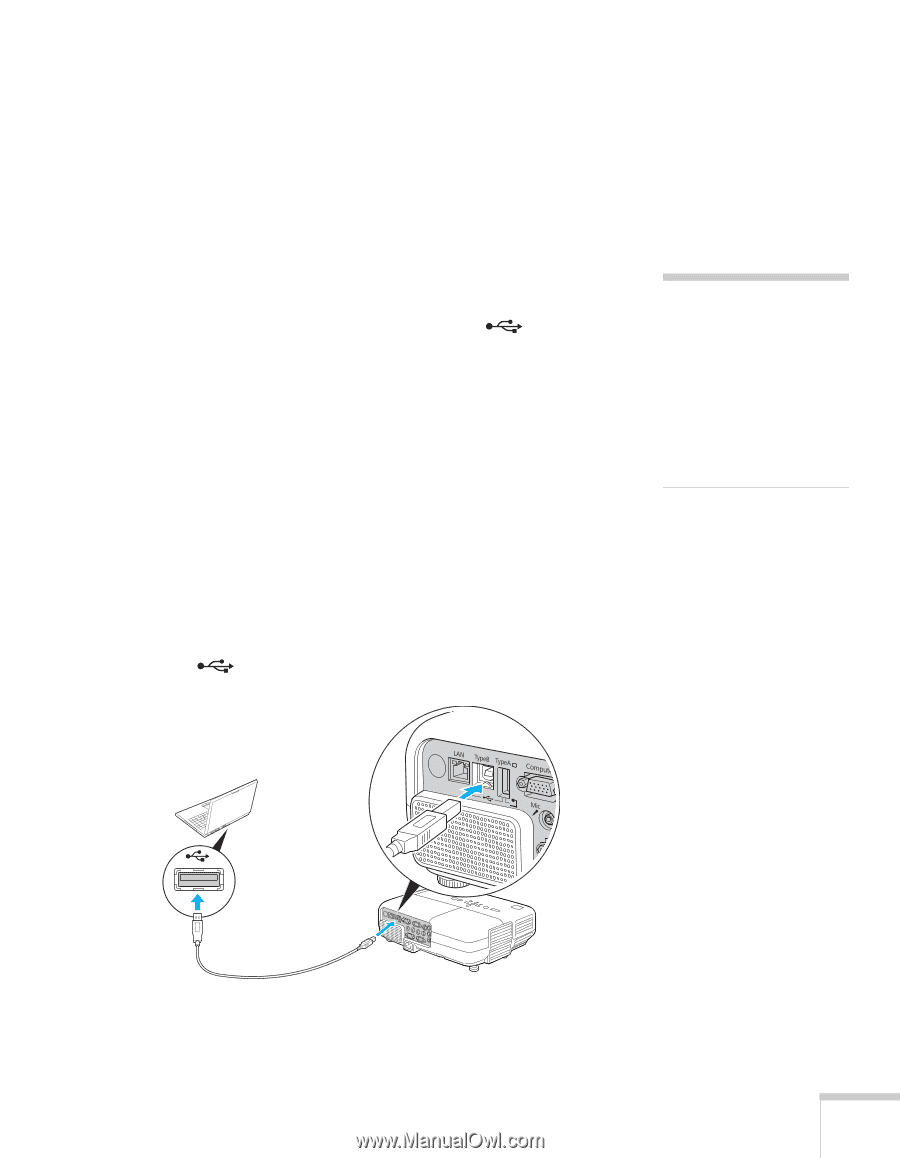
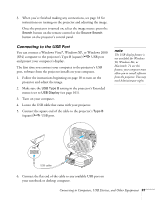
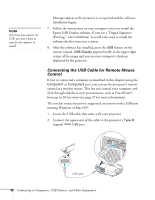
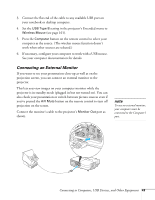
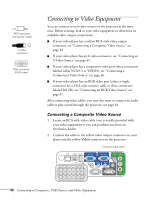
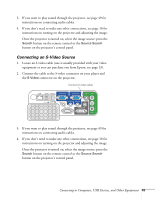
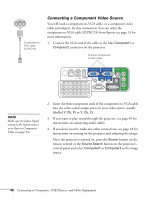
3. When you've finished making any connections, see page 18 for instructions on turning on the projector and adjusting the image. Once the projector is turned on, select the image source: press the Search button on the remote control or the Source Search button on the projector's control panel. Connecting to the USB Port You can connect a Windows Vista®, Windows XP, or Windows 2000 (SP4) computer to the projector's Type B (square) USB port and project your computer's display. The first time you connect your computer to the projector's USB port, software from the projector installs on your computer. 1. Follow the instructions beginning on page 18 to turn on the projector and adjust the image. 2. Make sure the USB Type B setting in the projector's Extended menu is set to USB Display (see page 101). 3. Turn on your computer. 4. Locate the USB cable that came with your projector. 5. Connect the square end of the cable to the projector's Type B (square) USB port. note The USB display feature is not available for Windows 98, Windows Me, or Macintosh. To use this feature, your computer must allow you to install software from the projector. You may need Administrator rights. USB cable 6. Connect the flat end of the cable to any available USB port on your notebook or desktop computer. Connecting to Computers, USB Devices, and Other Equipment 41
-
 1
1 -
2
-
3
-
4
-
5
-
6
-
7
-
8
-
9
-
10
-
11
-
12
-
13
-
14
-
15
-
16
-
17
-
18
-
19
-
20
-
21
-
22
-
23
-
24
-
25
-
26
-
27
-
28
-
29
-
30
-
31
-
32
-
33
-
34
-
35
-
 36
36 -
 37
37 -
 38
38 -
 39
39 -
 40
40 -
 41
41 -
 42
42 -
 43
43 -
 44
44 -
 45
45 -
 46
46 -
47
-
48
-
49
-
50
-
51
-
52
-
53
-
54
-
55
-
56
-
57
-
58
-
59
-
60
-
61
-
62
-
63
-
64
-
65
-
66
-
67
-
68
-
69
-
70
-
71
-
72
-
73
-
74
-
75
-
76
-
77
-
78
-
79
-
80
-
81
-
82
-
83
-
84
-
85
-
86
-
87
-
88
-
89
-
90
-
91
-
92
-
93
-
94
-
95
-
96
-
97
-
98
-
99
-
100
-
101
-
102
-
103
-
104
-
105
-
106
-
107
-
108
-
109
-
110
-
111
-
112
-
113
-
114
-
115
-
116
-
117
-
118
-
119
-
120
-
121
-
122
-
123
-
124
-
125
-
126
-
127
-
128
-
129
-
130
-
131
-
132
-
133
-
134
-
135
-
136
-
137
-
138
-
139
-
140
-
141
-
142
-
143
-
144
-
145
-
146
-
147
-
148
-
149
-
150
-
151
-
152
-
153
-
154
-
155
-
156
-
157
-
158
-
159
-
160
-
161
-
162
-
163
-
164
-
165
-
166
-
167
-
168
-
169
-
170
-
171
-
172
-
173
-
174
-
175
 |
 |