Epson Stylus COLOR 900G User Manual - Page 132
Installing Optional Interfaces, Optional Interfaces,
 |
View all Epson Stylus COLOR 900G manuals
Add to My Manuals
Save this manual to your list of manuals |
Page 132 highlights
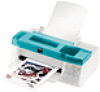
port on the Macintosh. Then attach the LocalTalk cable between the two connector boxes. For more information, see the instructions that came with the connector kits. If you install the Ethernet board connected to a thin coaxial (10BASE2) cable, and the printer is the last device on the network, you need to obtain a 50-ohm terminator. The Ethernet transceiver is included on the EPSON Ethernet board, so you do not need an adapter box for the printer. To avoid damaging your printer or computer, do not install the interface board when the printer is connected to an electrical outlet. Installing Optional Interfaces Before you install an optional interface board in your printer, make sure the printer is turned off and all the printer's lights are off. Then follow these steps: 1 Unplug the power cord from the electrical outlet. 2 Disconnect any interface cables from the printer. 3 Use a Phillips (cross-head) screwdriver to remove the two screws securing the interface cover; then lift off the cover. Be sure to keep both screws; you'll need to use them again if you reinstall the cover. Optional Interfaces Page 131
-
 1
1 -
2
-
3
-
4
-
5
-
6
-
7
-
8
-
9
-
10
-
11
-
12
-
13
-
14
-
15
-
16
-
17
-
18
-
19
-
20
-
21
-
22
-
23
-
24
-
25
-
26
-
27
-
28
-
29
-
30
-
31
-
32
-
33
-
34
-
35
-
36
-
37
-
38
-
39
-
40
-
41
-
42
-
43
-
44
-
45
-
46
-
47
-
48
-
49
-
50
-
51
-
52
-
53
-
54
-
55
-
56
-
57
-
58
-
59
-
60
-
61
-
62
-
63
-
64
-
65
-
66
-
67
-
68
-
69
-
70
-
71
-
72
-
73
-
74
-
75
-
76
-
77
-
78
-
79
-
80
-
81
-
82
-
83
-
84
-
85
-
86
-
87
-
88
-
89
-
90
-
91
-
92
-
93
-
94
-
95
-
96
-
97
-
98
-
99
-
100
-
101
-
102
-
103
-
104
-
105
-
106
-
107
-
108
-
109
-
110
-
111
-
112
-
113
-
114
-
115
-
116
-
117
-
118
-
119
-
120
-
121
-
122
-
123
-
124
-
125
-
126
-
 127
127 -
 128
128 -
 129
129 -
 130
130 -
 131
131 -
 132
132 -
 133
133 -
 134
134 -
 135
135 -
 136
136 -
 137
137 -
138
-
139
-
140
-
141
-
142
-
143
-
144
-
145
-
146
-
147
-
148
-
149
-
150
-
151
-
152
-
153
-
154
-
155
-
156
-
157
-
158
-
159
-
160
-
161
-
162
-
163
-
164
-
165
-
166
-
167
-
168
-
169
-
170
-
171
-
172
-
173
-
174
-
175
-
176
-
177
-
178
-
179
-
180
-
181
-
182
-
183
-
184
-
185
-
186
-
187
-
188
-
189
-
190
-
191
-
192
-
193
-
194
-
195
-
196
-
197
-
198
-
199
-
200
-
201
-
202
-
203
-
204
-
205
-
206
 |
 |
