Epson Stylus COLOR 900G User Manual - Page 61
Adding a Watermark, Reducing and Enlarging Your Document Size, Printing from Windows
 |
View all Epson Stylus COLOR 900G manuals
Add to My Manuals
Save this manual to your list of manuals |
Page 61 highlights
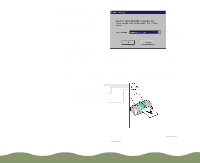
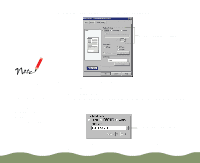
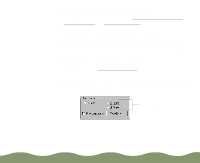
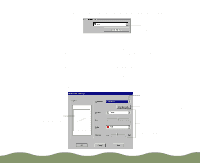
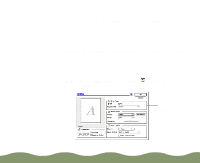
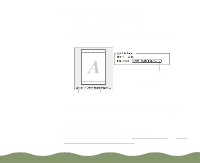
To add a custom watermark, you must first create the watermark as a bitmap in an application program that can create bitmap files. See your application's documentation for instructions. If you selected a multi-page print layout option (as described in Using Multiple Print Layouts and Page Frames), your watermark will appear on each page in the layout. 4 If the page order in the on-screen graphic is how you want your document printed, go to step 5. To change the page order, click the Page Order button. Then select the page order you want to use from the Print Layout dialog box that appears. 5 If you want to frame each page's contents with a black line, one dot wide, click the Print page frames checkbox. 6 If you're finished selecting Layout options, click OK. If you want to select more options, see Reducing and Enlarging Your Document Size and Adding a Watermark. Adding a Watermark You can add a watermark to each page in your document to emphasize its purpose or indicate how it should be handled. For example, you may want to add a watermark of the word "Confidential" to documents you don't want distributed to other parties. Or you can add a custom bitmap of your company logo so your document looks like printed letterhead. Follow these steps to add a watermark: 1 Follow the steps in Printing from Windows to access the printer settings dialog box. 2 Click the Layout tab. You see the Layout dialog box. Advanced Printing Page 60
-
 1
1 -
2
-
3
-
4
-
5
-
6
-
7
-
8
-
9
-
10
-
11
-
12
-
13
-
14
-
15
-
16
-
17
-
18
-
19
-
20
-
21
-
22
-
23
-
24
-
25
-
26
-
27
-
28
-
29
-
30
-
31
-
32
-
33
-
34
-
35
-
36
-
37
-
38
-
39
-
40
-
41
-
42
-
43
-
44
-
45
-
46
-
47
-
48
-
49
-
50
-
51
-
52
-
53
-
54
-
55
-
 56
56 -
 57
57 -
 58
58 -
 59
59 -
 60
60 -
 61
61 -
 62
62 -
 63
63 -
 64
64 -
 65
65 -
 66
66 -
67
-
68
-
69
-
70
-
71
-
72
-
73
-
74
-
75
-
76
-
77
-
78
-
79
-
80
-
81
-
82
-
83
-
84
-
85
-
86
-
87
-
88
-
89
-
90
-
91
-
92
-
93
-
94
-
95
-
96
-
97
-
98
-
99
-
100
-
101
-
102
-
103
-
104
-
105
-
106
-
107
-
108
-
109
-
110
-
111
-
112
-
113
-
114
-
115
-
116
-
117
-
118
-
119
-
120
-
121
-
122
-
123
-
124
-
125
-
126
-
127
-
128
-
129
-
130
-
131
-
132
-
133
-
134
-
135
-
136
-
137
-
138
-
139
-
140
-
141
-
142
-
143
-
144
-
145
-
146
-
147
-
148
-
149
-
150
-
151
-
152
-
153
-
154
-
155
-
156
-
157
-
158
-
159
-
160
-
161
-
162
-
163
-
164
-
165
-
166
-
167
-
168
-
169
-
170
-
171
-
172
-
173
-
174
-
175
-
176
-
177
-
178
-
179
-
180
-
181
-
182
-
183
-
184
-
185
-
186
-
187
-
188
-
189
-
190
-
191
-
192
-
193
-
194
-
195
-
196
-
197
-
198
-
199
-
200
-
201
-
202
-
203
-
204
-
205
-
206
 |
 |
