Epson TM-m30 Installation Guide
Epson TM-m30 Manual
 |
View all Epson TM-m30 manuals
Add to My Manuals
Save this manual to your list of manuals |
Epson TM-m30 manual content summary:
- Epson TM-m30 | Installation Guide - Page 1
EPSON JavaPOS ADK Installation Guide Version 1.14.1 Sep. 2015 - Epson TM-m30 | Installation Guide - Page 2
Notes (1) Reproduction of any part of this documentation by any means is prohibited. (2) The contents of this documentation are subject to change without notice. (3) Comments and notification of any mistakes in this documentation are gratefully accepted. (4) This software cannot be used with other - Epson TM-m30 | Installation Guide - Page 3
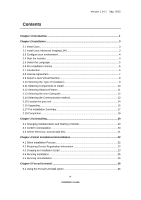
Information 22 4.3 Creating an Installation Script 23 4.4 Running Installation 25 4.5 Running Uninstallation 25 Chapter 5 Forced Uninstall 26 5.1 Using the Forced Uninstall option 26 iii Installation Guide - Epson TM-m30 | Installation Guide - Page 4
Version 1.14.1 Sep. 2015 Chapter 6 Windows Information 27 6.1 Configuring environment variables 27 iv Installation Guide - Epson TM-m30 | Installation Guide - Page 5
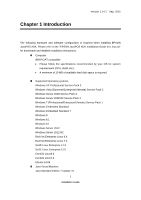
detailed installation instructions. „ Computer IBM PC/AT compatible • Please follow the specifications recommended by your OS for system requirements (CPU, RAM, etc.). • A minimum of 10 MB of available hard disk space is required. „ Supported Operating systems Windows XP Professional Service Pack - Epson TM-m30 | Installation Guide - Page 6
Java Standard Edition 8 Update 40 See "2.1 Install Java" Version 1.14.1 Sep. 2015 2 Installation Guide - Epson TM-m30 | Installation Guide - Page 7
the JavaPOS ADK installer. Please refer to the following website for downloads and detailed installation instructions: http://www.oracle.com/technetwork/java/current-142188.html Users: Install the Java Runtime Environment .jar and jai_core.jar into the 64-bit Java's ext folder. 3 Installation Guide - Epson TM-m30 | Installation Guide - Page 8
when an installed version of Epson software is incompatible with this version. Choose whether to continue the installation according to the message. (Windows only) 4 Installation Guide - Epson TM-m30 | Installation Guide - Page 9
2.16 for details on this. • If the installer is not run with Administrator (Windows) privileges, then it will display an error message and exit. 5 Installation Guide - Epson TM-m30 | Installation Guide - Page 10
View Release Notes' button to view the release notes. • Click the 'View Installation Manual' button to view the Installation manual. This manual is in Adobe Portable Document Format (PDF). If your system does not have a location. Click Next to continue installing the software. 6 Installation Guide - Epson TM-m30 | Installation Guide - Page 11
, Next is not enabled. At any time, the user clicks on "I do not accept the terms of the License Agreement", the following screen appears. 7 Installation Guide - Epson TM-m30 | Installation Guide - Page 12
Version 1.14.1 Sep. 2015 2.9 Select a Java Virtual Machine A Java Virtual Machine (JVM) is required to run JavaPOS ADK 1.14.1. The supported JVM is Sun JVM version 1.7.0_75 and higher. This list is automatically populated with the JVM found on the system. Select a JVM to use. If - Epson TM-m30 | Installation Guide - Page 13
. • Selecting User installs the Services, Setup utility and Check Health utility. • Selecting Custom allows you to select installation options. When Custom is selected, the user can customize the components installed. The user can also select the installation folder locations. 9 Installation Guide - Epson TM-m30 | Installation Guide - Page 14
Version 1.14.1 Sep. 2015 2.11 Selecting Components to Install Select the components to install and click Next. At least one component must be selected to proceed with the installation. 10 Installation Guide - Epson TM-m30 | Installation Guide - Page 15
scenario. The 'Restore Default' button resets to the default location. The default location for JavaPOS Services is '%JAVA_HOME%\lib\ext'. The default location for other modules (SetupPOS, CheckHealth, Documentation, Samples from "Add or Remove Programs" in Control Panel. 11 Installation Guide - Epson TM-m30 | Installation Guide - Page 16
Version 1.14.1 Sep. 2015 2.13 Selecting the User Classpath Select the Classpath for the service files and then click Next. 12 Installation Guide - Epson TM-m30 | Installation Guide - Page 17
the communication methods must be selected to continue. If USB is selected, TMUSB is installed.(Windows only) You can select multiple connection methods. 13 Installation Guide - Epson TM-m30 | Installation Guide - Page 18
file is located at %APPDATA%\EPSON\portcommunicationservice\pcs.properties For Windows Vista or later, the file located at %ALLUSERSPROFILE%\EPSON\portcommunicationservice\pcs.properties 14 Installation Guide - Epson TM-m30 | Installation Guide - Page 19
the devices after installation is complete. POSPrinter For Windows: TM-H6000II, TM-H6000III, TM-T88III, TM-T88IV, TM-T70, TM-T90, TM-L90, 15 Installation Guide - Epson TM-m30 | Installation Guide - Page 20
TM-U220A, TM-U220B, TM-U220D LineDisplay All Devices CashDrawer All Devices MICR All Devices Checkscanner All Devices ElectronicJournal All Devices Version 1.14.1 Sep. 2015 16 Installation Guide - Epson TM-m30 | Installation Guide - Page 21
Version 1.14.1 Sep. 2015 2.17 Pre-Installation Summary A summary screen to show the options selected before installing files. If the settings are correct, click Install. 17 Installation Guide - Epson TM-m30 | Installation Guide - Page 22
Version 1.14.1 Sep. 2015 Installation starts, and progress is shown on the status bar. When the installation is complete, the completion screen appears. 18 Installation Guide - Epson TM-m30 | Installation Guide - Page 23
the installer was launched. If the installer was run from a read-only medium like a CD-ROM, the log file will not be created. 19 Installation Guide - Epson TM-m30 | Installation Guide - Page 24
for EPSON JavaPOS ADK 1.14.1. 3.2 Confirm uninstallation Click Uninstall button to start uninstalling. Once the uninstallation procedure is done, the summary screen appears. 20 Installation Guide - Epson TM-m30 | Installation Guide - Page 25
Journal data files The uninstaller does not remove data files created for the Electronic Journal. If these files have been created, they must be deleted manually. 21 Installation Guide - Epson TM-m30 | Installation Guide - Page 26
tool. The following files used in silent installation are stored in the folder. For Windows: jpos.xml pcs.properties jpos1141.jar SetModules.bat 22 Installation Guide - Epson TM-m30 | Installation Guide - Page 27
file cannot be generated unless the previous file is moved, deleted, or overwritten. Note: On Chinese language Operating Systems, only the default installation folders are supported for silent installation. 23 Installation Guide - Epson TM-m30 | Installation Guide - Page 28
Version 1.14.1 Sep. 2015 After the Pre-installation summary screen, the Silent Installer Summary screen is displayed. This has the location for where the silent.properties file has been created. 24 Installation Guide - Epson TM-m30 | Installation Guide - Page 29
system may be rebooted. 4.5 Running Uninstallation Uninstallation runs silently if the installation was silent. Example: Uninstall from "Add or Remove Programs" (for Windows) 25 Installation Guide - Epson TM-m30 | Installation Guide - Page 30
this is complete, run the installer again without this parameter to reinstall JavaPOS. Force Uninstall option is not available on 64bit operating systems. 26 Installation Guide - Epson TM-m30 | Installation Guide - Page 31
applied. After the environment variables are set, the java version can be confirmed by typing the following in a Command Prompt window: java -version 27 Installation Guide
-
 1
1 -
 2
2 -
 3
3 -
 4
4 -
 5
5 -
 6
6 -
 7
7 -
8
-
9
-
10
-
11
-
12
-
13
-
14
-
15
-
16
-
17
-
18
-
19
-
20
-
21
-
22
-
23
-
24
-
25
-
26
-
27
-
28
-
29
-
30
-
31
 |
 |

EPSON JavaPOS ADK
Installation Guide
Version 1.14.1
Sep. 2015