Epson V11H341020 User's Guide - Page 60
Wireless LAN, Enter., Quick, Advanced, To Setup Wizard, IP Address, Subnet, Gateway Address
 |
UPC - 010343874749
View all Epson V11H341020 manuals
Add to My Manuals
Save this manual to your list of manuals |
Page 60 highlights
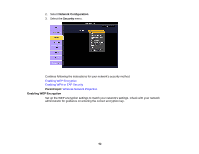
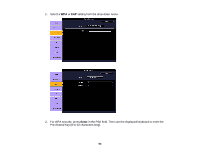
7. Select the Wireless LAN menu and press Enter. 8. Select one of the following connection modes: • Quick mode lets you easily connect one computer to the projector at a time. You can also select this setting when you're using the optional Epson Quick Wireless Connection USB key. • Advanced mode lets multiple computers access the projector at the same time and easily trade off control of the projector. This method requires a wireless network access point or an AirPort Extreme (or AirPort) base station. Note: The wireless network card or access point must comply with the 802.11g, 802.11b, or 802.11a standard. 9. Click To Setup Wizard if your access point is compatible with Wi-Fi Protected Setup (WPS), and you want to use the Push Button or PIN Code method to configure the projector. 10. Enter the SSID (network name) for your existing wireless network. 11. Select your IP settings as necessary: • If your network assigns addresses automatically, turn on the DHCP setting. • If you must set addresses manually, turn off DHCP and enter the projector's IP Address, Subnet Mask, and Gateway Address as needed. 12. To prevent display of the SSID on the network standby screen, turn off SSID Display. 60
-
 1
1 -
2
-
3
-
4
-
5
-
6
-
7
-
8
-
9
-
10
-
11
-
12
-
13
-
14
-
15
-
16
-
17
-
18
-
19
-
20
-
21
-
22
-
23
-
24
-
25
-
26
-
27
-
28
-
29
-
30
-
31
-
32
-
33
-
34
-
35
-
36
-
37
-
38
-
39
-
40
-
41
-
42
-
43
-
44
-
45
-
46
-
47
-
48
-
49
-
50
-
51
-
52
-
53
-
54
-
 55
55 -
 56
56 -
 57
57 -
 58
58 -
 59
59 -
 60
60 -
 61
61 -
 62
62 -
 63
63 -
 64
64 -
 65
65 -
66
-
67
-
68
-
69
-
70
-
71
-
72
-
73
-
74
-
75
-
76
-
77
-
78
-
79
-
80
-
81
-
82
-
83
-
84
-
85
-
86
-
87
-
88
-
89
-
90
-
91
-
92
-
93
-
94
-
95
-
96
-
97
-
98
-
99
-
100
-
101
-
102
-
103
-
104
-
105
-
106
-
107
-
108
-
109
-
110
-
111
-
112
-
113
-
114
-
115
-
116
-
117
-
118
-
119
-
120
-
121
-
122
-
123
-
124
-
125
-
126
-
127
-
128
-
129
-
130
-
131
-
132
-
133
-
134
-
135
-
136
-
137
-
138
-
139
-
140
-
141
-
142
-
143
-
144
-
145
-
146
-
147
-
148
-
149
-
150
-
151
-
152
-
153
-
154
-
155
-
156
-
157
-
158
-
159
-
160
-
161
-
162
-
163
-
164
-
165
-
166
-
167
-
168
-
169
-
170
-
171
-
172
-
173
-
174
-
175
-
176
-
177
-
178
-
179
-
180
-
181
-
182
-
183
-
184
-
185
-
186
-
187
-
188
-
189
-
190
-
191
-
192
-
193
-
194
-
195
-
196
-
197
-
198
 |
 |
