Epson VS355 Operation Guide - Epson iProjection v2.20 Windows/Mac - Page 46
Sharing a Profile over a Network
 |
View all Epson VS355 manuals
Add to My Manuals
Save this manual to your list of manuals |
Page 46 highlights
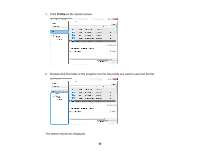
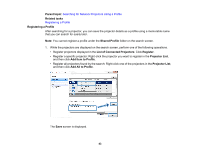
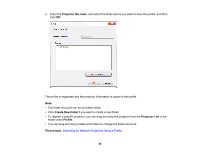
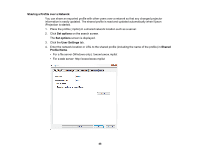
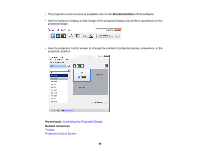
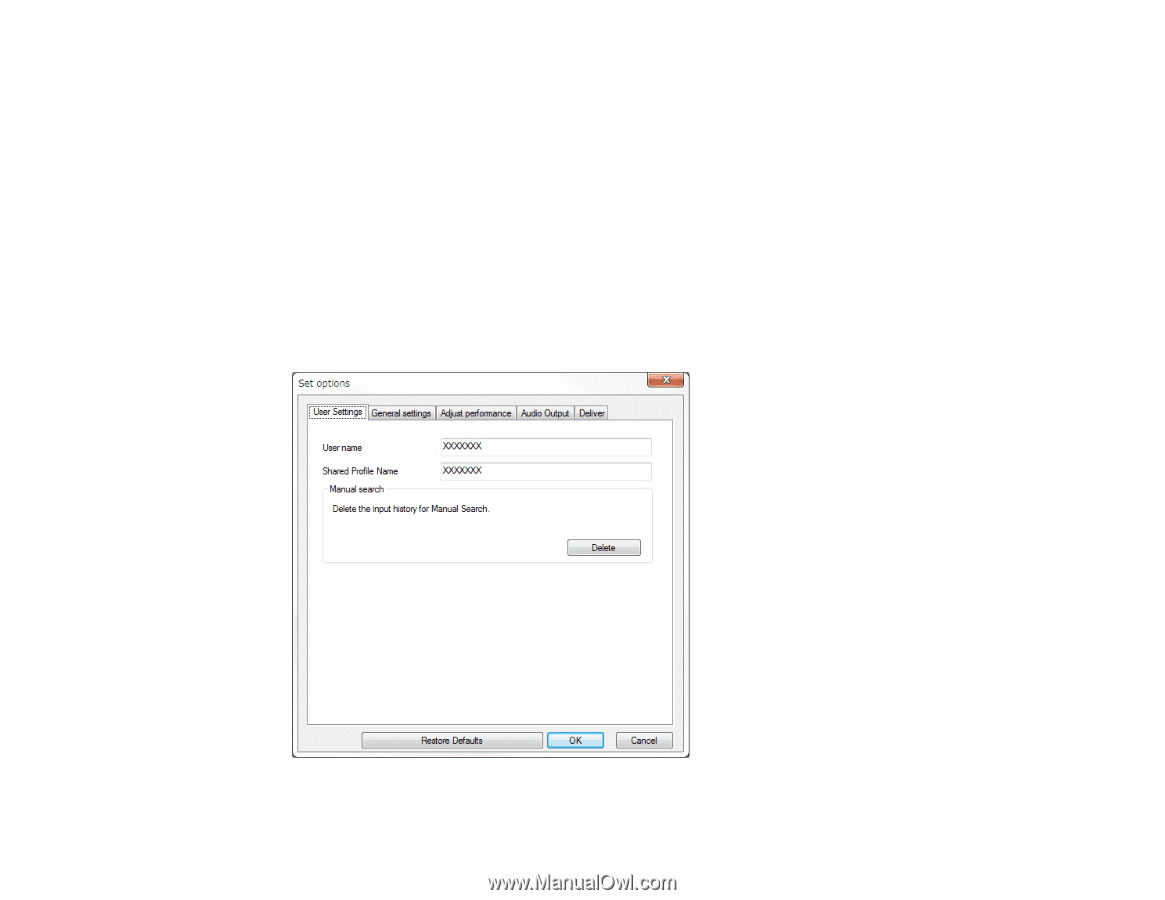
Sharing a Profile over a Network You can share an exported profile with other users over a network so that any changed projector information is easily updated. The shared profile is read and updated automatically when Epson iProjection is started. 1. Place the profile (.mplist) in a shared network location such as a server. 2. Click Set options on the search screen. The Set options screen is displayed. 3. Click the User Settings tab. 4. Enter the network location or URL to the shared profile (including the name of the profile) in Shared Profile Name. • For a file server (Windows only): \\xxxxx\xxxxx.mplist • For a web server: http://xxxxx/xxxxx.mplist 46
-
 1
1 -
2
-
3
-
4
-
5
-
6
-
7
-
8
-
9
-
10
-
11
-
12
-
13
-
14
-
15
-
16
-
17
-
18
-
19
-
20
-
21
-
22
-
23
-
24
-
25
-
26
-
27
-
28
-
29
-
30
-
31
-
32
-
33
-
34
-
35
-
36
-
37
-
38
-
39
-
40
-
 41
41 -
 42
42 -
 43
43 -
 44
44 -
 45
45 -
 46
46 -
 47
47 -
 48
48 -
 49
49 -
 50
50 -
 51
51 -
52
-
53
-
54
-
55
-
56
-
57
-
58
-
59
-
60
-
61
-
62
-
63
-
64
-
65
-
66
-
67
-
68
-
69
-
70
-
71
-
72
-
73
-
74
-
75
-
76
-
77
-
78
-
79
-
80
-
81
-
82
-
83
-
84
-
85
-
86
-
87
-
88
-
89
-
90
-
91
-
92
-
93
-
94
-
95
-
96
-
97
-
98
-
99
-
100
-
101
-
102
-
103
-
104
-
105
-
106
-
107
-
108
-
109
-
110
-
111
-
112
-
113
-
114
-
115
-
116
-
117
-
118
-
119
-
120
-
121
-
122
 |
 |
46
Sharing a Profile over a Network
You can share an exported profile with other users over a network so that any changed projector
information is easily updated. The shared profile is read and updated automatically when Epson
iProjection is started.
1.
Place the profile (.mplist) in a shared network location such as a server.
2.
Click
Set options
on the search screen.
The
Set options
screen is displayed.
3.
Click the
User Settings
tab.
4.
Enter the network location or URL to the shared profile (including the name of the profile) in
Shared
Profile Name
.
• For a file server (Windows only): \\xxxxx\xxxxx.mplist
• For a web server: http://xxxxx/xxxxx.mplist